Is your BISSELL ProHeat 2X Revolution Pet Pro carpet cleaner not spraying properly? This common issue can be frustrating when you’re trying to tackle pet messes and keep your carpets fresh. Fortunately, many spray problems with the BISSELL ProHeat 2X Revolution Pet Pro can be resolved with simple troubleshooting steps. As pet care experts at pets.edu.vn, we understand the importance of a clean home environment for both you and your furry friends. That’s why we’ve created this comprehensive guide to help you diagnose and fix spray issues on your BISSELL ProHeat 2X Revolution Pet Pro, ensuring you can get back to cleaning quickly and efficiently.
Identifying the Location of the Spray Issue
Before diving into specific solutions, it’s important to pinpoint where the spray issue is occurring. Are you experiencing no spray or low spray from the hose attachment, the foot of the machine, or both?
Knowing whether the problem lies in the hose or the foot will help you focus on the relevant troubleshooting steps and save you time. Let’s start with the most common culprit: the clean water tank.
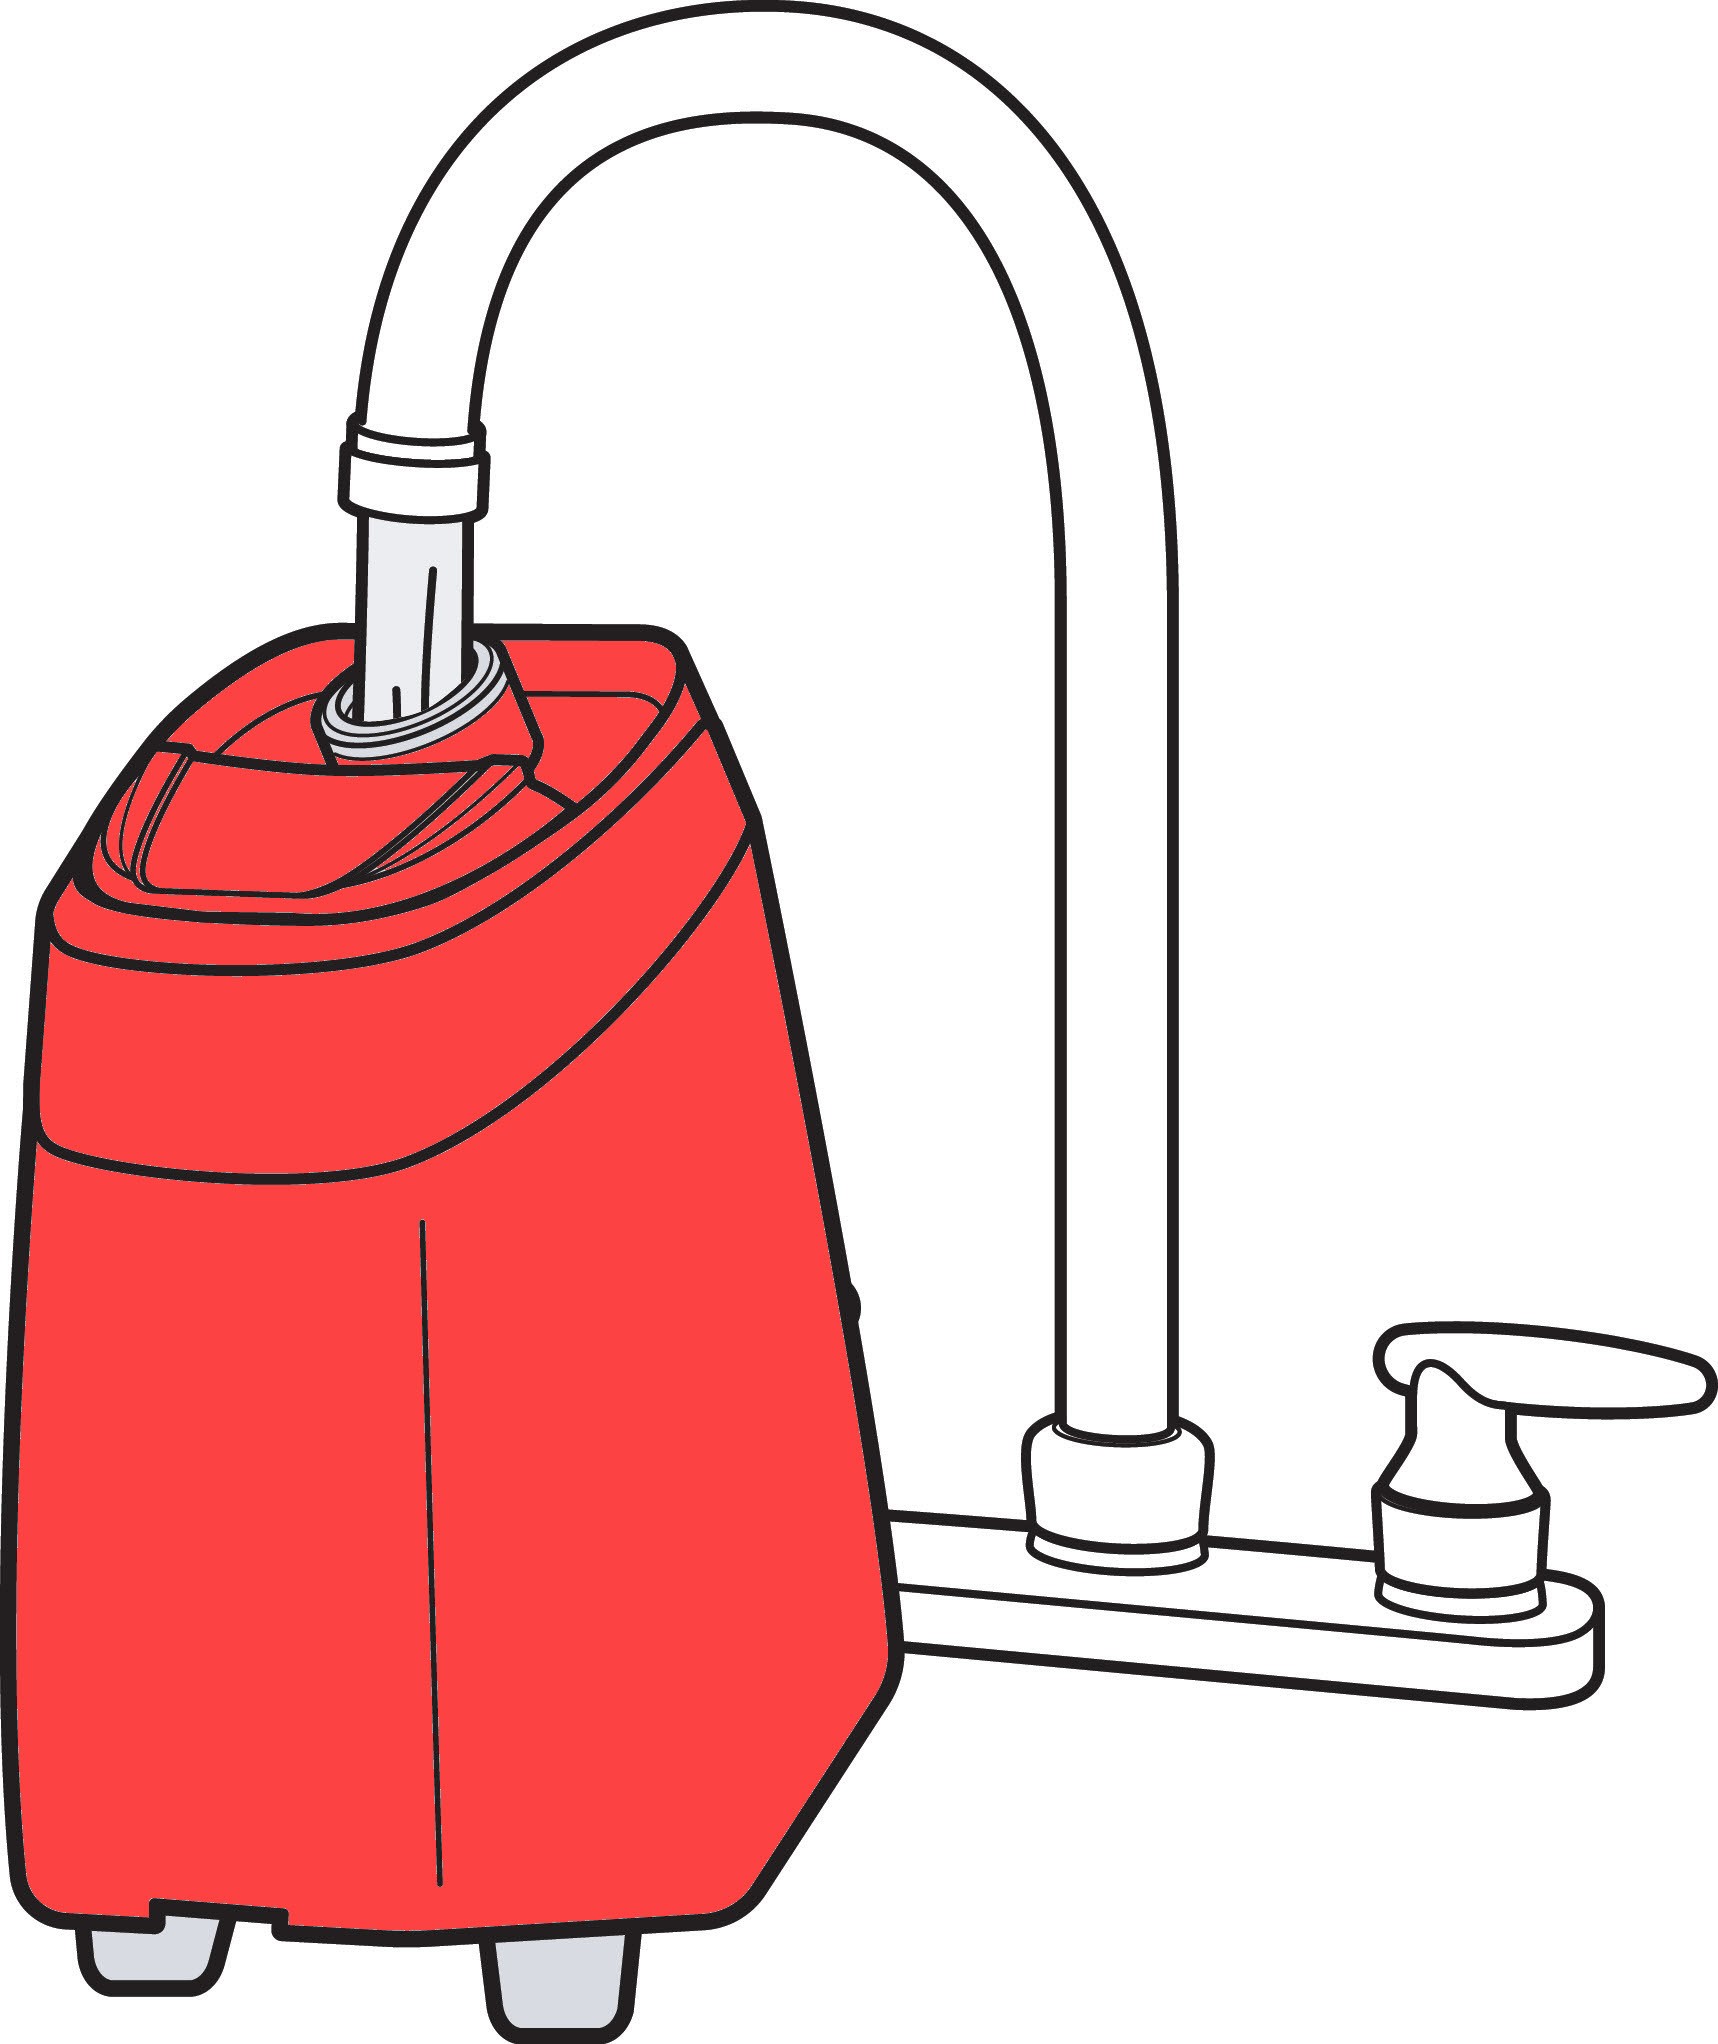
Inspecting Your Clean Water Tank for Damage and Proper Function
The clean water tank is crucial for delivering cleaning solution to your BISSELL ProHeat 2X Revolution Pet Pro. Damage or improper installation can easily lead to spray issues.
Important Note: Avoid using excessively hot water in your tank or microwaving it. This can warp the plastic, creating gaps and preventing proper suction and spray function.
Follow these steps to inspect your clean water tank:
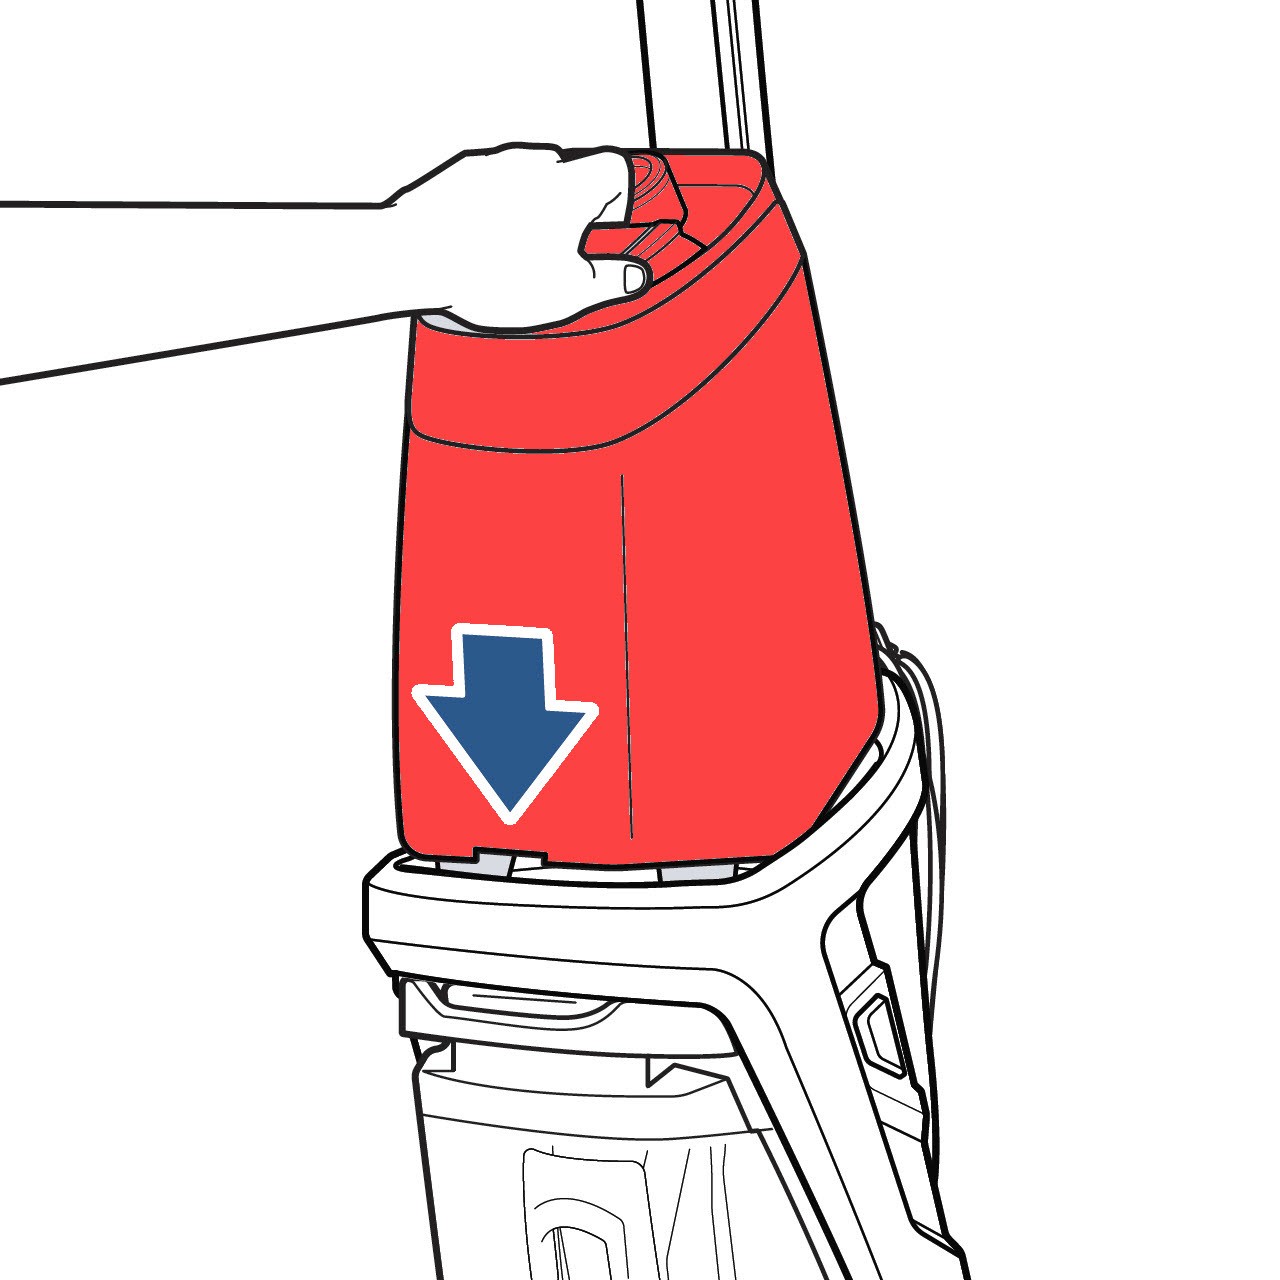
- Power Down: Turn your BISSELL ProHeat 2X Revolution Pet Pro OFF and unplug it from the power outlet for safety.
- Fill the Tank: Remove the clean water tank and fill it with cool or warm tap water and BISSELL cleaning formula as directed in your user manual.
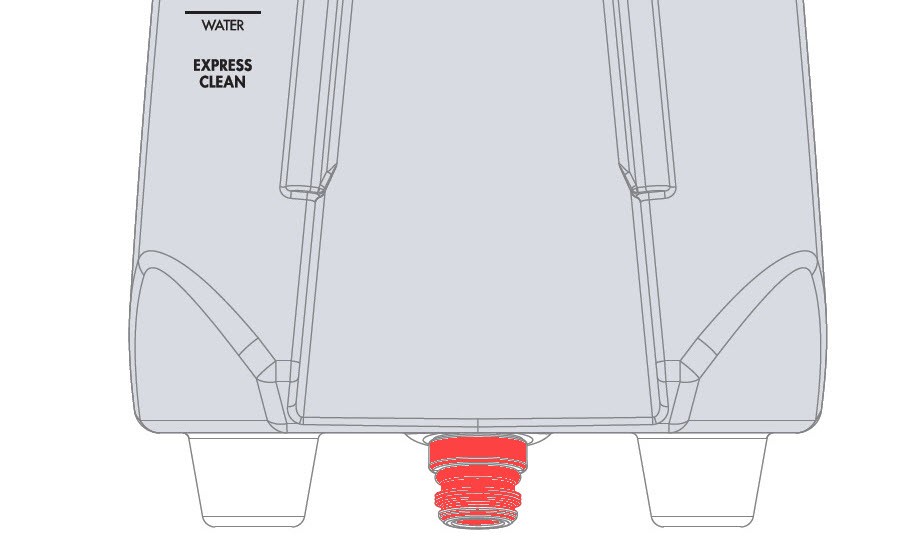
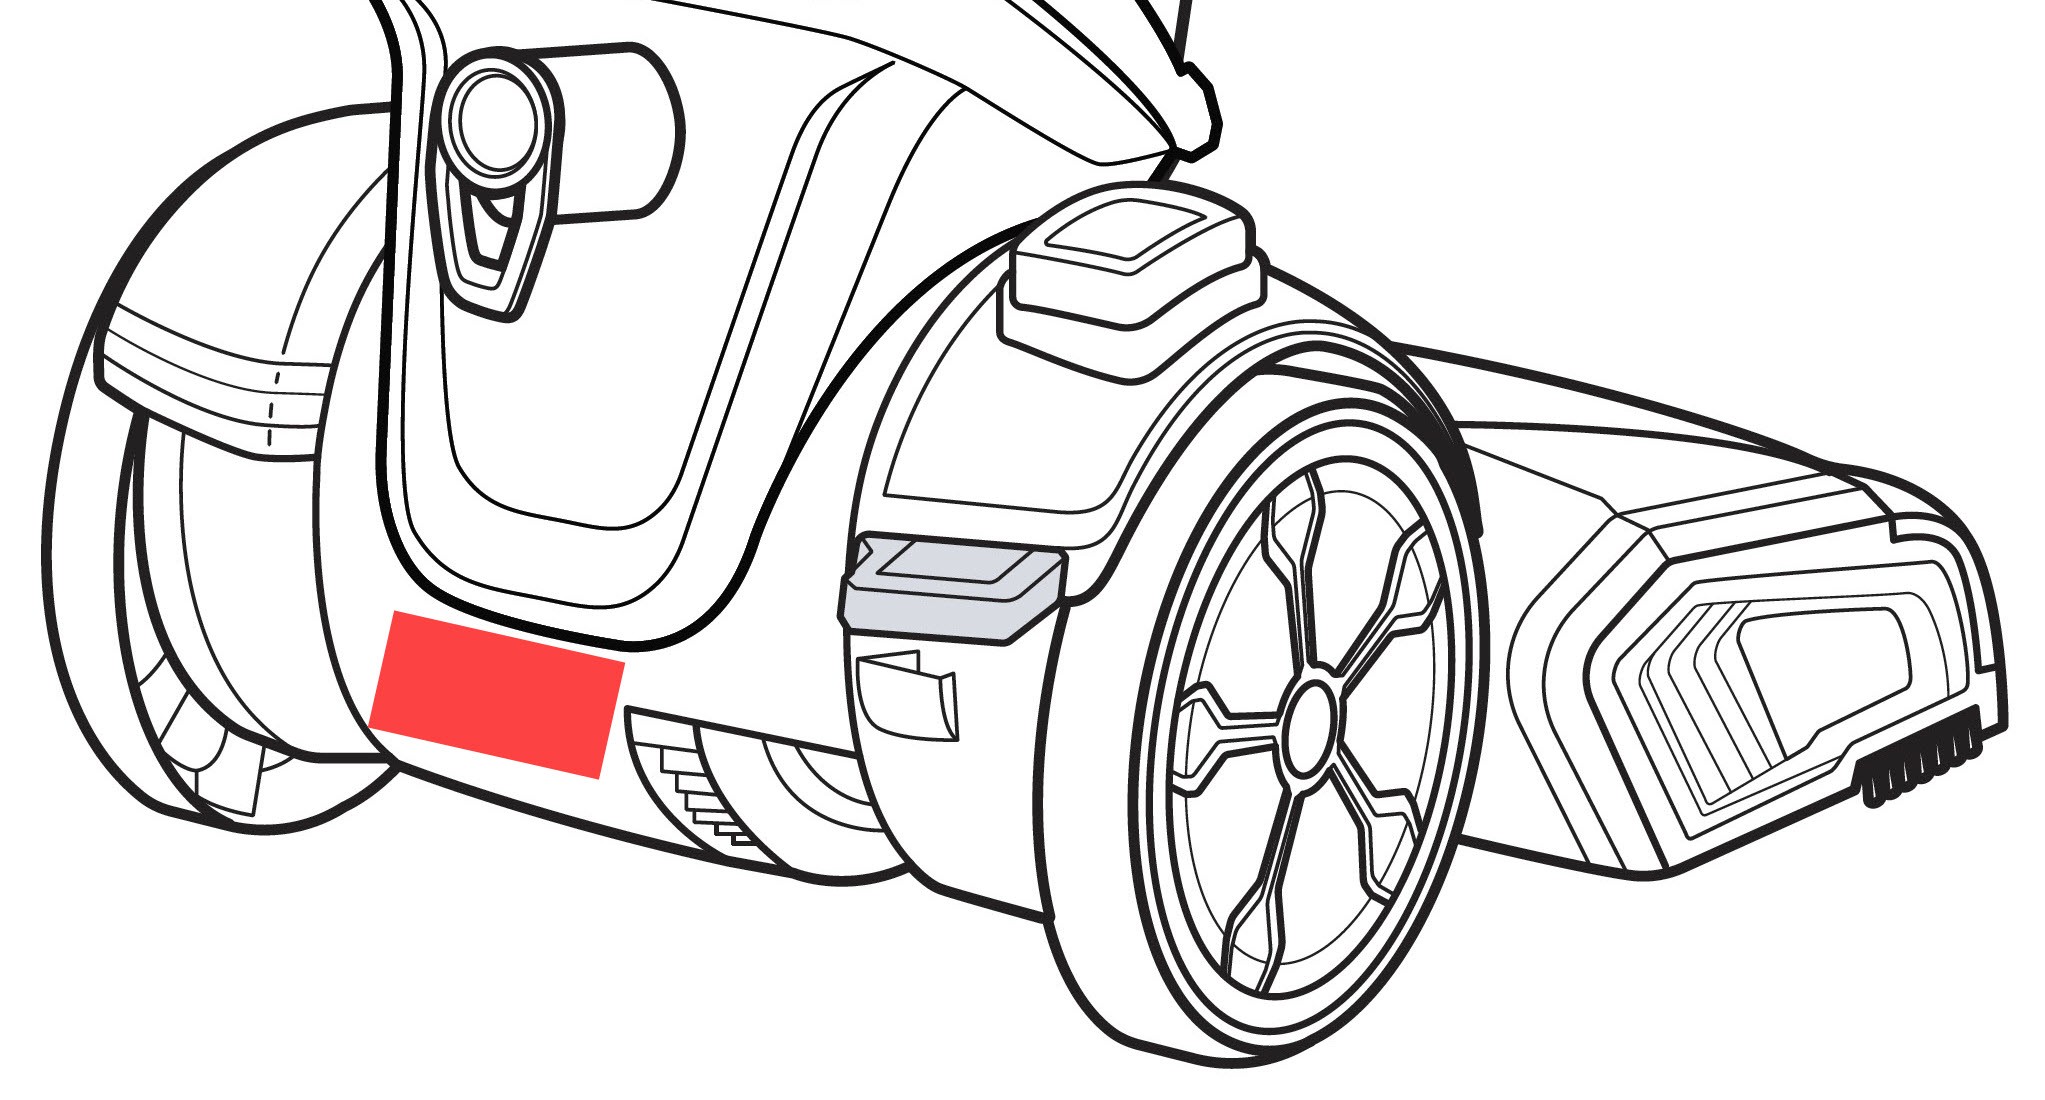
- Examine for Damage: Carefully inspect the tank for any cracks, warping, or other damage. Pay close attention to the bottom of the tank where the valve is located.
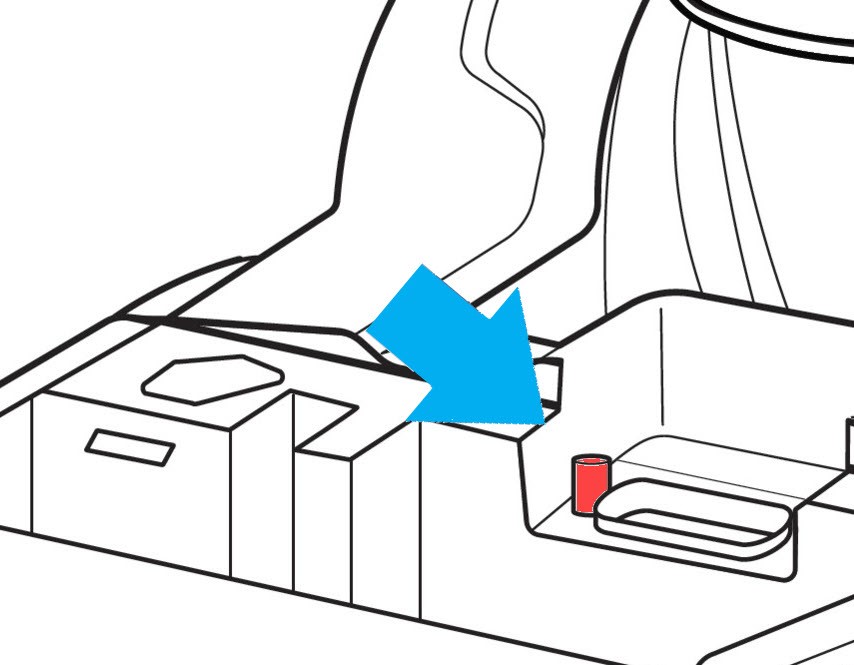
- Test the Valve: Locate the red valve on the bottom of the clean water tank. Push up on it to ensure water flows freely. A blocked or stuck valve will restrict water flow to your machine.
- Reinstall Securely: Reinstall the clean water tank onto your BISSELL ProHeat 2X Revolution Pet Pro. Push it firmly into place to ensure a tight seal with no gaps. Gaps can prevent proper water flow and pressure.
If the clean water tank seems to be in good condition and properly installed, and you are still experiencing spray issues, the next step is to check for clogged spray tips.
Cleaning Clogged Spray Tips on Your BISSELL ProHeat 2X Revolution Pet Pro
Clogged spray tips are a very common cause of low or no spray in carpet cleaners, including the BISSELL ProHeat 2X Revolution Pet Pro. Debris, dried cleaning solution, or pet hair can easily obstruct these small openings.
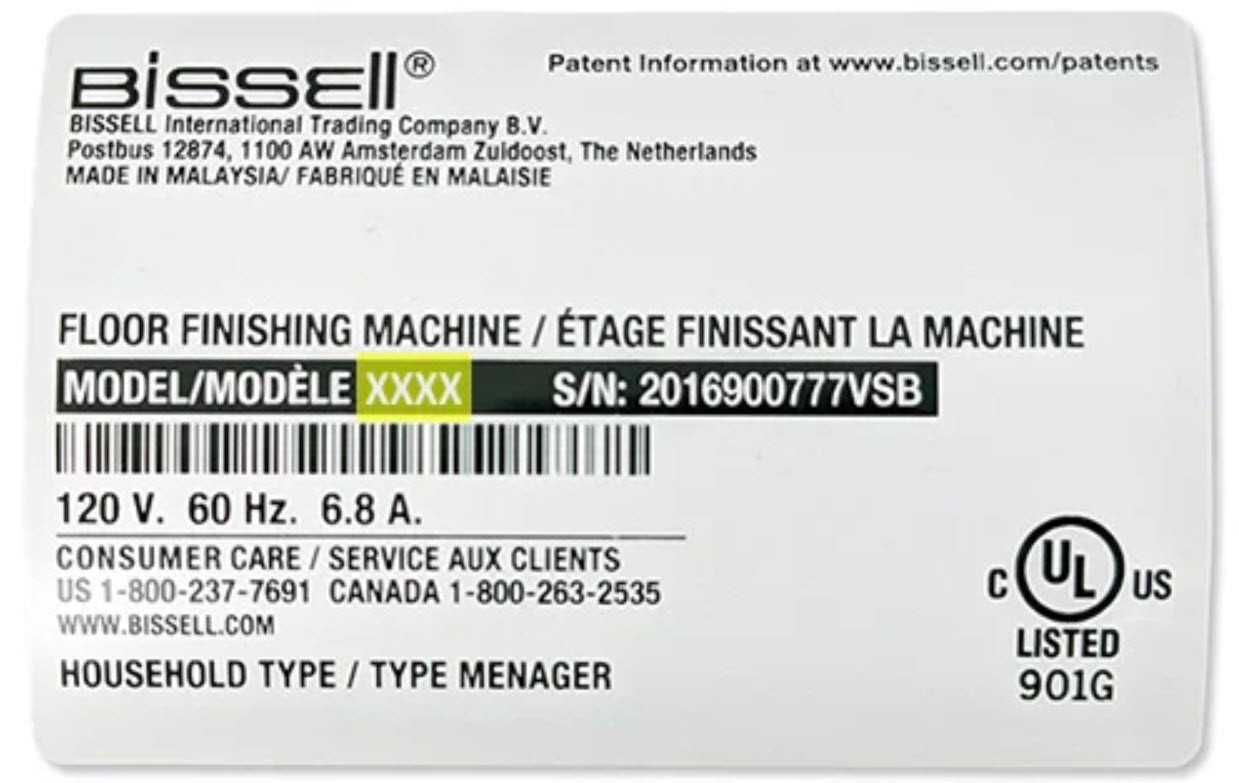
To clean the spray tips, you’ll first need to identify your model number. This will determine the type of nozzle your machine uses and the specific removal process.
Once you’ve located your model number, follow the appropriate steps below to remove and clean the nozzle and spray tips:
For Models Starting with 1 or 2:
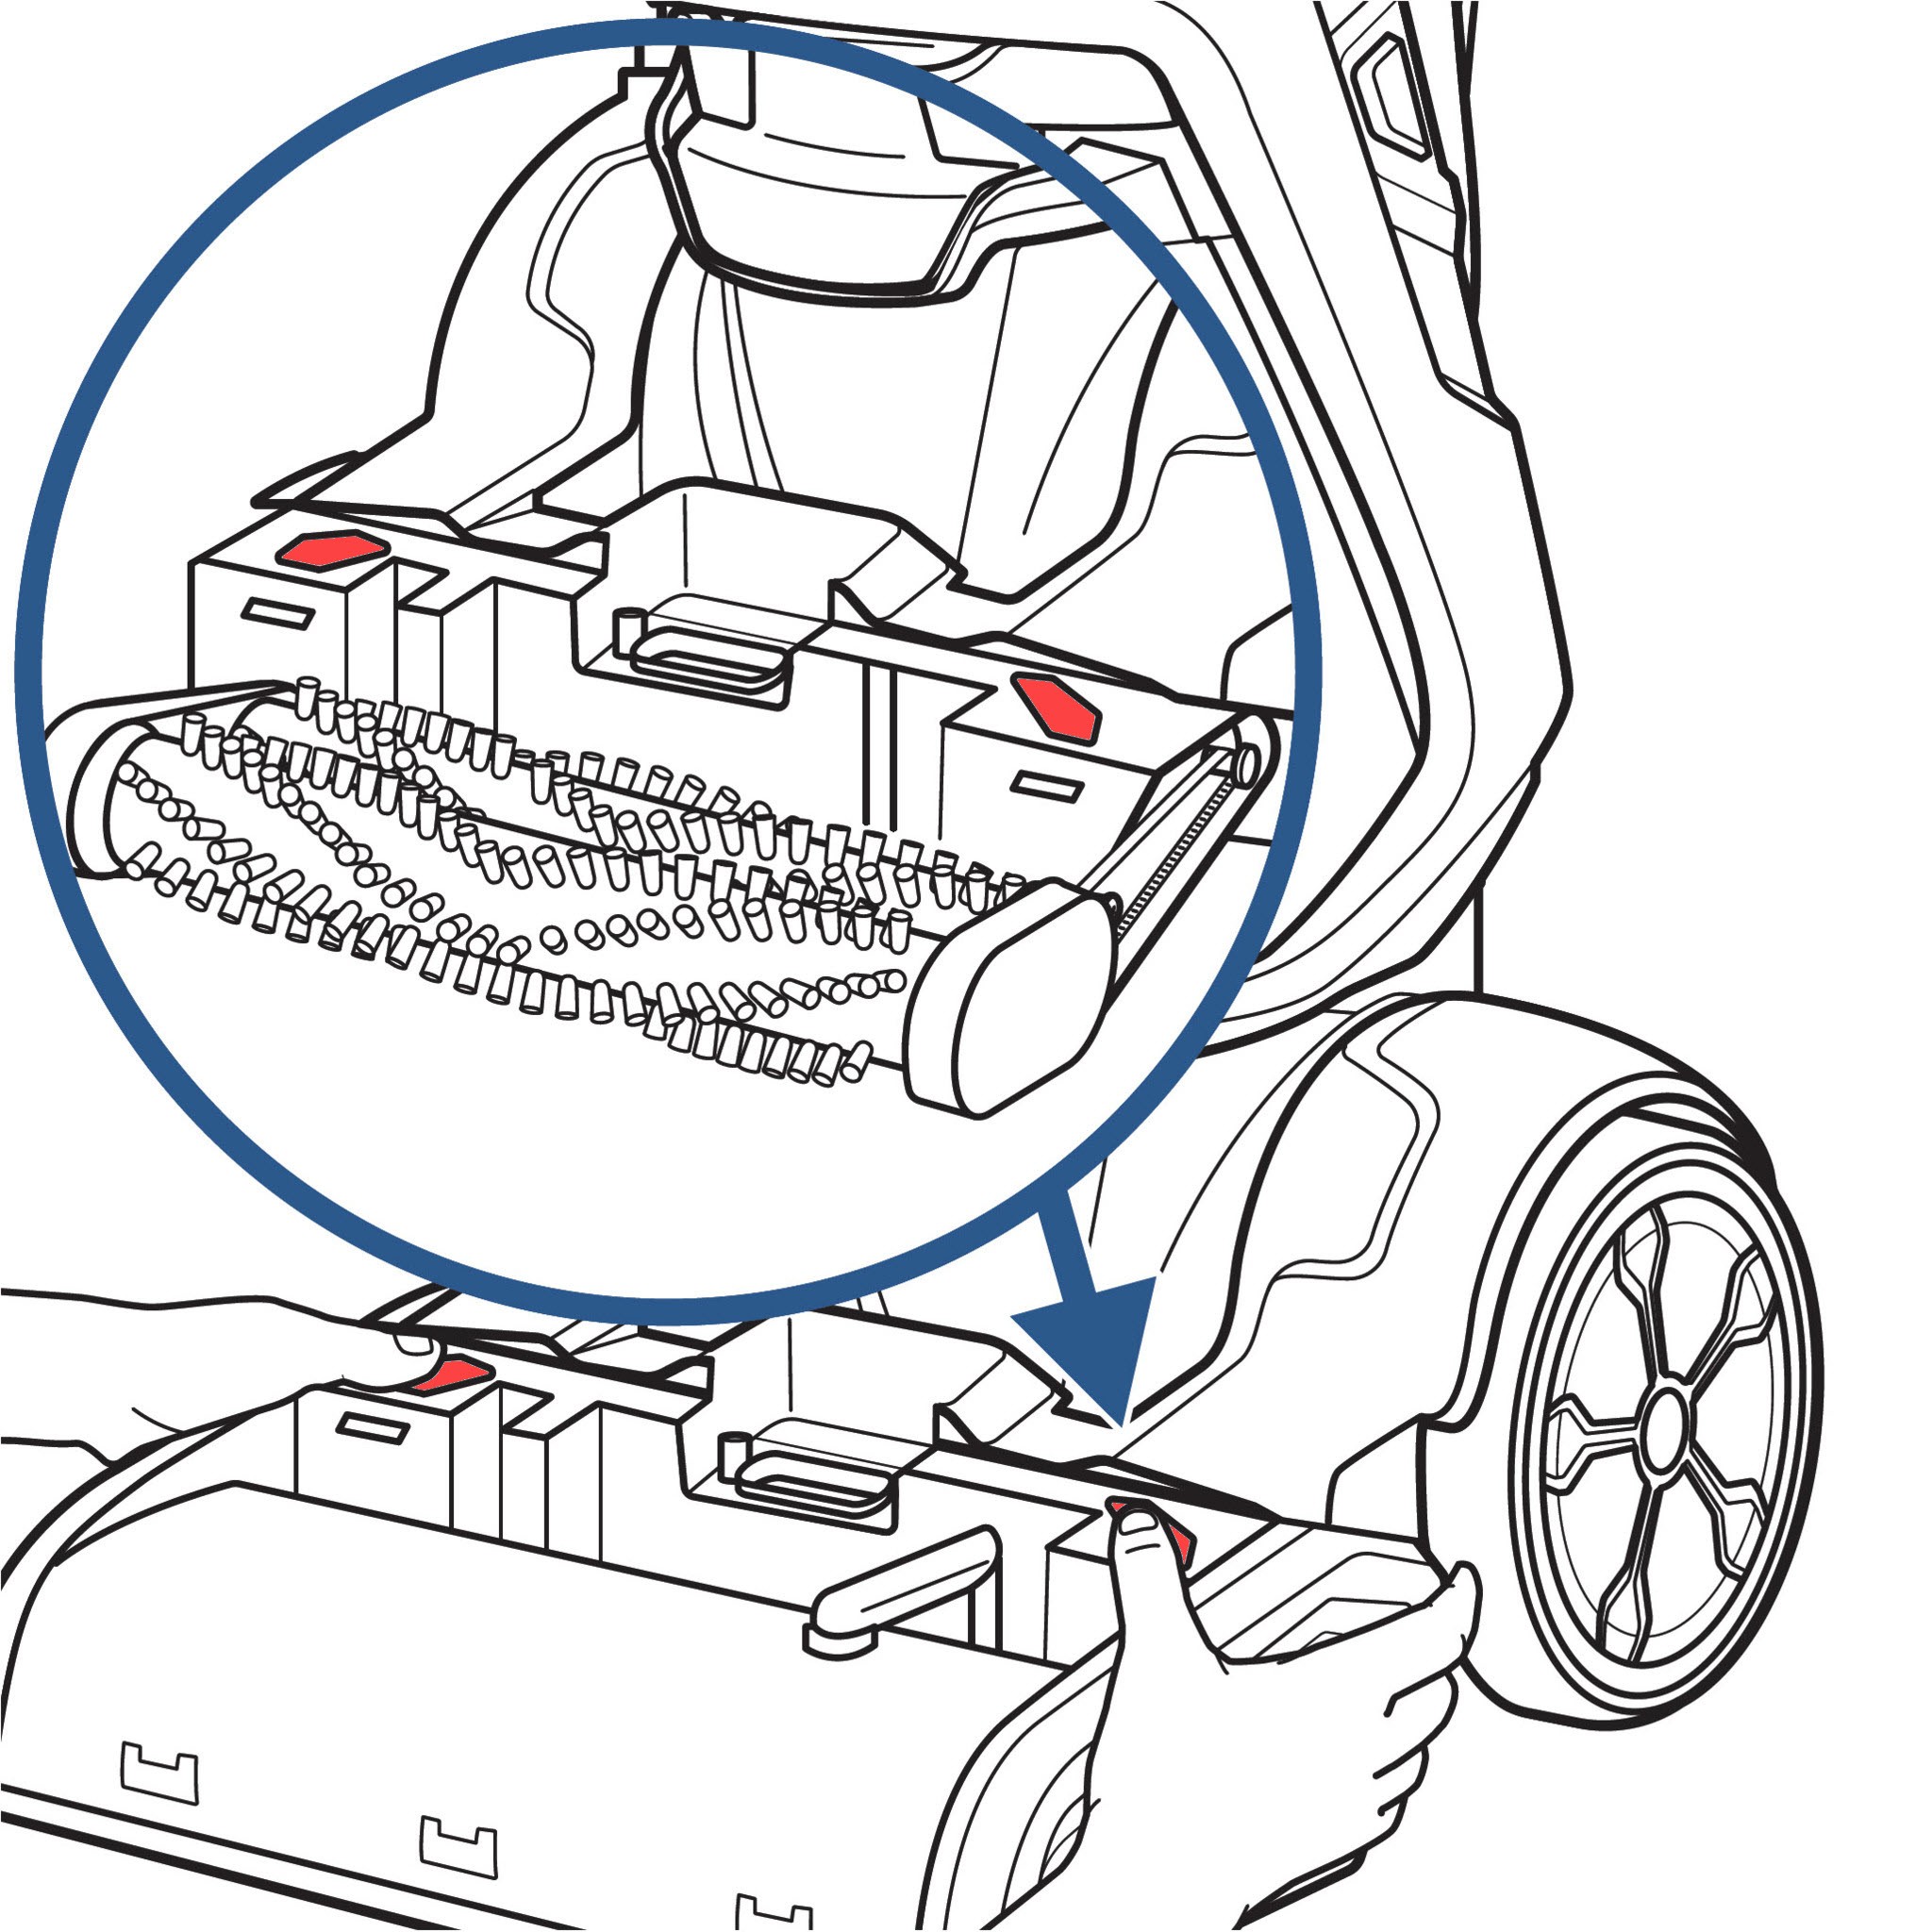
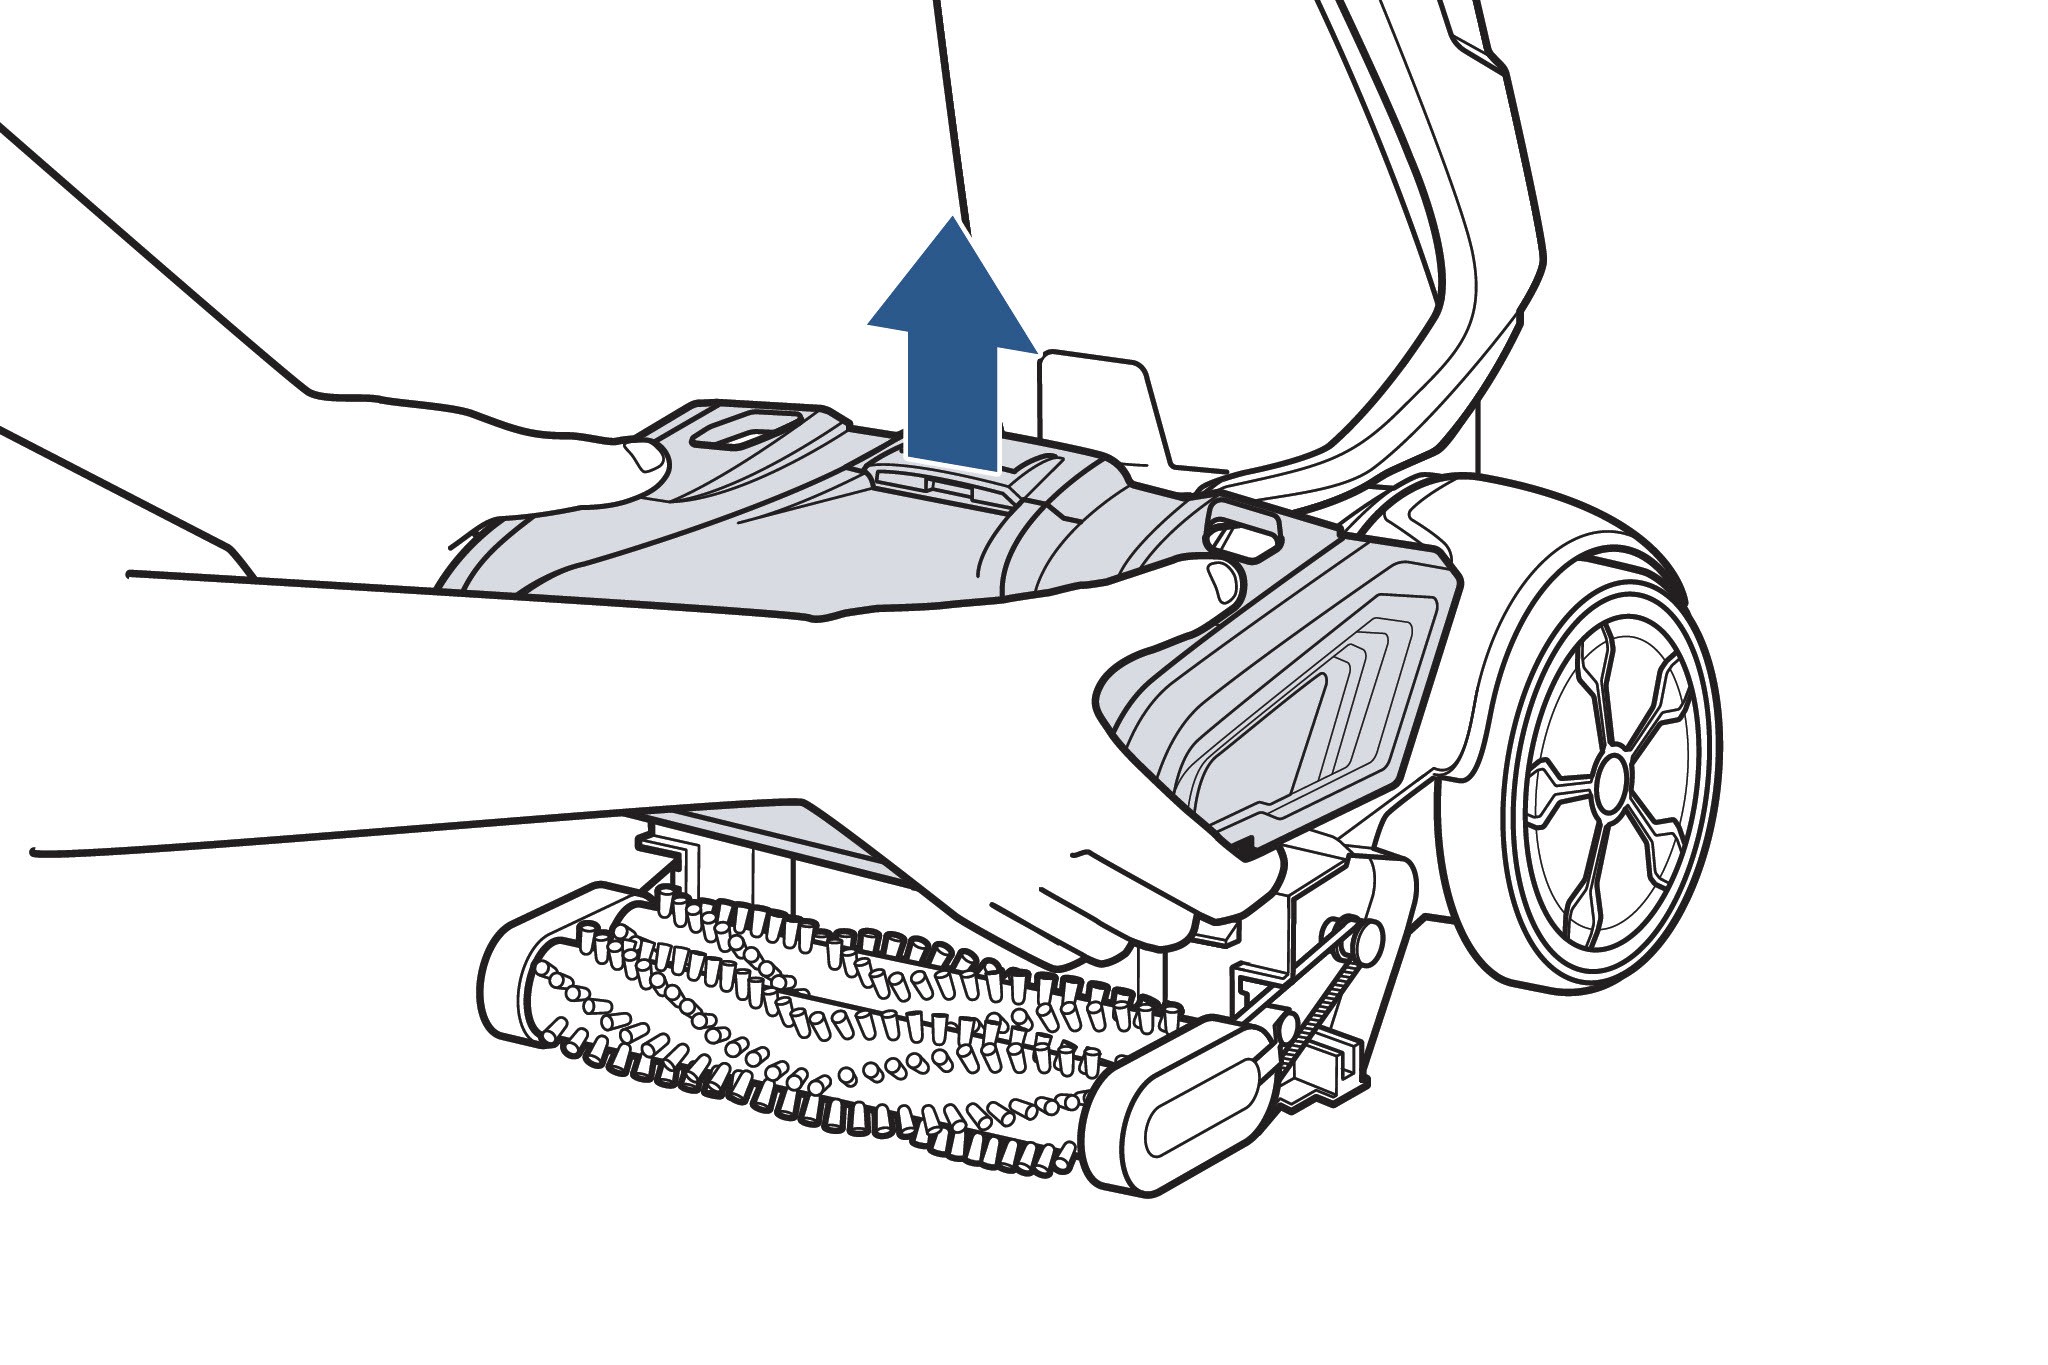
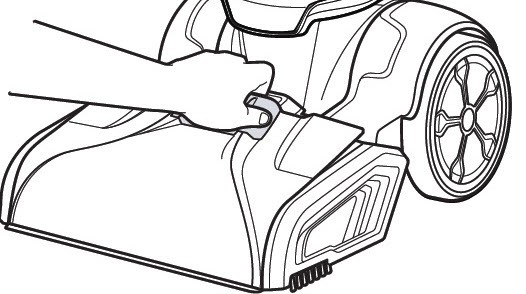
- Remove Nozzle: Pull up on the nozzle release latch and remove the nozzle from the foot of your BISSELL ProHeat 2X Revolution Pet Pro.
- Remove Brush Cover: Press the brush cover release buttons and pull up to remove the brush cover, exposing the spray tips.
| Model 1 or 2 Nozzle Removal | Model 1 or 2 Brush Cover Removal |
|---|---|

For Models Starting with 3:
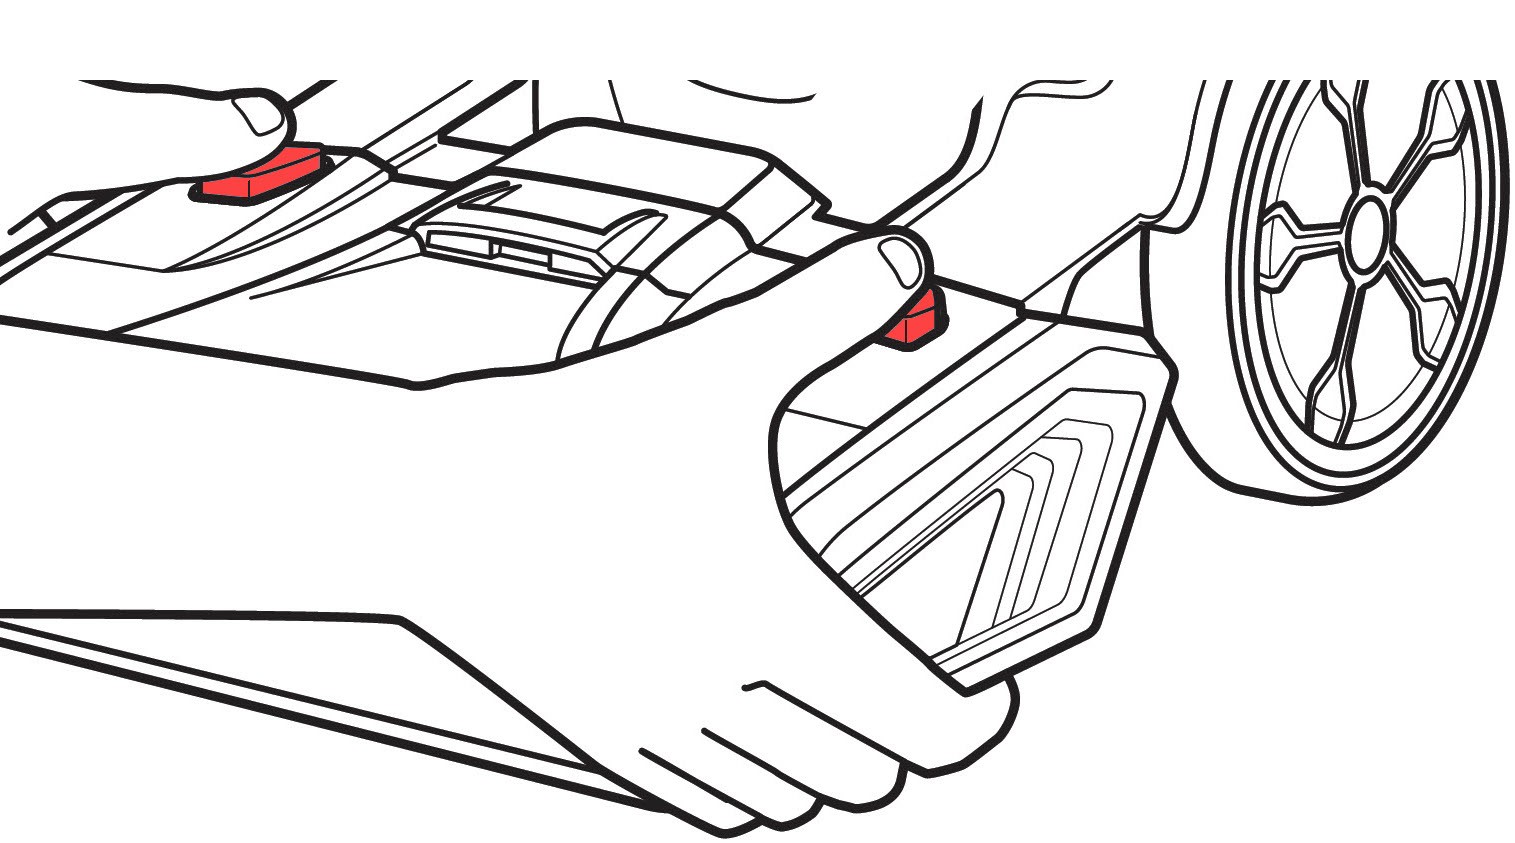
- Remove Combined Nozzle/Brush Cover: Press the release buttons on the nozzle assembly.
- Remove Assembly: Remove the combined nozzle and brush cover assembly from the foot of your BISSELL ProHeat 2X Revolution Pet Pro.
| Model 3 Nozzle Release Buttons | Model 3 Combined Nozzle/Brush Cover Removal |
|---|---|
Cleaning the Spray Tips (All Models):
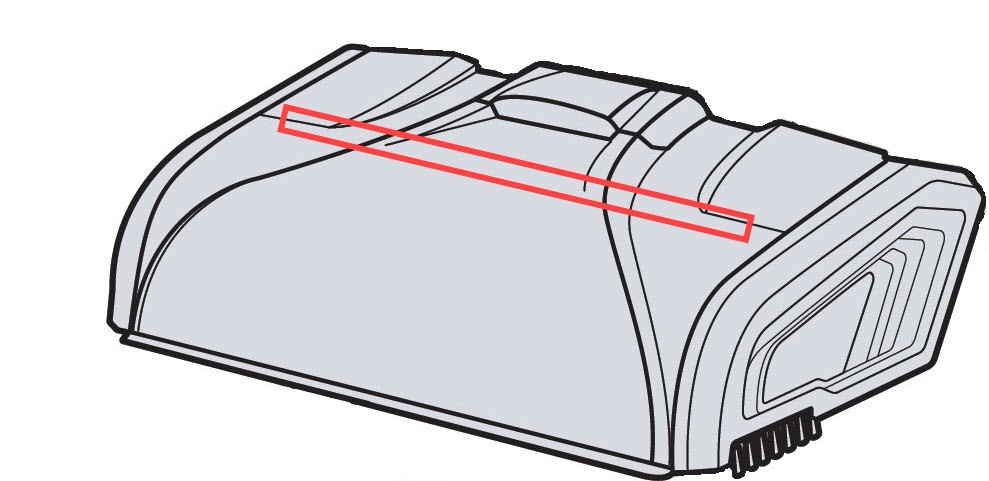
- Locate Spray Tips: The spray tips are located on the underside of either the brush cover (models 1 or 2) or the integrated nozzle (models starting with 3).
- Remove Debris: Carefully remove any visible debris from the spray tips. You can use a dry cloth or a toothbrush to gently dislodge any blockages. Ensure all openings are clear.
| Cleaning spray tips on a model 1 or 2 brush cover | Cleaning spray tips on a model 3 integrated nozzle |
|---|---|
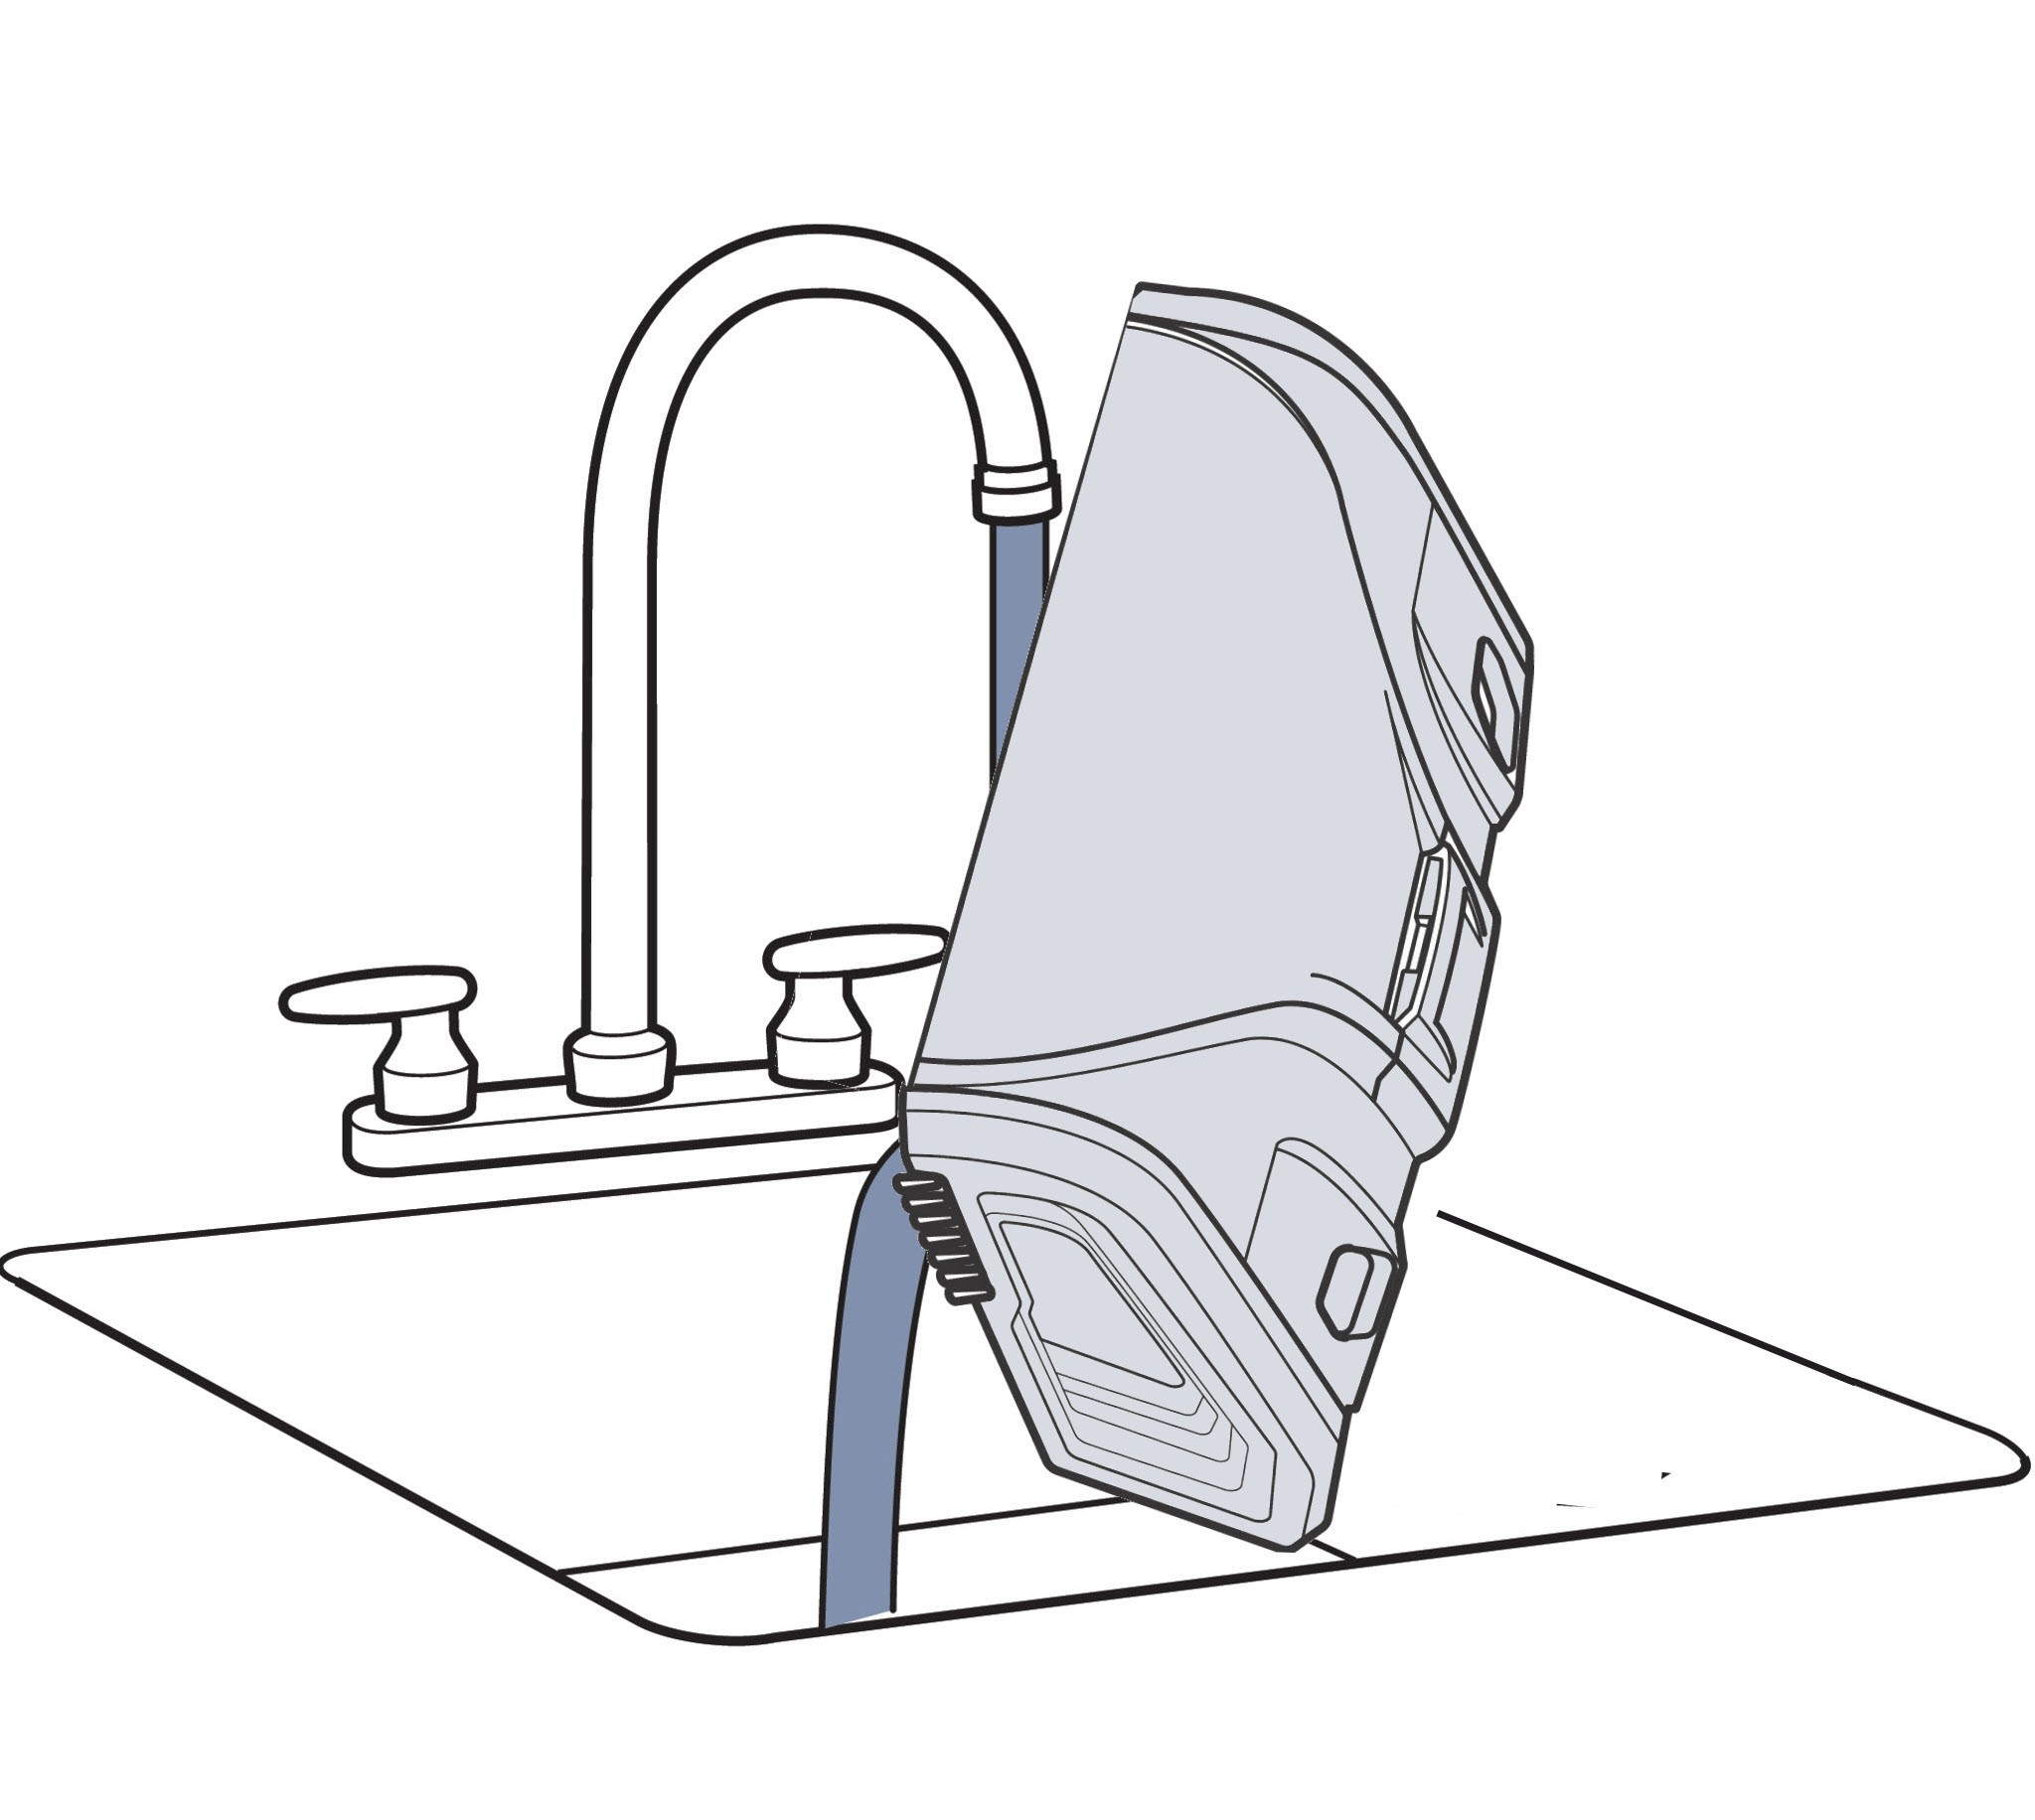
- Rinse with Water: Rinse the nozzle or brush cover under running water. Allow water to flow through the spray tips to flush out any remaining debris.
| Rinsing the brush cover spray tips of a model 1 or 2 Bissell ProHeat 2X Revolution Pet Pro | Rinsing the integrated nozzle spray tips of a model 3 Bissell ProHeat 2X Revolution Pet Pro |
|---|---|
After cleaning the spray tips, reassemble the nozzle and brush cover according to your model type and proceed to test for spray.
Testing for Spray Functionality After Cleaning
After addressing potential issues with the water tank and spray tips, it’s time to test if your BISSELL ProHeat 2X Revolution Pet Pro is spraying correctly.
Priming the Spray Pump:
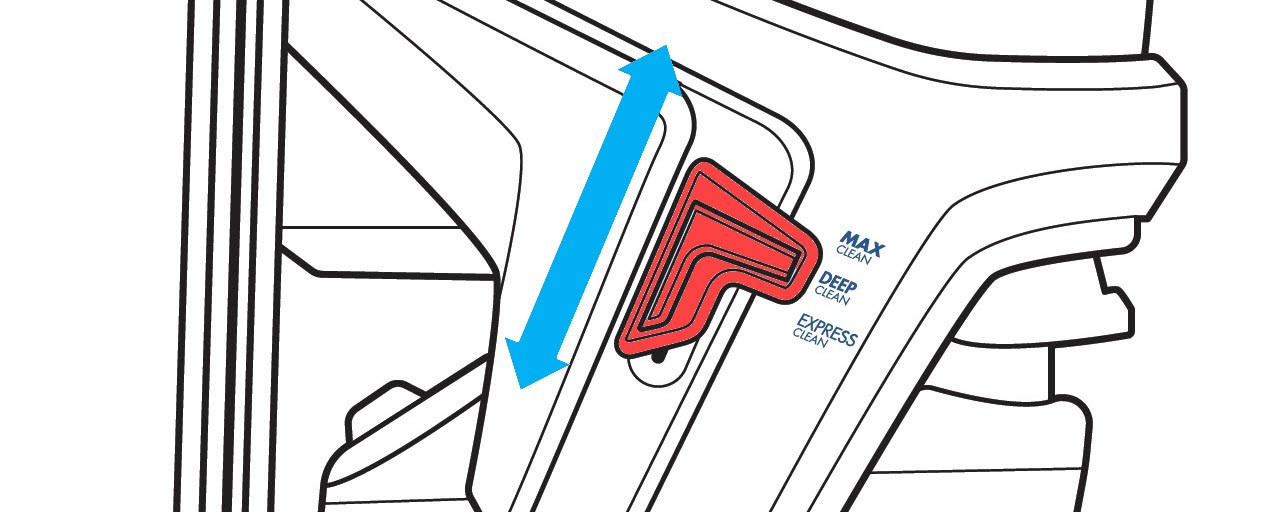
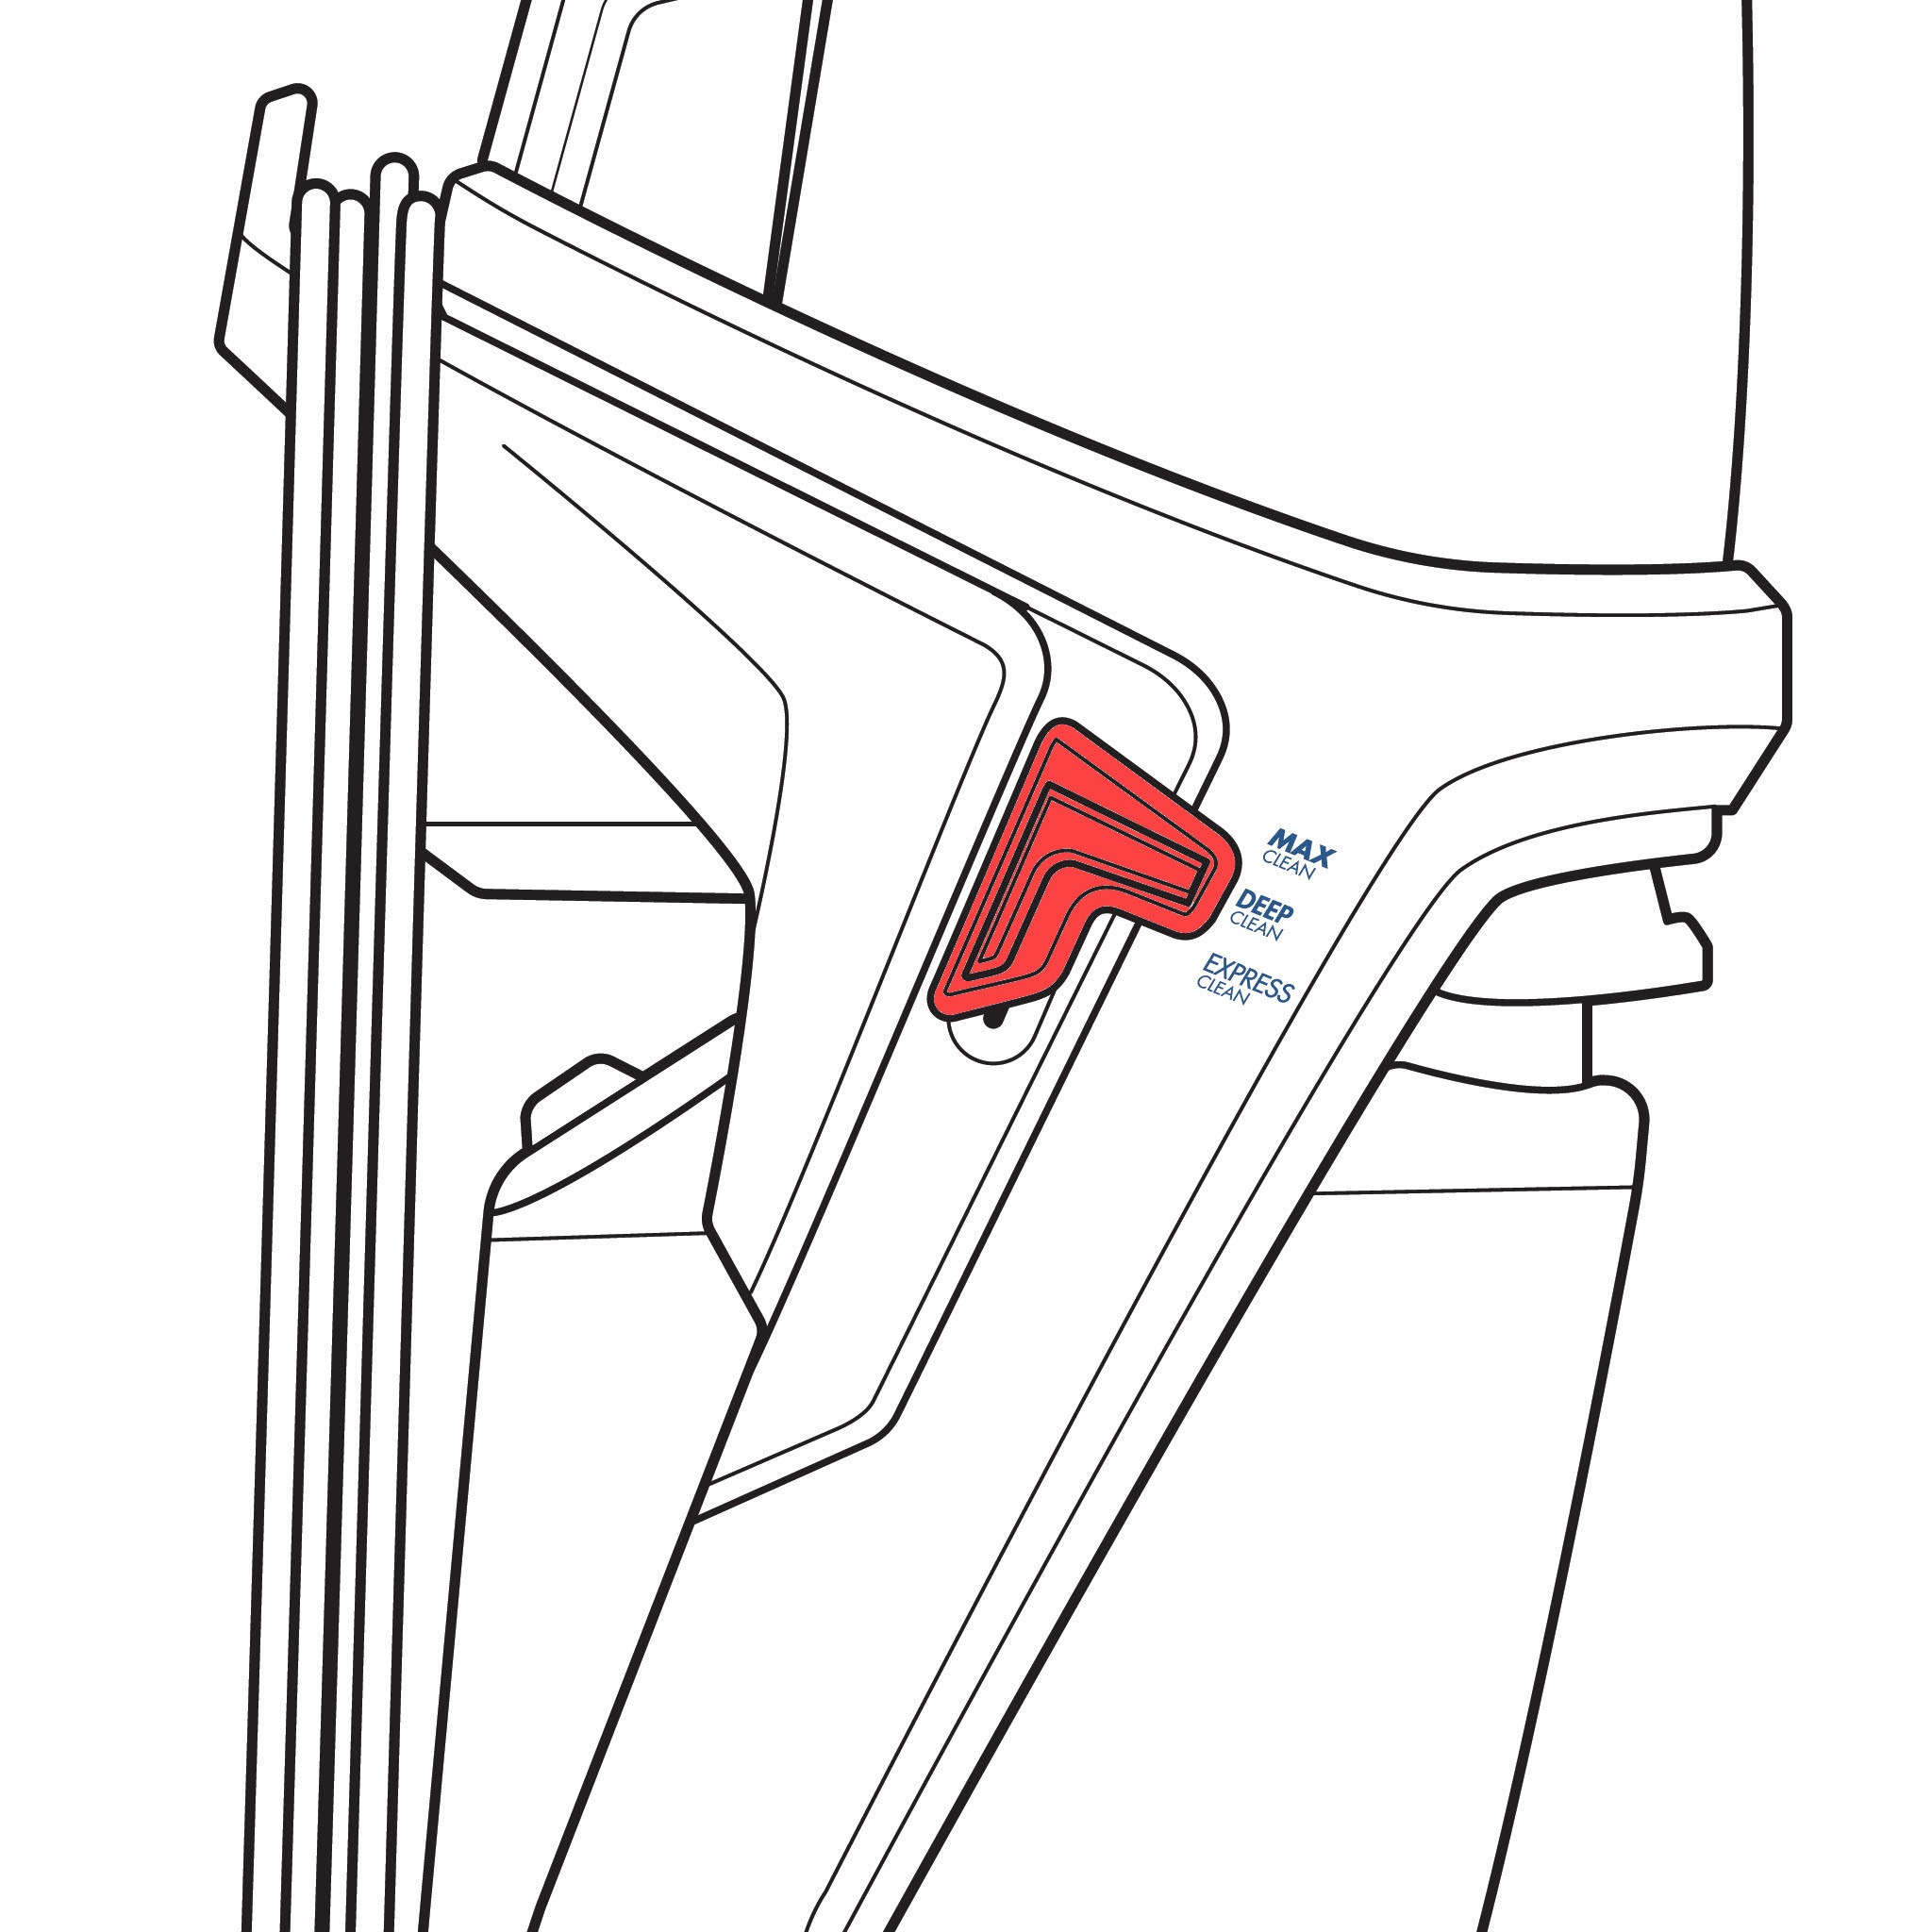
- Mode Switch Cycling: With the machine OFF, switch between all cleaning modes (Express Clean, Deep Clean, Max Clean, etc.) about 5 times. Move the switch fully up and down each time. This action helps prime the spray pump system.
- Select Max or Deep Clean Mode: Ensure the machine is set to either MAX Clean or Deep Clean mode. These modes dispense more water than the Express Clean mode, making it easier to check for spray functionality.
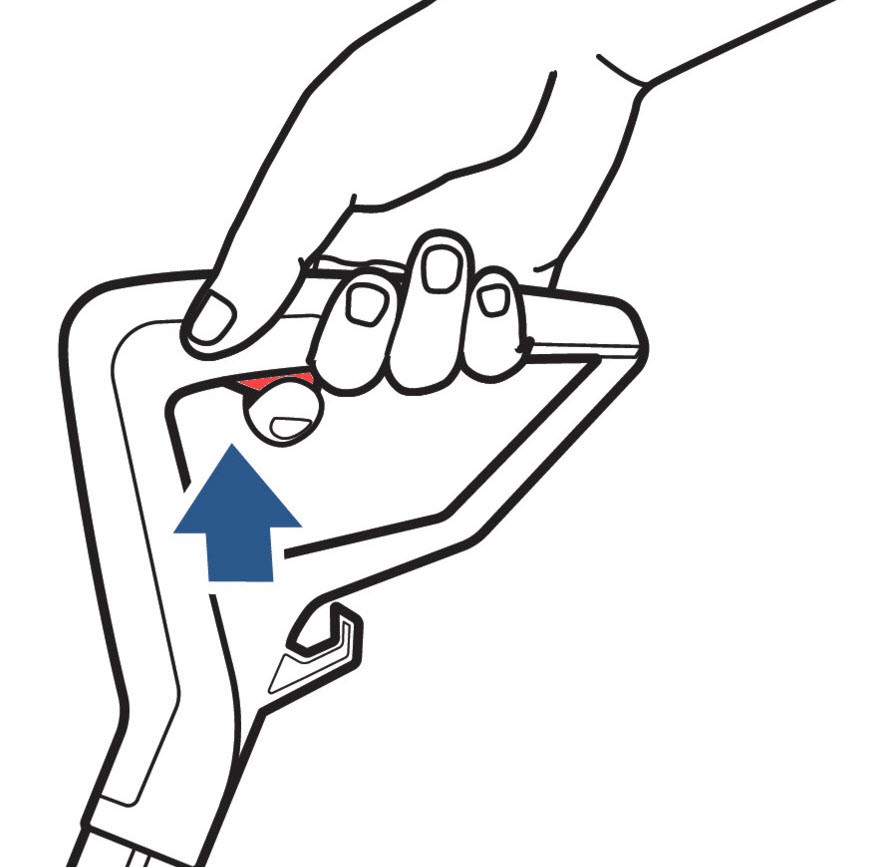
- Hold Trigger (Machine OFF): Keep the machine OFF and hold the spray trigger on the handle for about 15 seconds. This action further primes the pump and allows you to check for water flow at the spray port before turning the machine on.
- Check Spray Port: While still holding the trigger, check for water flowing from the spray port on the machine, where the hose or foot attaches.
If Water Does Not Spray: If you don’t see water flowing from the spray port after 15 seconds, it indicates that the issue might be more complex. Continue with the following steps to inspect the foot nozzle. If the problem persists after these steps, consider contacting BISSELL customer support for further assistance.
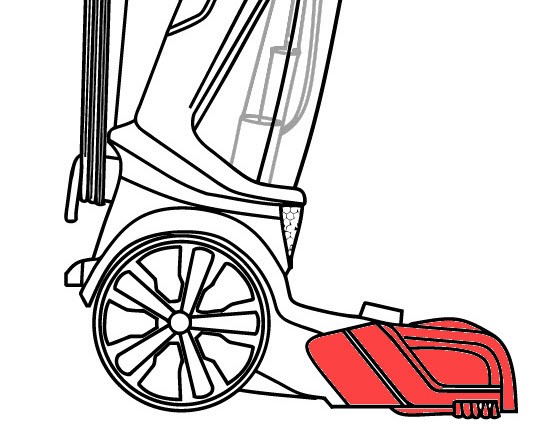
Inspecting the Spray Nozzle on the Foot of Your Machine
If the spray issue persists, the nozzle on the foot of your BISSELL ProHeat 2X Revolution Pet Pro might be clogged or improperly assembled.
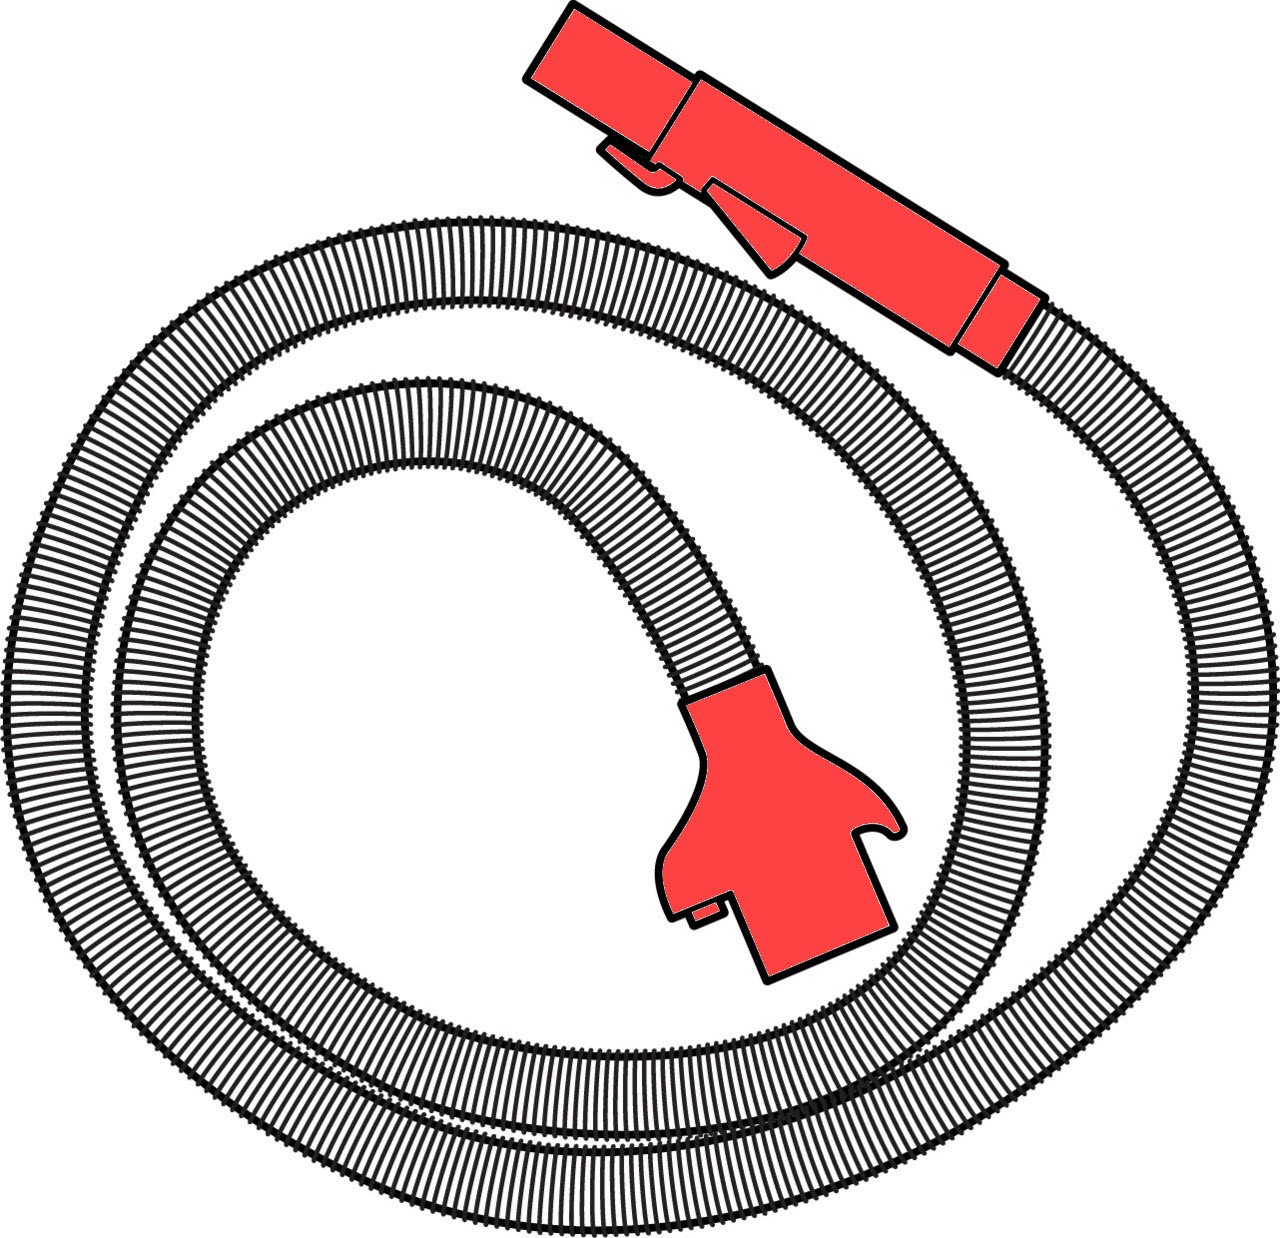
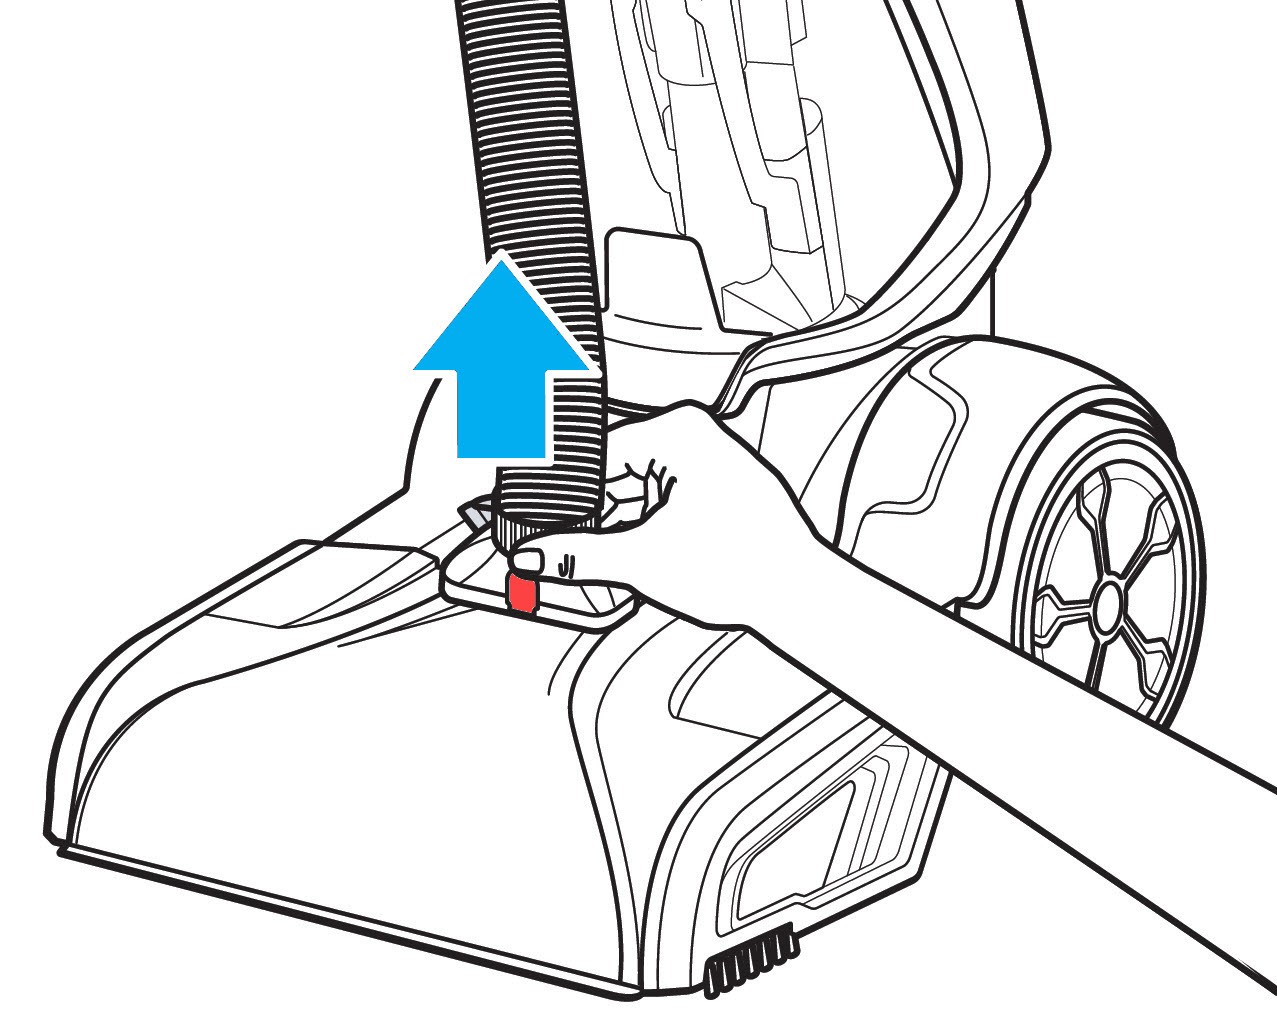
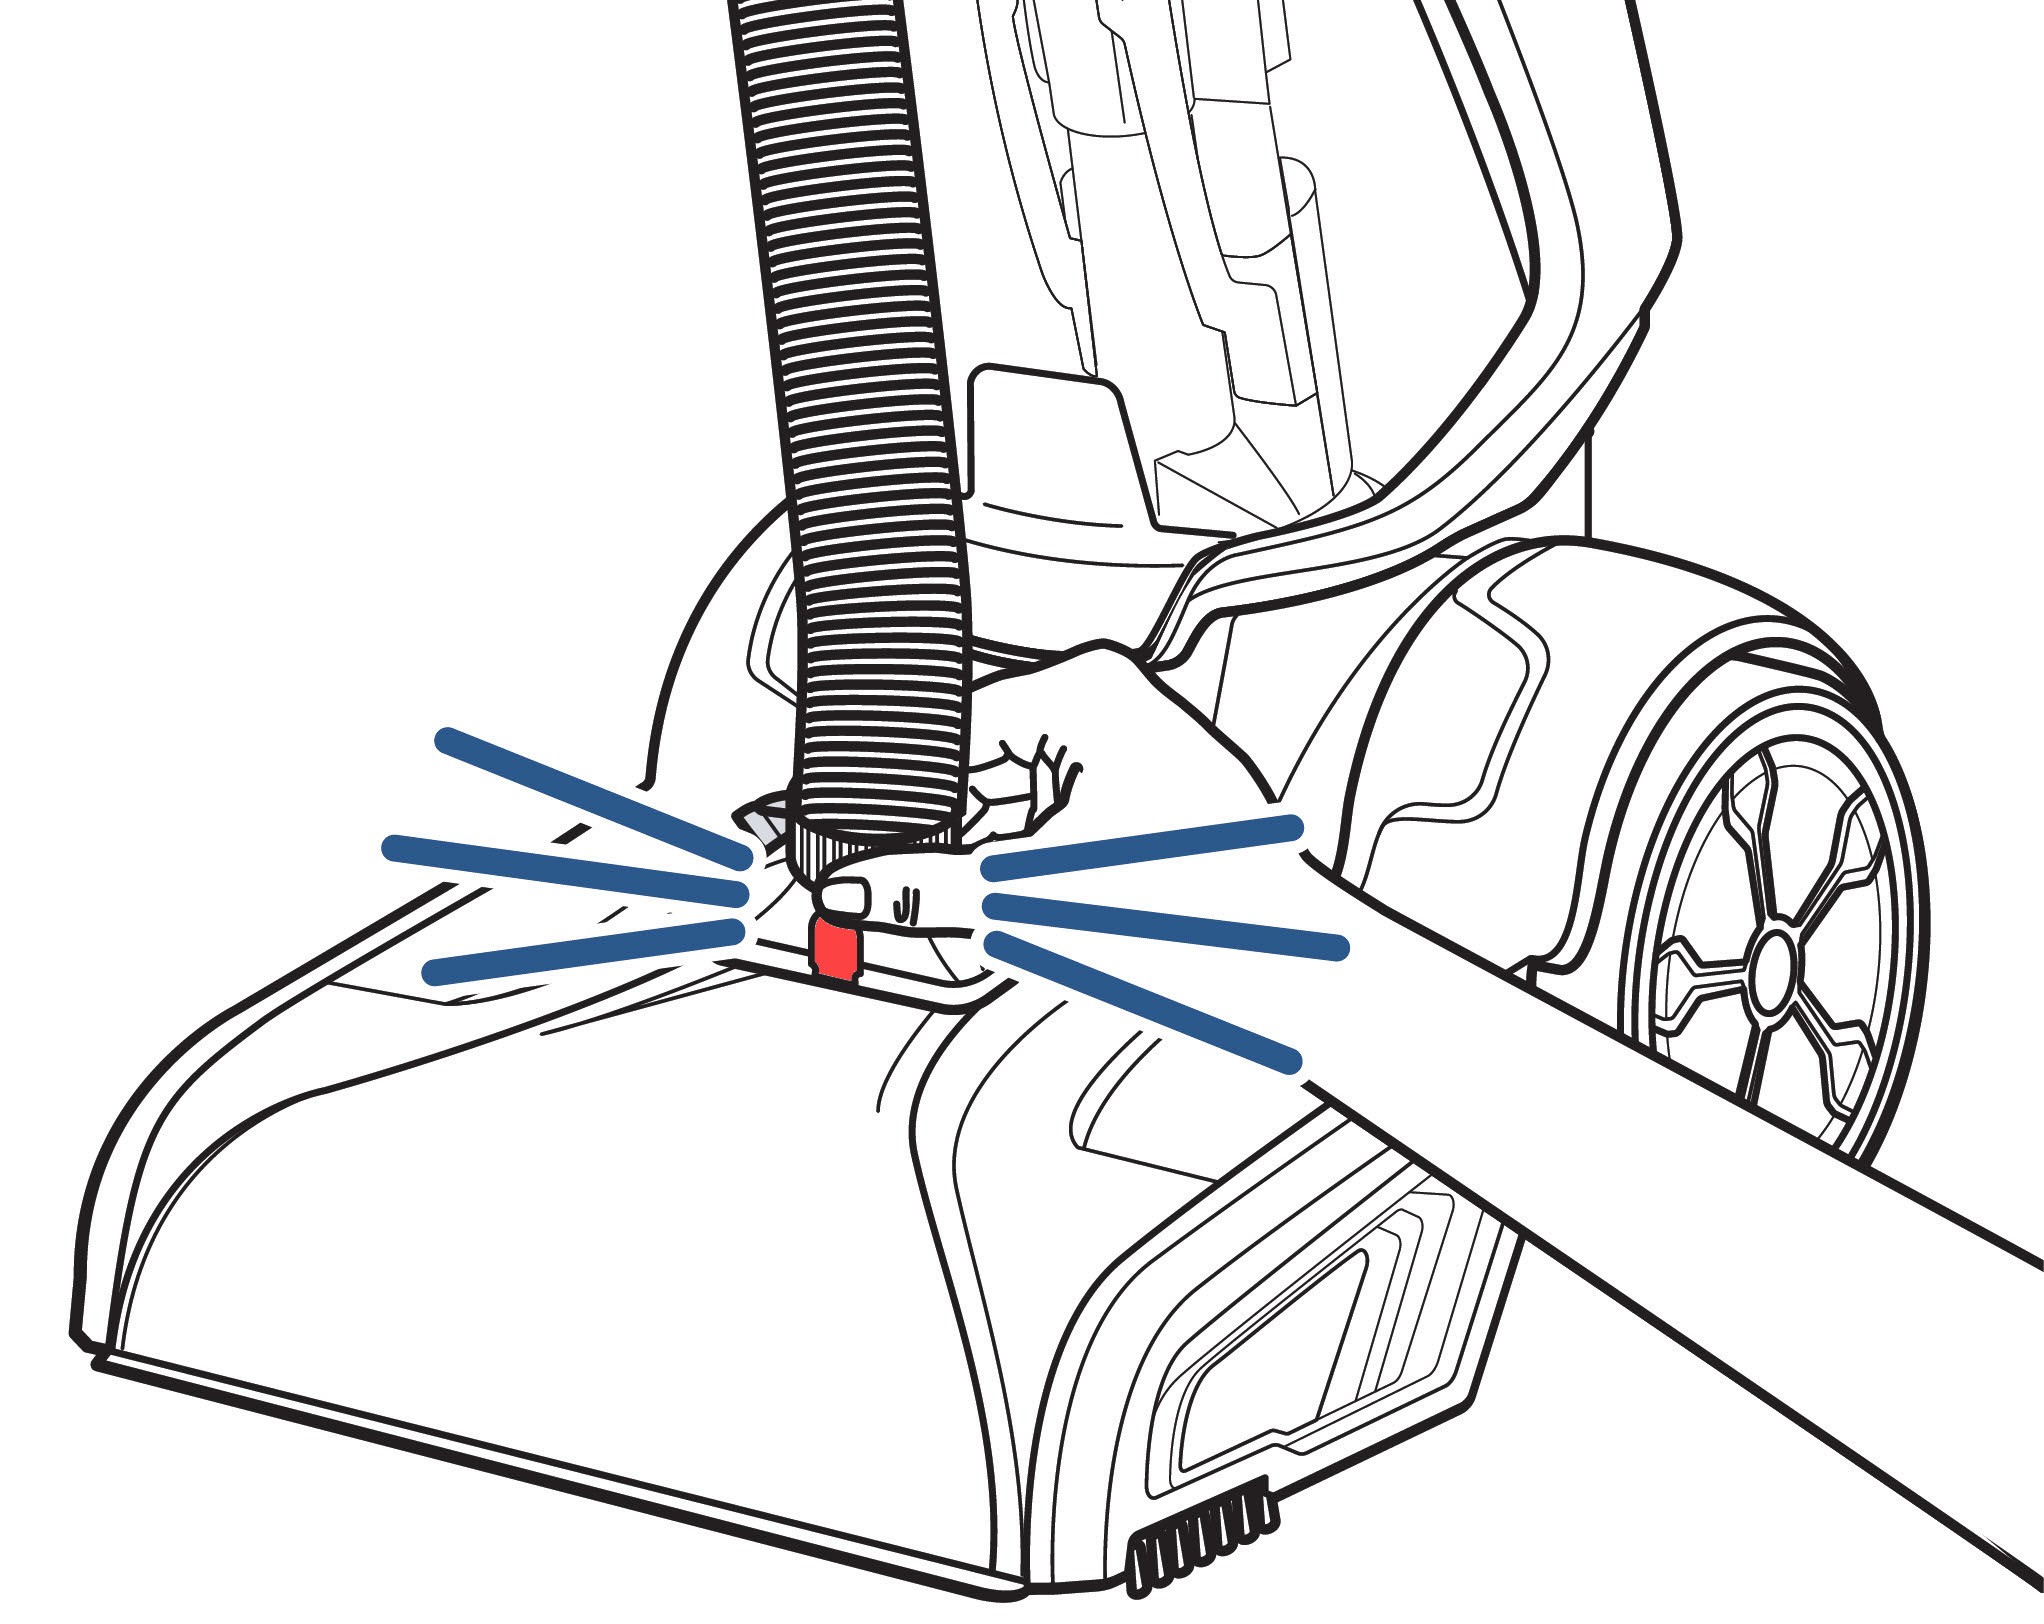
- Remove Hose: Detach the hose from the foot of the machine by pressing the hose release button and gently pulling the hose away.
- Remove Foot Nozzle: Remove the nozzle from the foot of the machine. The removal method may vary slightly depending on your model, but typically involves releasing clips or latches.
-
Prime Spray Port (Foot): With the nozzle removed, locate the spray port underneath where the nozzle was attached. Use a pen or a similar-sized object to gently insert into the port until water flows out. This helps clear any blockage in the foot’s spray mechanism.
-
Reassemble Nozzle: Reassemble the nozzle onto the foot of your BISSELL ProHeat 2X Revolution Pet Pro. Ensure it is securely locked into place. The reassembly process depends on your model type:
| Model 1 or 2 Nozzle Reassembly | Model 3 Nozzle Reassembly |
|---|---|
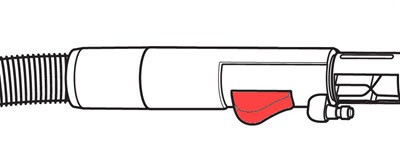
- Clean Hose End and Reattach: Clean the end of the hose and reattach it to the foot of the machine. Make sure the hose release clip is facing away from the machine for proper connection.
- Clean Hose Handle Spray Tip: Remove any tools attached to the hose handle. Inspect and clean the spray tip on the hose handle itself, as this can also become clogged.
Final Spray Tests: Hose and Foot
Now that you’ve inspected and cleaned the nozzle on the foot and hose, perform these final spray tests to confirm if the issue is resolved.
Testing Spray at the Hose:
- Remove Tool & Power On: Ensure no tools are attached to the hose. Plug in your BISSELL ProHeat 2X Revolution Pet Pro and turn it ON.
- Lay Hose Flat: Lay the hose flat on the ground or below the level of the clean water tank. This helps with priming.
- Hold Hose Trigger: Press and hold the spray trigger on the hose handle. Water should begin to spray from the hose. Priming the hose may take a few seconds.
Testing Spray at the Foot:
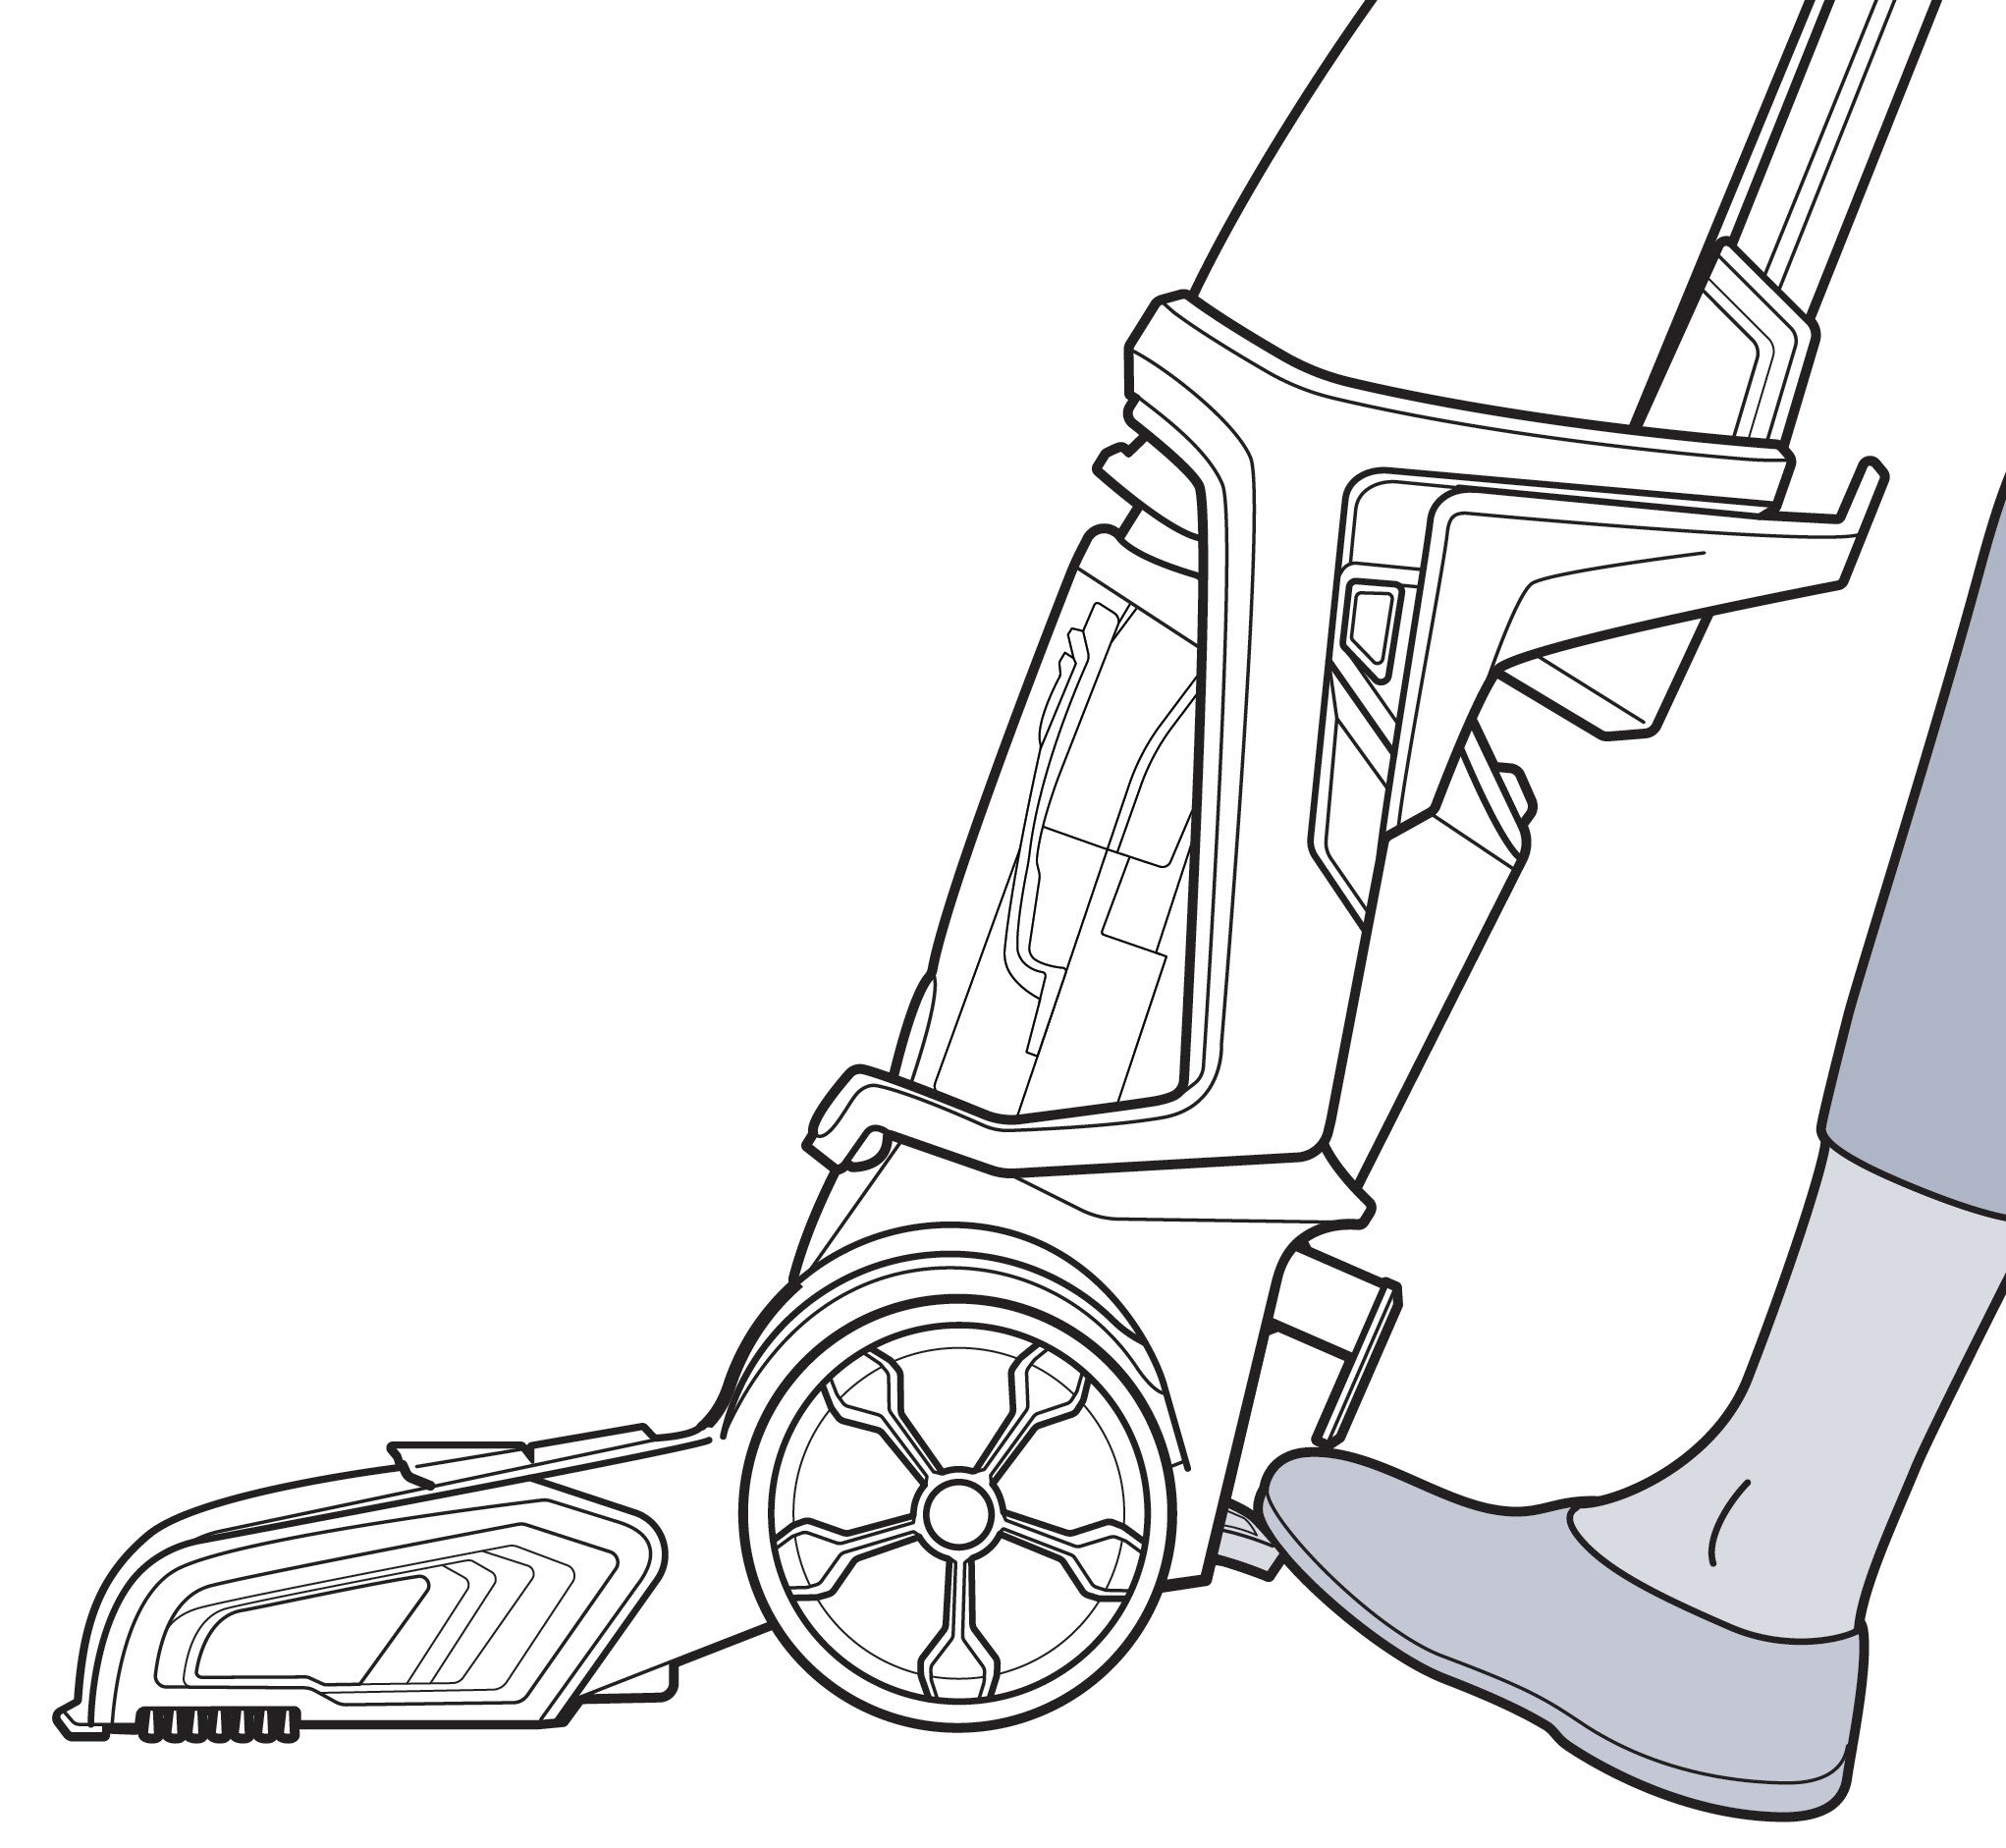
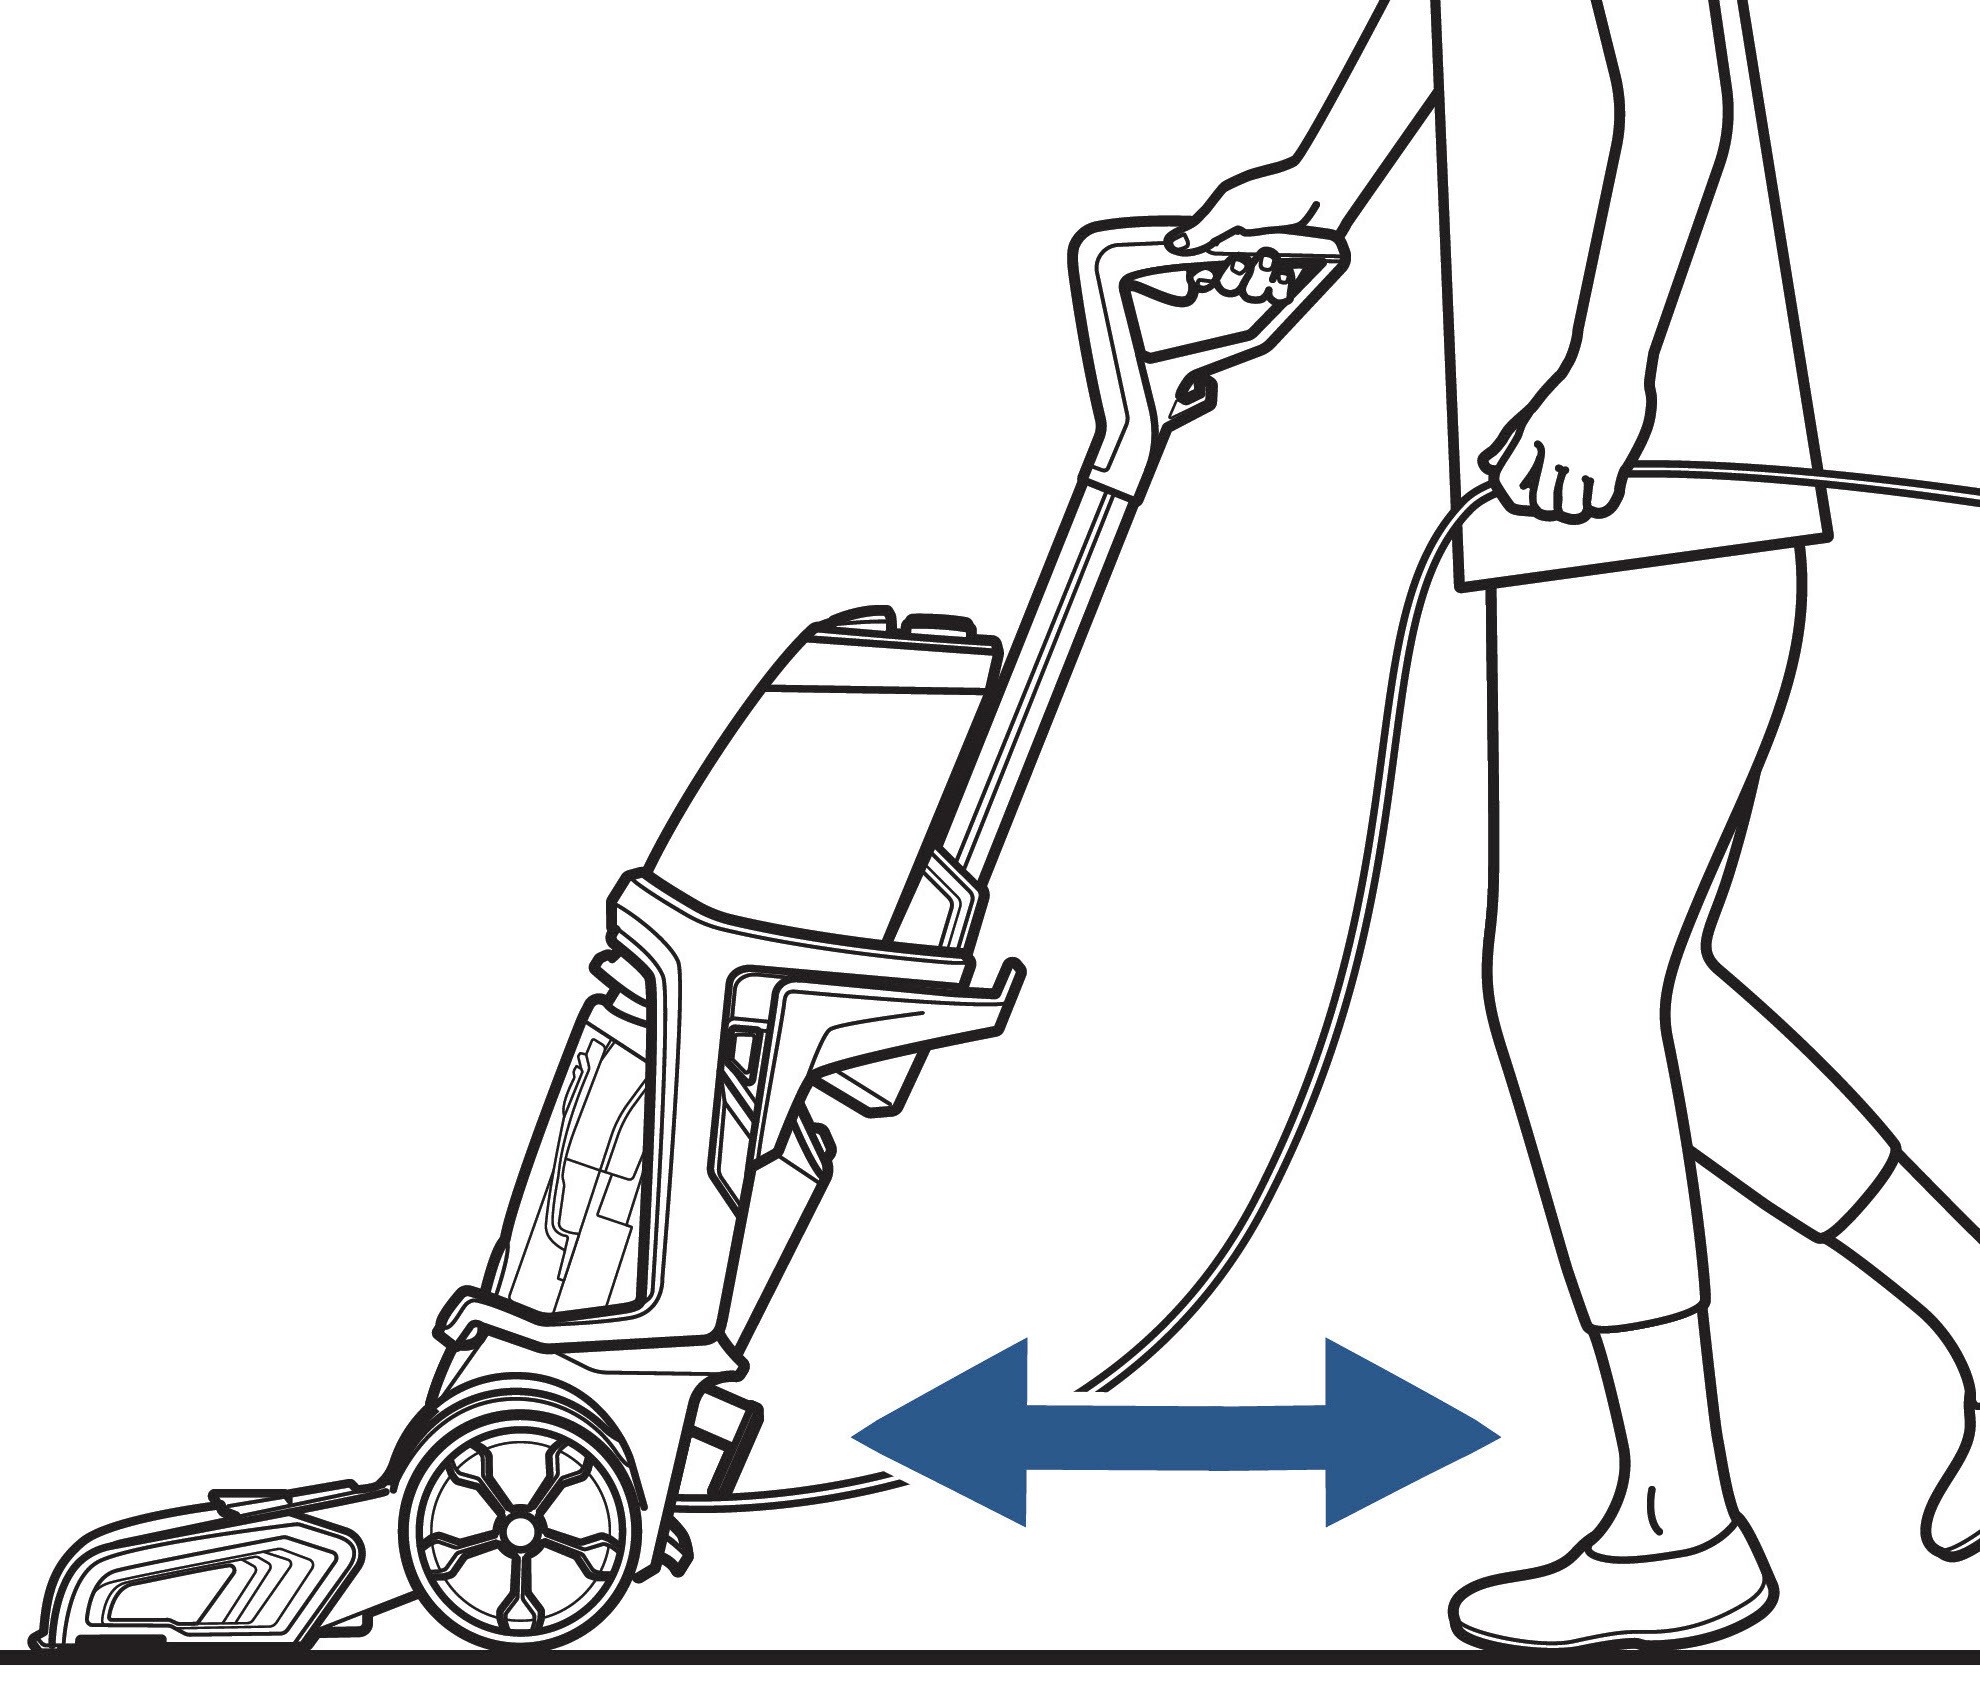
- Power On & Recline: Ensure the hose is attached to the foot. Plug in and turn ON your BISSELL ProHeat 2X Revolution Pet Pro. Recline the handle as you would for normal carpet cleaning.
- Set to Max Clean: Select the Max Clean mode for maximum spray output.
- Hold Trigger & Move Machine: Hold the spray trigger for 15 seconds to initiate spray. Slowly move the machine forward and backward over a small area of carpet about 3 times. Move at a slow pace (approximately 8 inches per second) to allow for proper spray and suction.
Checking for Spray on Carpet:
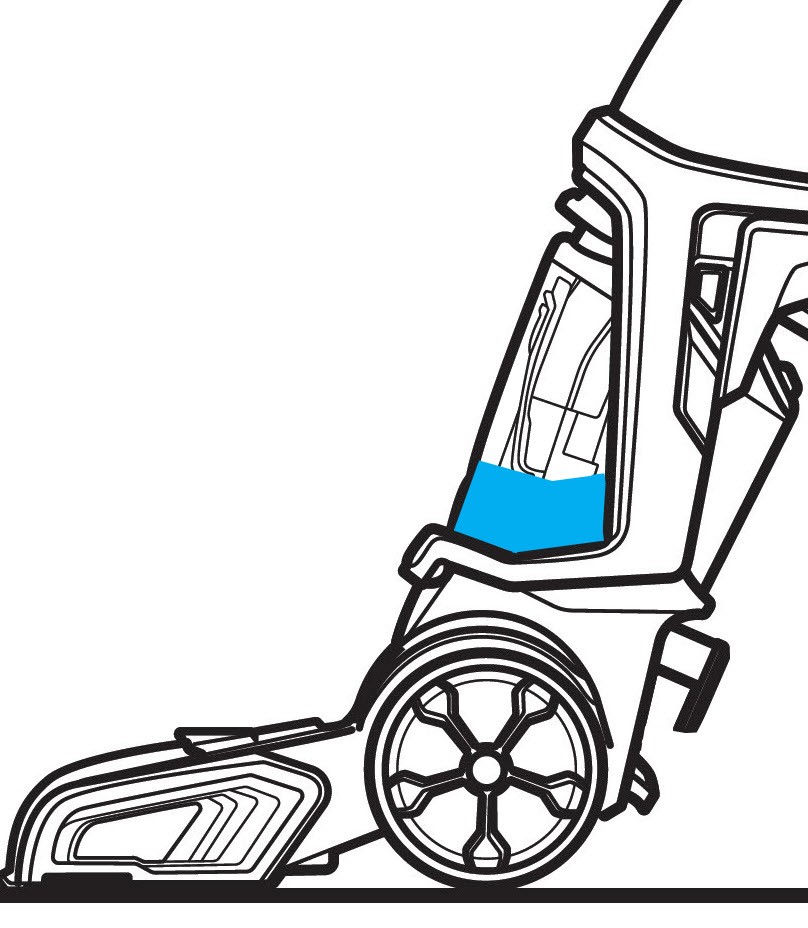
- Inspect Nozzle Flow: Observe if cleaning solution is flowing through the front nozzle and into the dirty water tank.
- Check Carpet Wetness: Place your hand on the cleaned area of the carpet. If the carpet is damp, it indicates that your BISSELL ProHeat 2X Revolution Pet Pro is now spraying correctly.
Issue Resolved?
If you now have spray function at both the hose and foot, congratulations! You’ve successfully troubleshooted the spray issues on your BISSELL ProHeat 2X Revolution Pet Pro. Regular maintenance, such as cleaning spray tips and properly maintaining your water tank, will help prevent future problems.
Still Experiencing Spray Issues?
If you’ve followed all these steps and are still experiencing no or low spray, it’s time to seek advanced help. Visit the official BISSELL support website or contact their customer service directly for further assistance specific to your BISSELL ProHeat 2X Revolution Pet Pro model. They may offer additional troubleshooting steps or advise on repair or replacement options.
We hope this guide has helped you resolve the spray issues with your BISSELL ProHeat 2X Revolution Pet Pro. Keeping your carpets clean is essential for a healthy and happy home, especially when you have pets!