The Bissell Pet Pro is a powerful tool for pet owners looking to keep their homes clean and fresh, and on PETS.EDU.VN, we will guide you on how to maximize its features to tackle pet messes effectively. With the right techniques and maintenance, you can achieve a spotless, odor-free environment. Let’s explore effective Bissell cleaning, pet stain removal, and the best carpet cleaning practices for your home.
1. Understanding Your Bissell Pet Pro
Before diving into cleaning, let’s familiarize ourselves with the Bissell Pet Pro’s components, features, and functionalities. This knowledge ensures you can effectively use the machine and maintain it for long-term performance.
1.1. Identifying the Parts
The Bissell Pet Pro comprises several key components, each serving a specific function. Understanding these parts is crucial for effective operation and maintenance:
| Part | Description |
|---|---|
| Handle | Provides grip and control during use. |
| Clean Water Tank | Holds the clean water and cleaning solution mixture. |
| Dirty Water Tank | Collects the dirty water extracted from carpets and upholstery. |
| Brush Roll | Rotating brush that agitates and cleans carpet fibers. |
| Spray Trigger | Dispenses the cleaning solution onto the carpet. |
| Power Switch | Turns the machine on and off. |
| Cleaning Mode Switch | Allows you to select different cleaning modes, such as Express Clean, Deep Clean, or Max Clean. |
| Hose and Tool Attachments | Enable spot cleaning and reaching difficult areas. |
| CleanShot Pretreater | Targets and pretreats tough stains with a concentrated spray. |
1.2. Assembling Your Bissell Pet Pro
Proper assembly is crucial for the safe and effective operation of your Bissell Pet Pro. Follow these steps to ensure all parts are correctly connected:
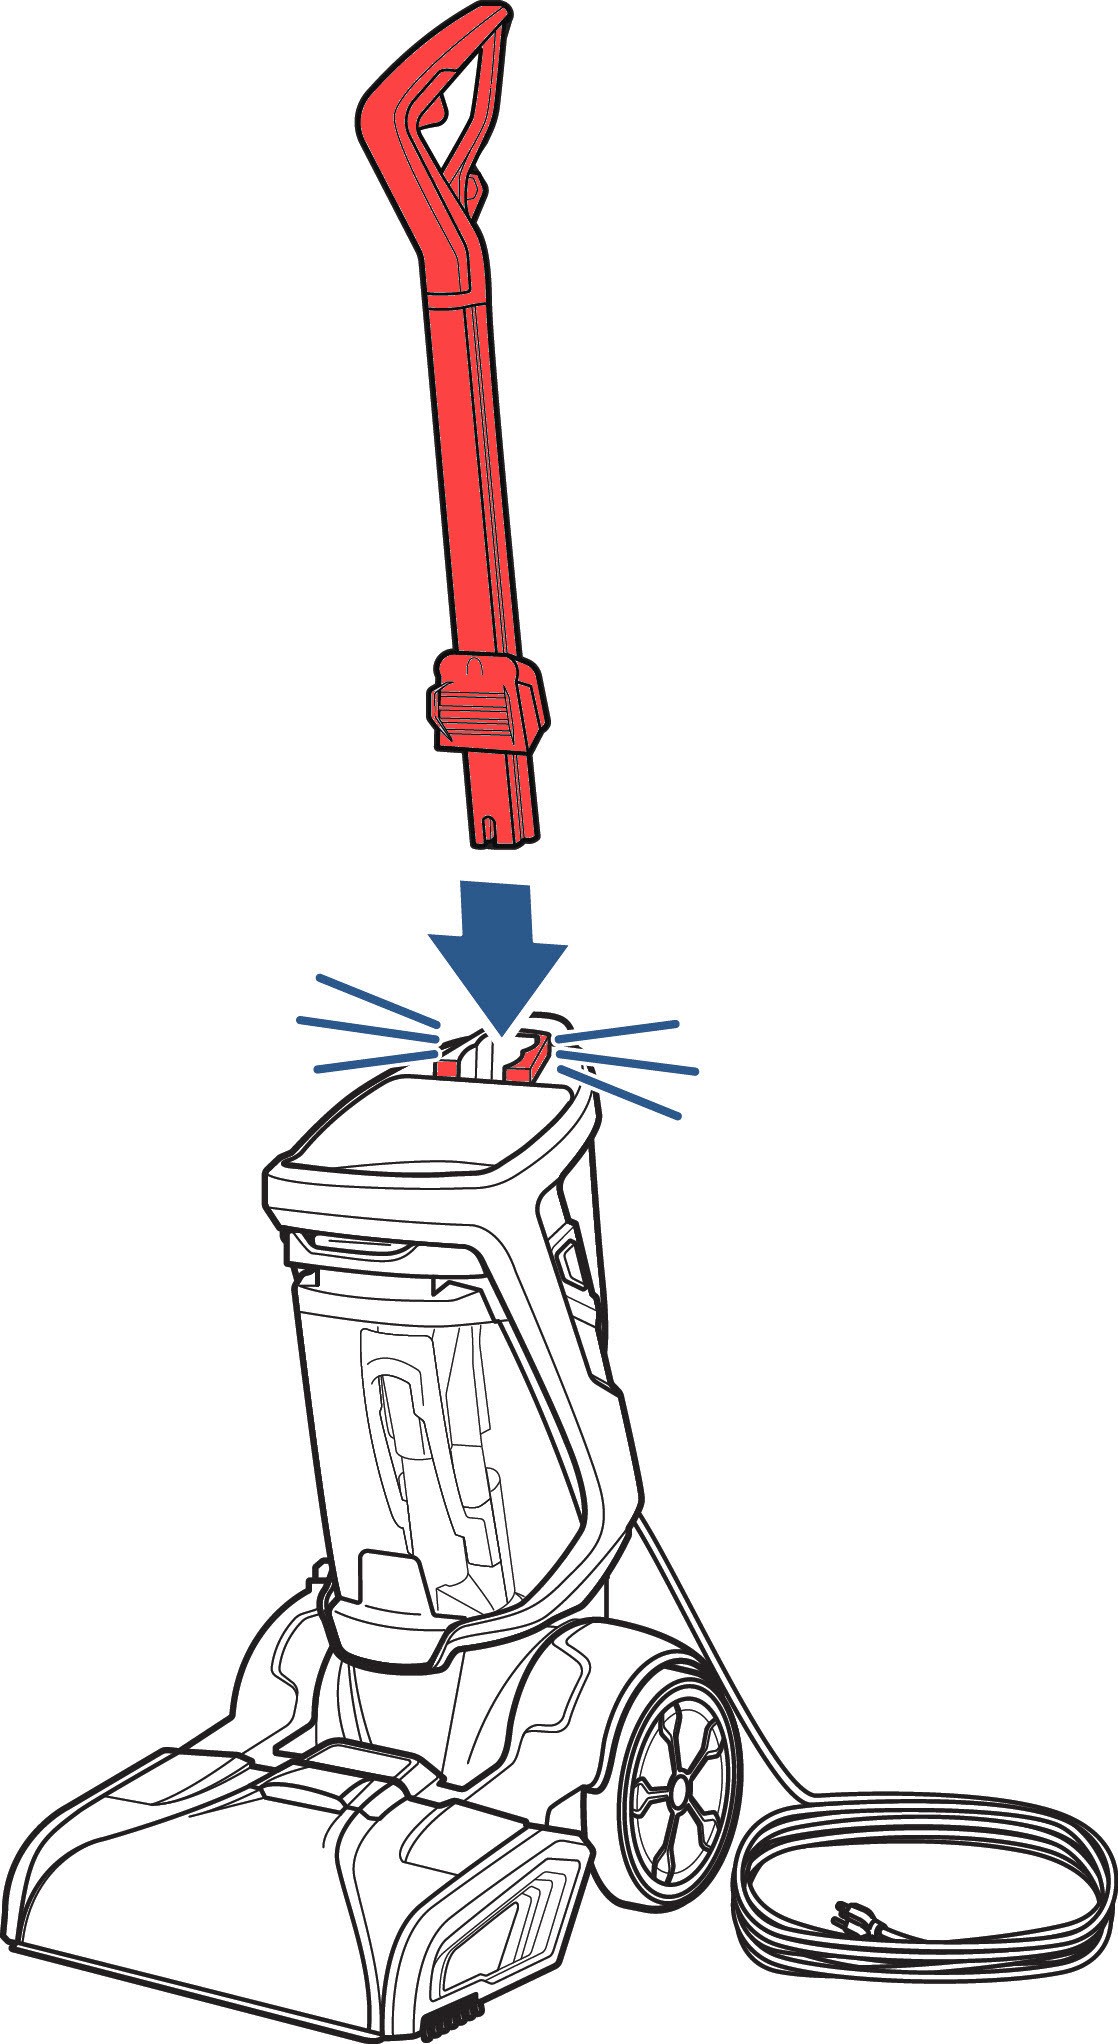
- Handle Insertion: Firmly insert the handle into the top of the machine until it clicks into place.
- Carry Handle Attachment: Align the carry handle with the slots on either side of the base until it clicks into place. Secure it with the provided screw using a Phillips-head screwdriver.
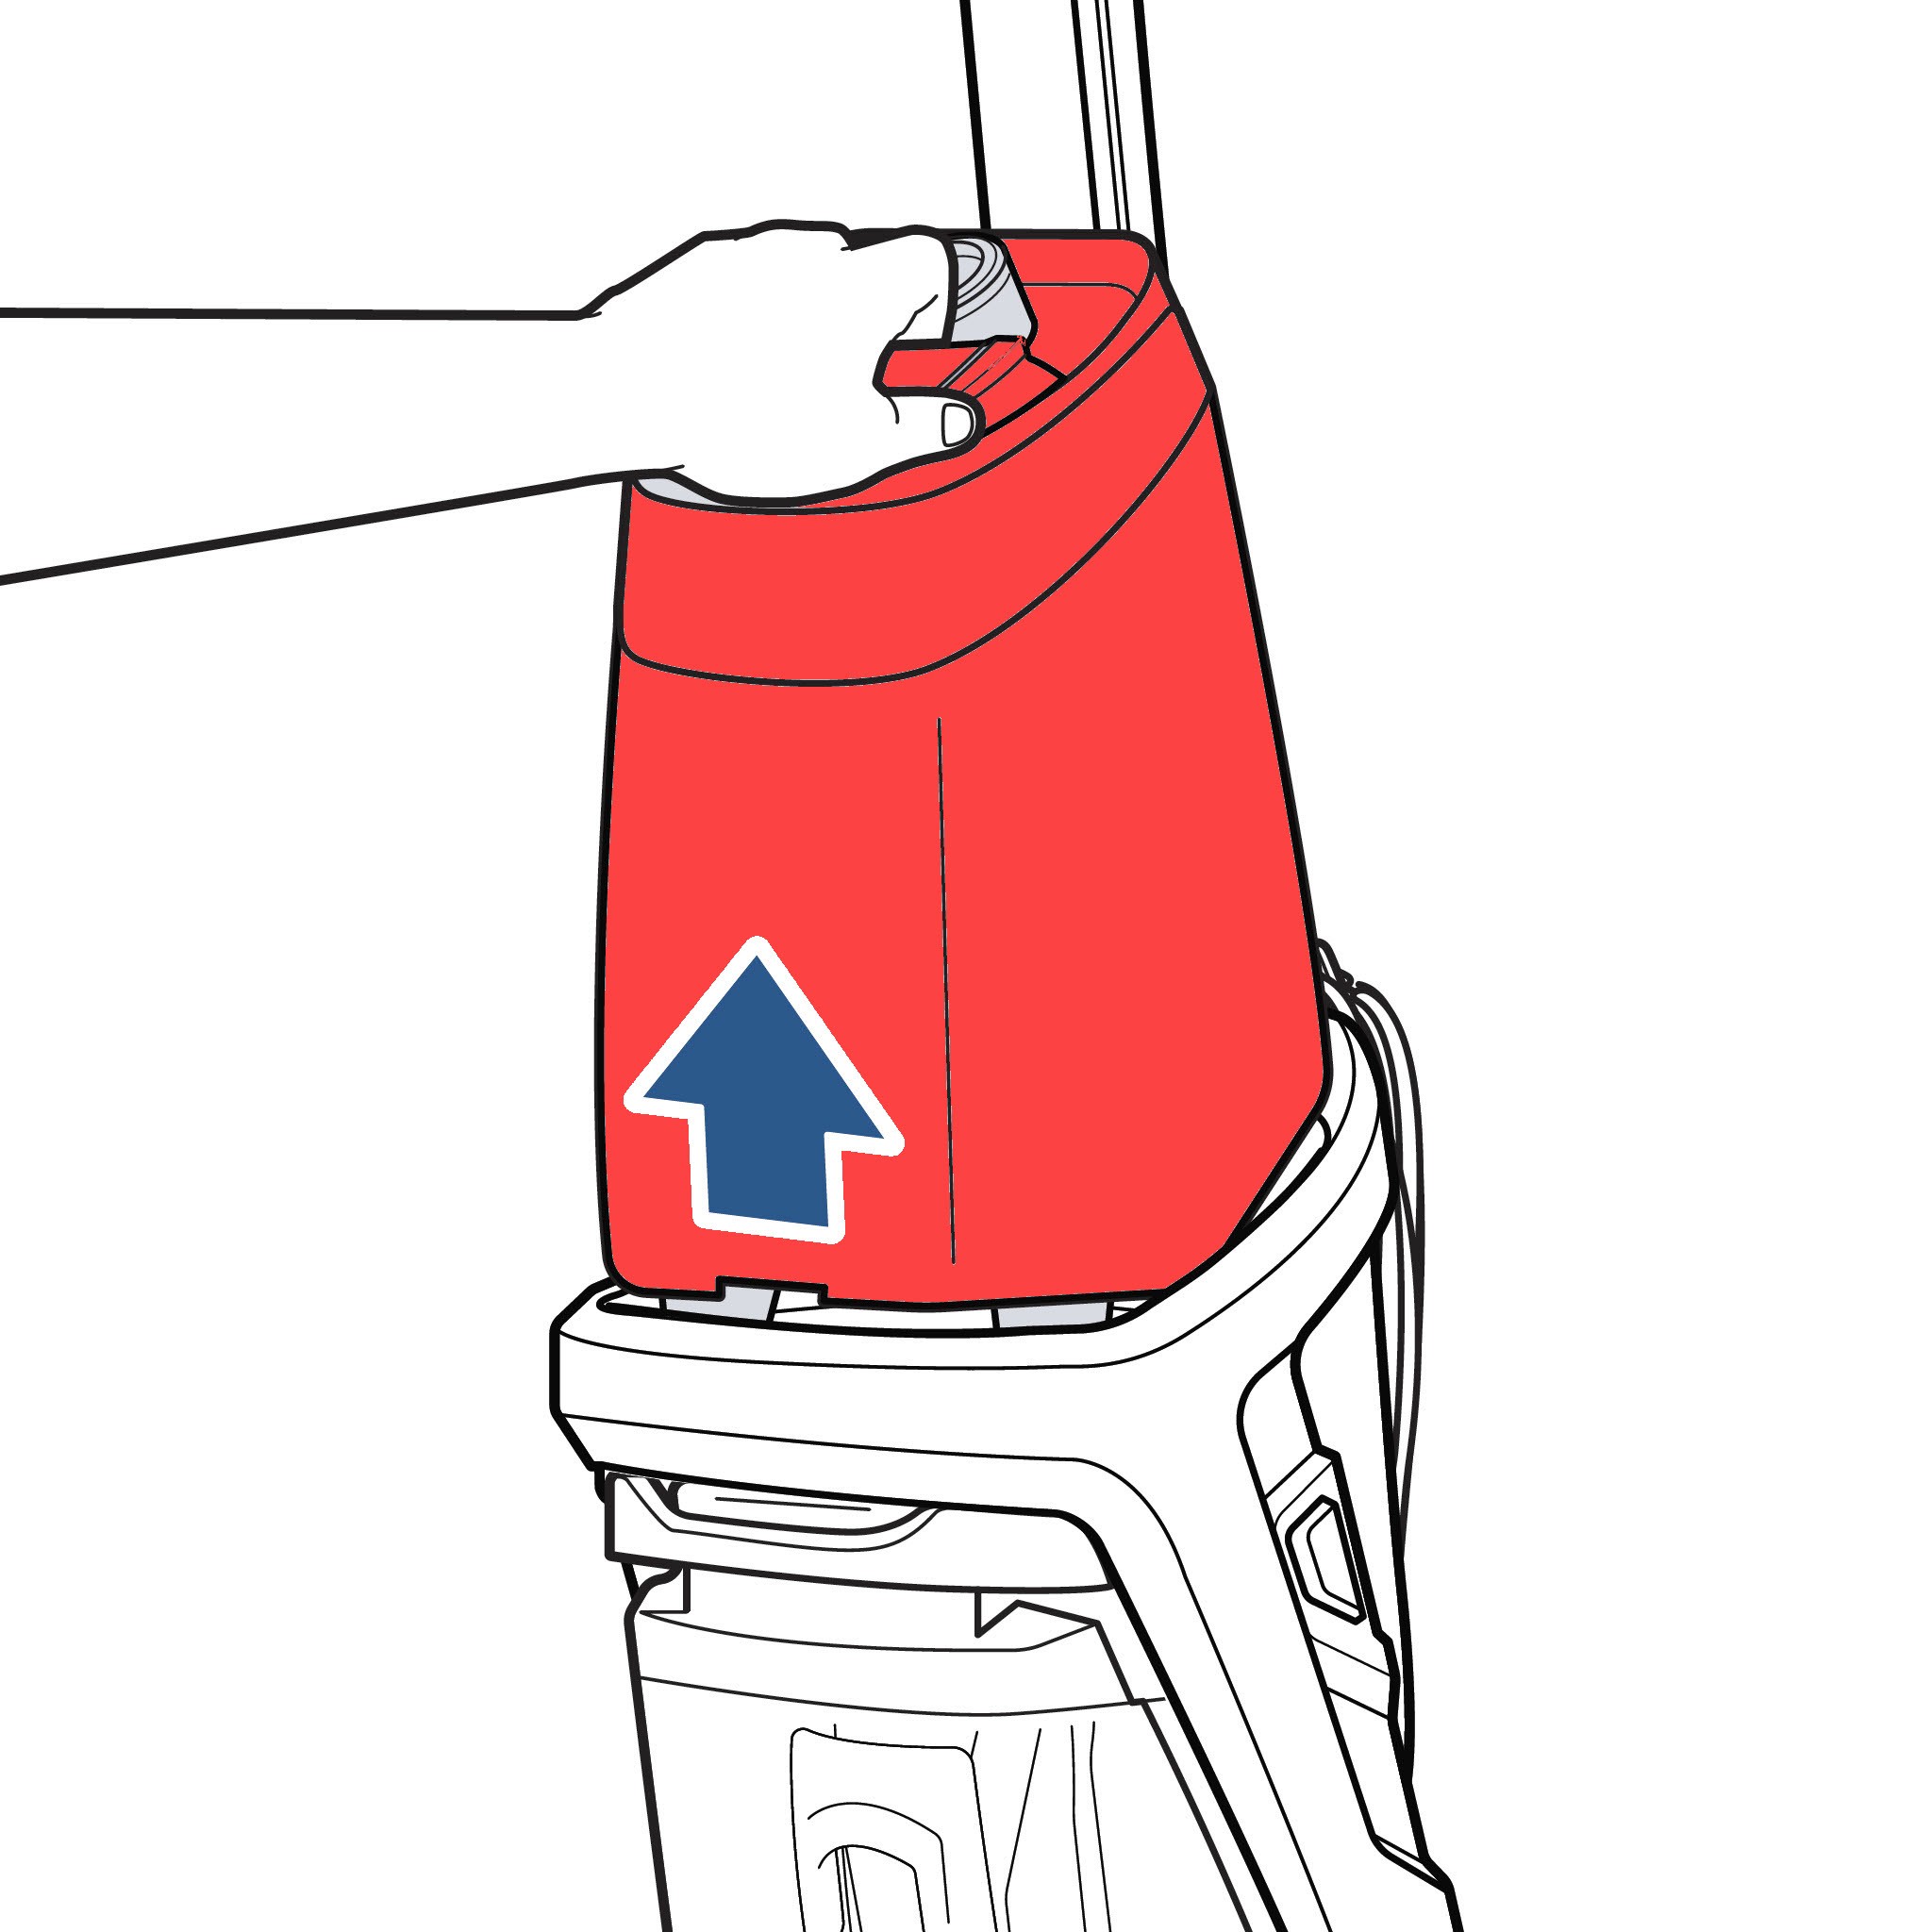
- Clean Water Tank Alignment: Align the clean water tank with the grooves on the machine before sliding it into place.
1.3. Understanding Cleaning Modes
The Bissell Pet Pro offers multiple cleaning modes to suit different cleaning needs. Each mode optimizes water usage and cleaning power:
- Express Clean: Ideal for light cleaning and quick drying.
- Max Clean/Deep Clean: Delivers a more thorough clean, using more water for heavily soiled areas.
2. Pre-Cleaning Preparations
Effective cleaning starts with proper preparation. Before you start using your Bissell Pet Pro, take these preparatory steps:
2.1. Vacuuming the Area
Before using the Bissell Pet Pro, vacuum the area to remove loose debris, pet hair, and dirt. This step prevents clogging and ensures the machine can focus on deep cleaning.
2.2. Removing Obstacles
Clear the area of furniture, toys, and other obstacles. This provides clear paths for cleaning and prevents accidents.
2.3. Spot Treating Stains
For tough stains, pretreat the area with a stain remover before using the Bissell Pet Pro. This increases the chances of complete stain removal.
3. Preparing the Cleaning Solution
The right cleaning solution is crucial for effective stain and odor removal. Follow these steps to prepare the cleaning solution for your Bissell Pet Pro:
3.1. Filling the Clean Water Tank
- Remove the clean water tank from the machine.
- Unscrew the cap from the tank.
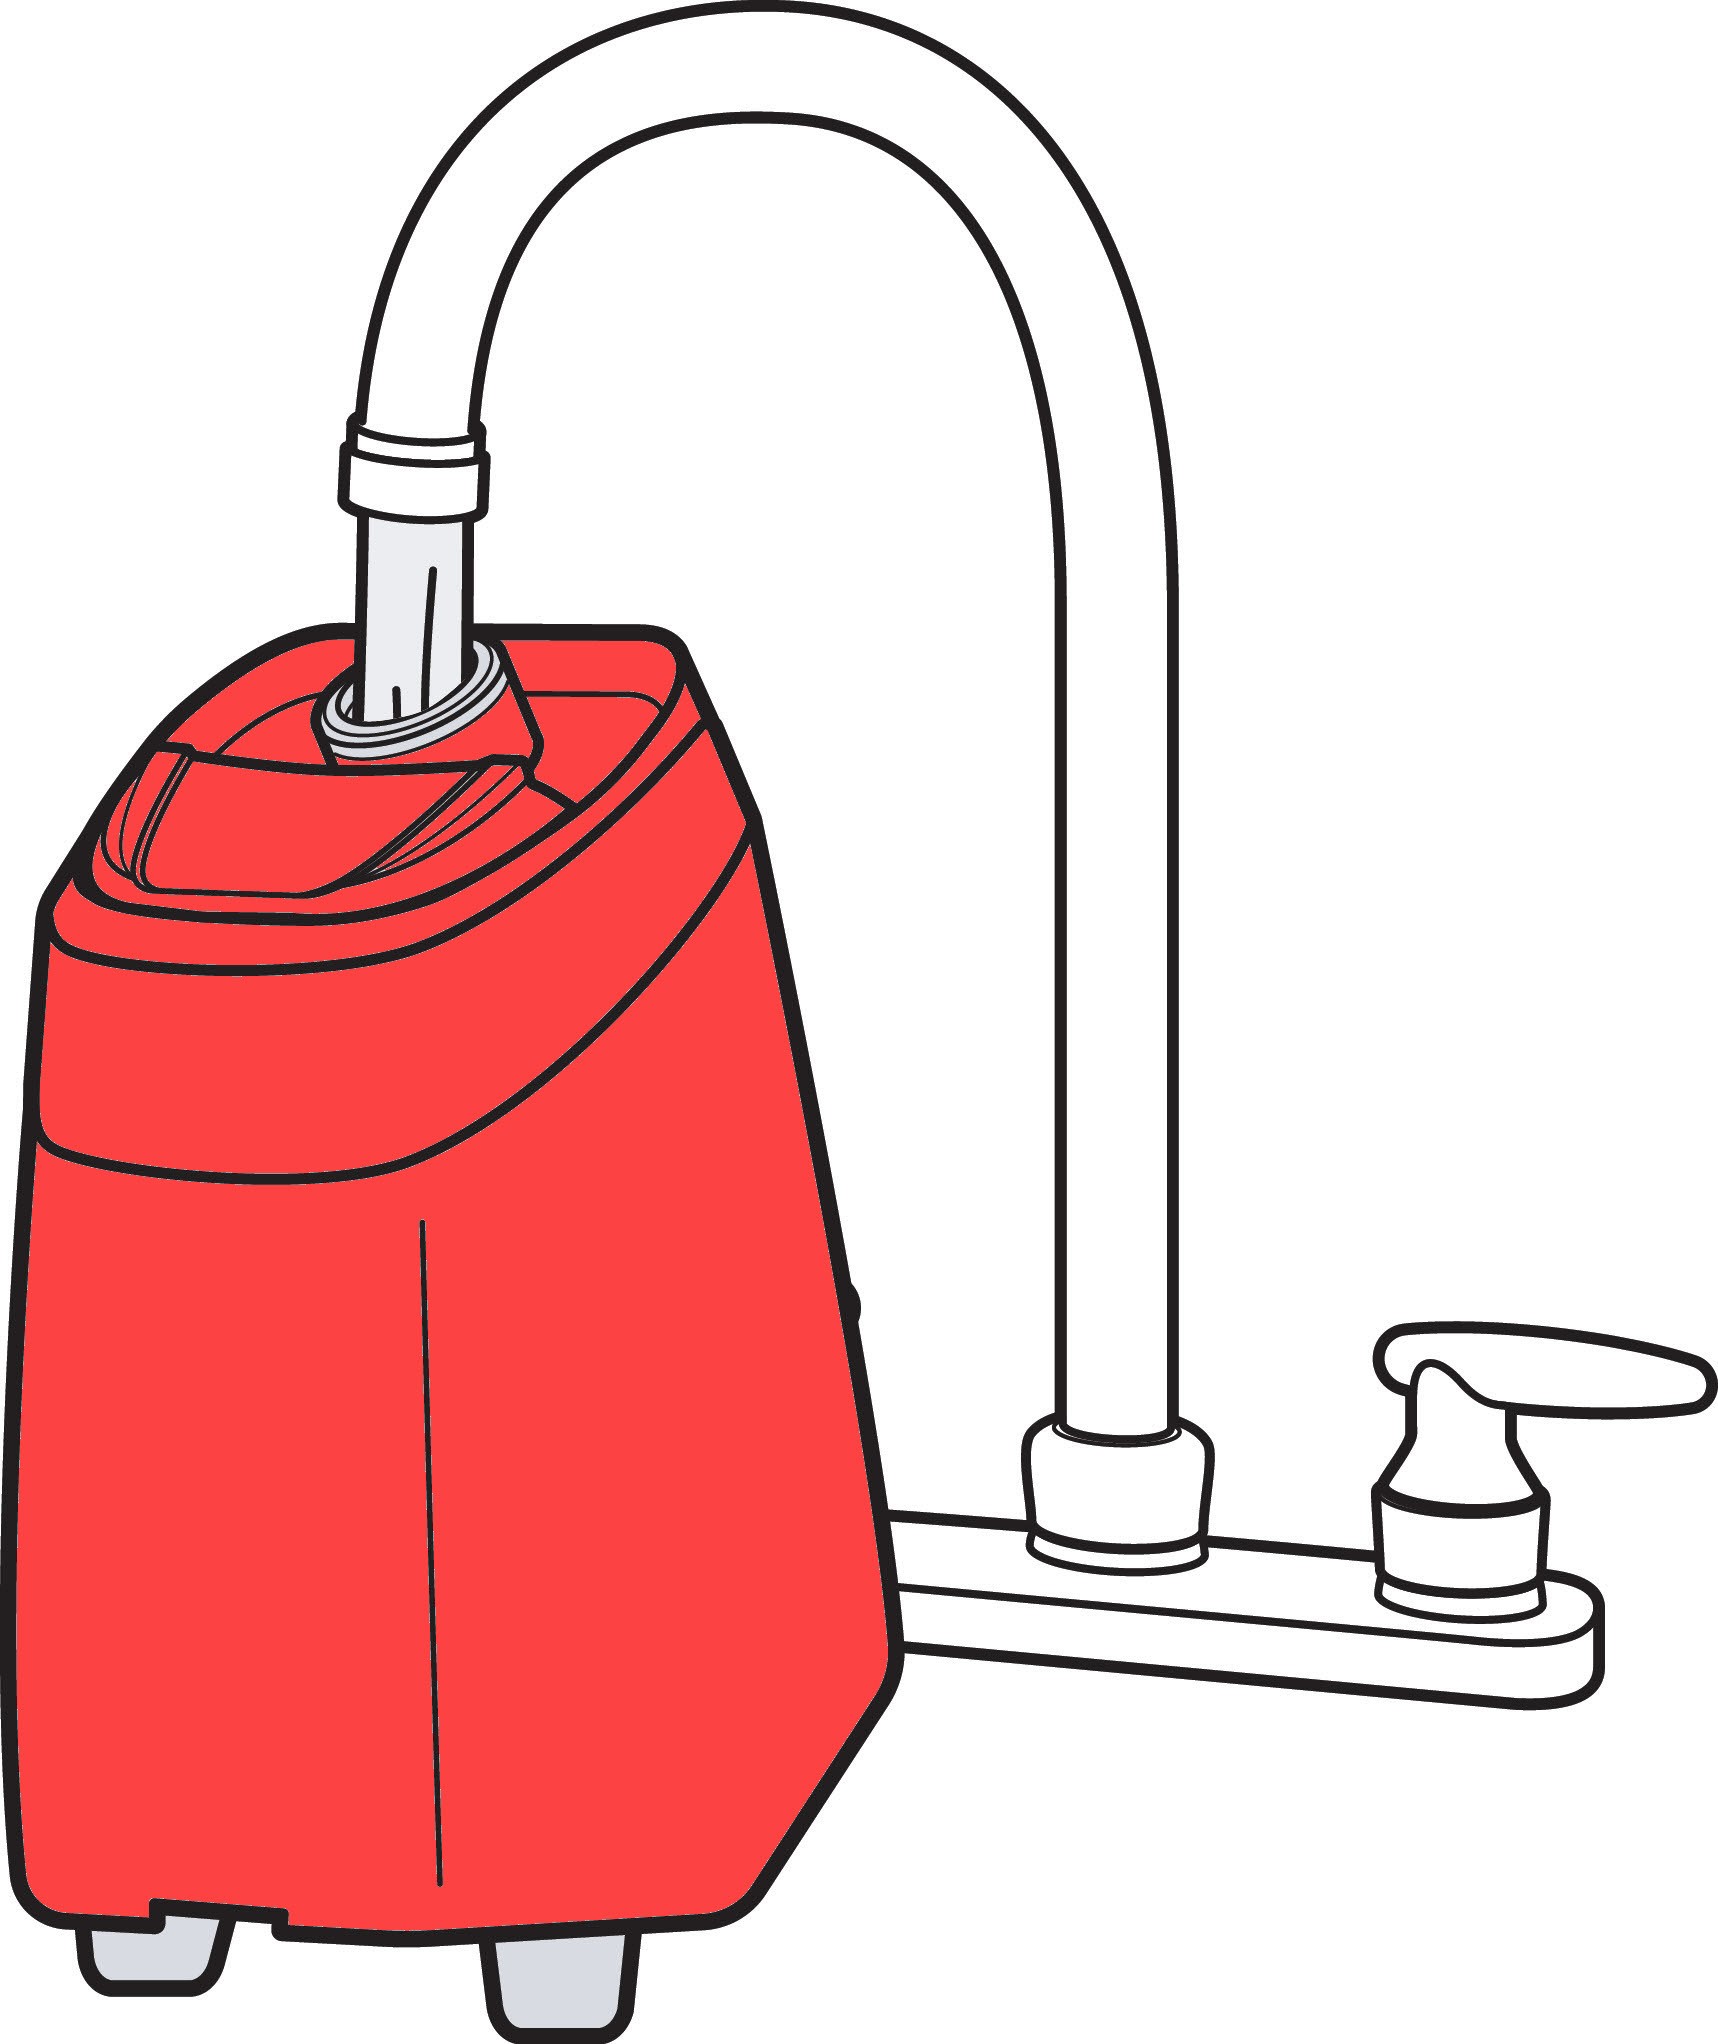
- Fill the tank with warm tap water (maximum 140°F or 60°C) to the appropriate water line, depending on the cleaning mode you’ve chosen (Express Clean or Max/Deep Clean).
3.2. Adding the Cleaning Formula
- Add the appropriate amount of Bissell cleaning formula to the formula fill line. Use formulas like Clean + Refresh, PET Stain & Odor, or PRO MAX Clean + Protect for best results.
- If using the ANTIBACTERIAL formula, ensure your machine has the Easy Fill System. Insert the formula bottle into the cap on the tank and squeeze until the formula reaches the easy fill line.
3.3. Selecting the Right Formula
Choosing the right formula can significantly impact the cleaning results. Here are some recommendations:
| Formula | Purpose |
|---|---|
| Clean + Refresh | General cleaning and refreshing carpets |
| PET Stain & Odor | Removing pet stains and odors |
| PRO MAX Clean + Protect | Deep cleaning and protecting carpets from future stains |
| PET PRO OXY Urine Eliminator | Specifically targets and eliminates urine stains and odors |
| PET Stain Pretreat | Pretreatment for tough stains |
| PET PRO OXY Stain Destroyer | Powerful stain removal |
| PET Pretreat + Sanitize | Pretreatment with sanitizing properties |
| Pet Stain & Odor + Antibacterial | Stain and odor removal with antibacterial action |
| OXY Boost | Boosts stain removal |
| PET OXY Boost | Enhances pet stain removal |
| BISSELL ANTIBACTERIAL Formula (Easy Fill) | Designed for BISSELL machines with Easy Fill System, provides antibacterial cleaning |
Always use genuine BISSELL formulas to optimize the performance of your machine and prevent potential damage.
4. Cleaning Carpets and Area Rugs
With preparations complete, you’re ready to start cleaning. Follow these steps for the best results:
4.1. Turning On the Machine
- Plug the Bissell Pet Pro into a properly grounded outlet.
- Ensure the machine is set to your desired cleaning mode using the switch on the side.
- Press the power button to turn the machine ON.
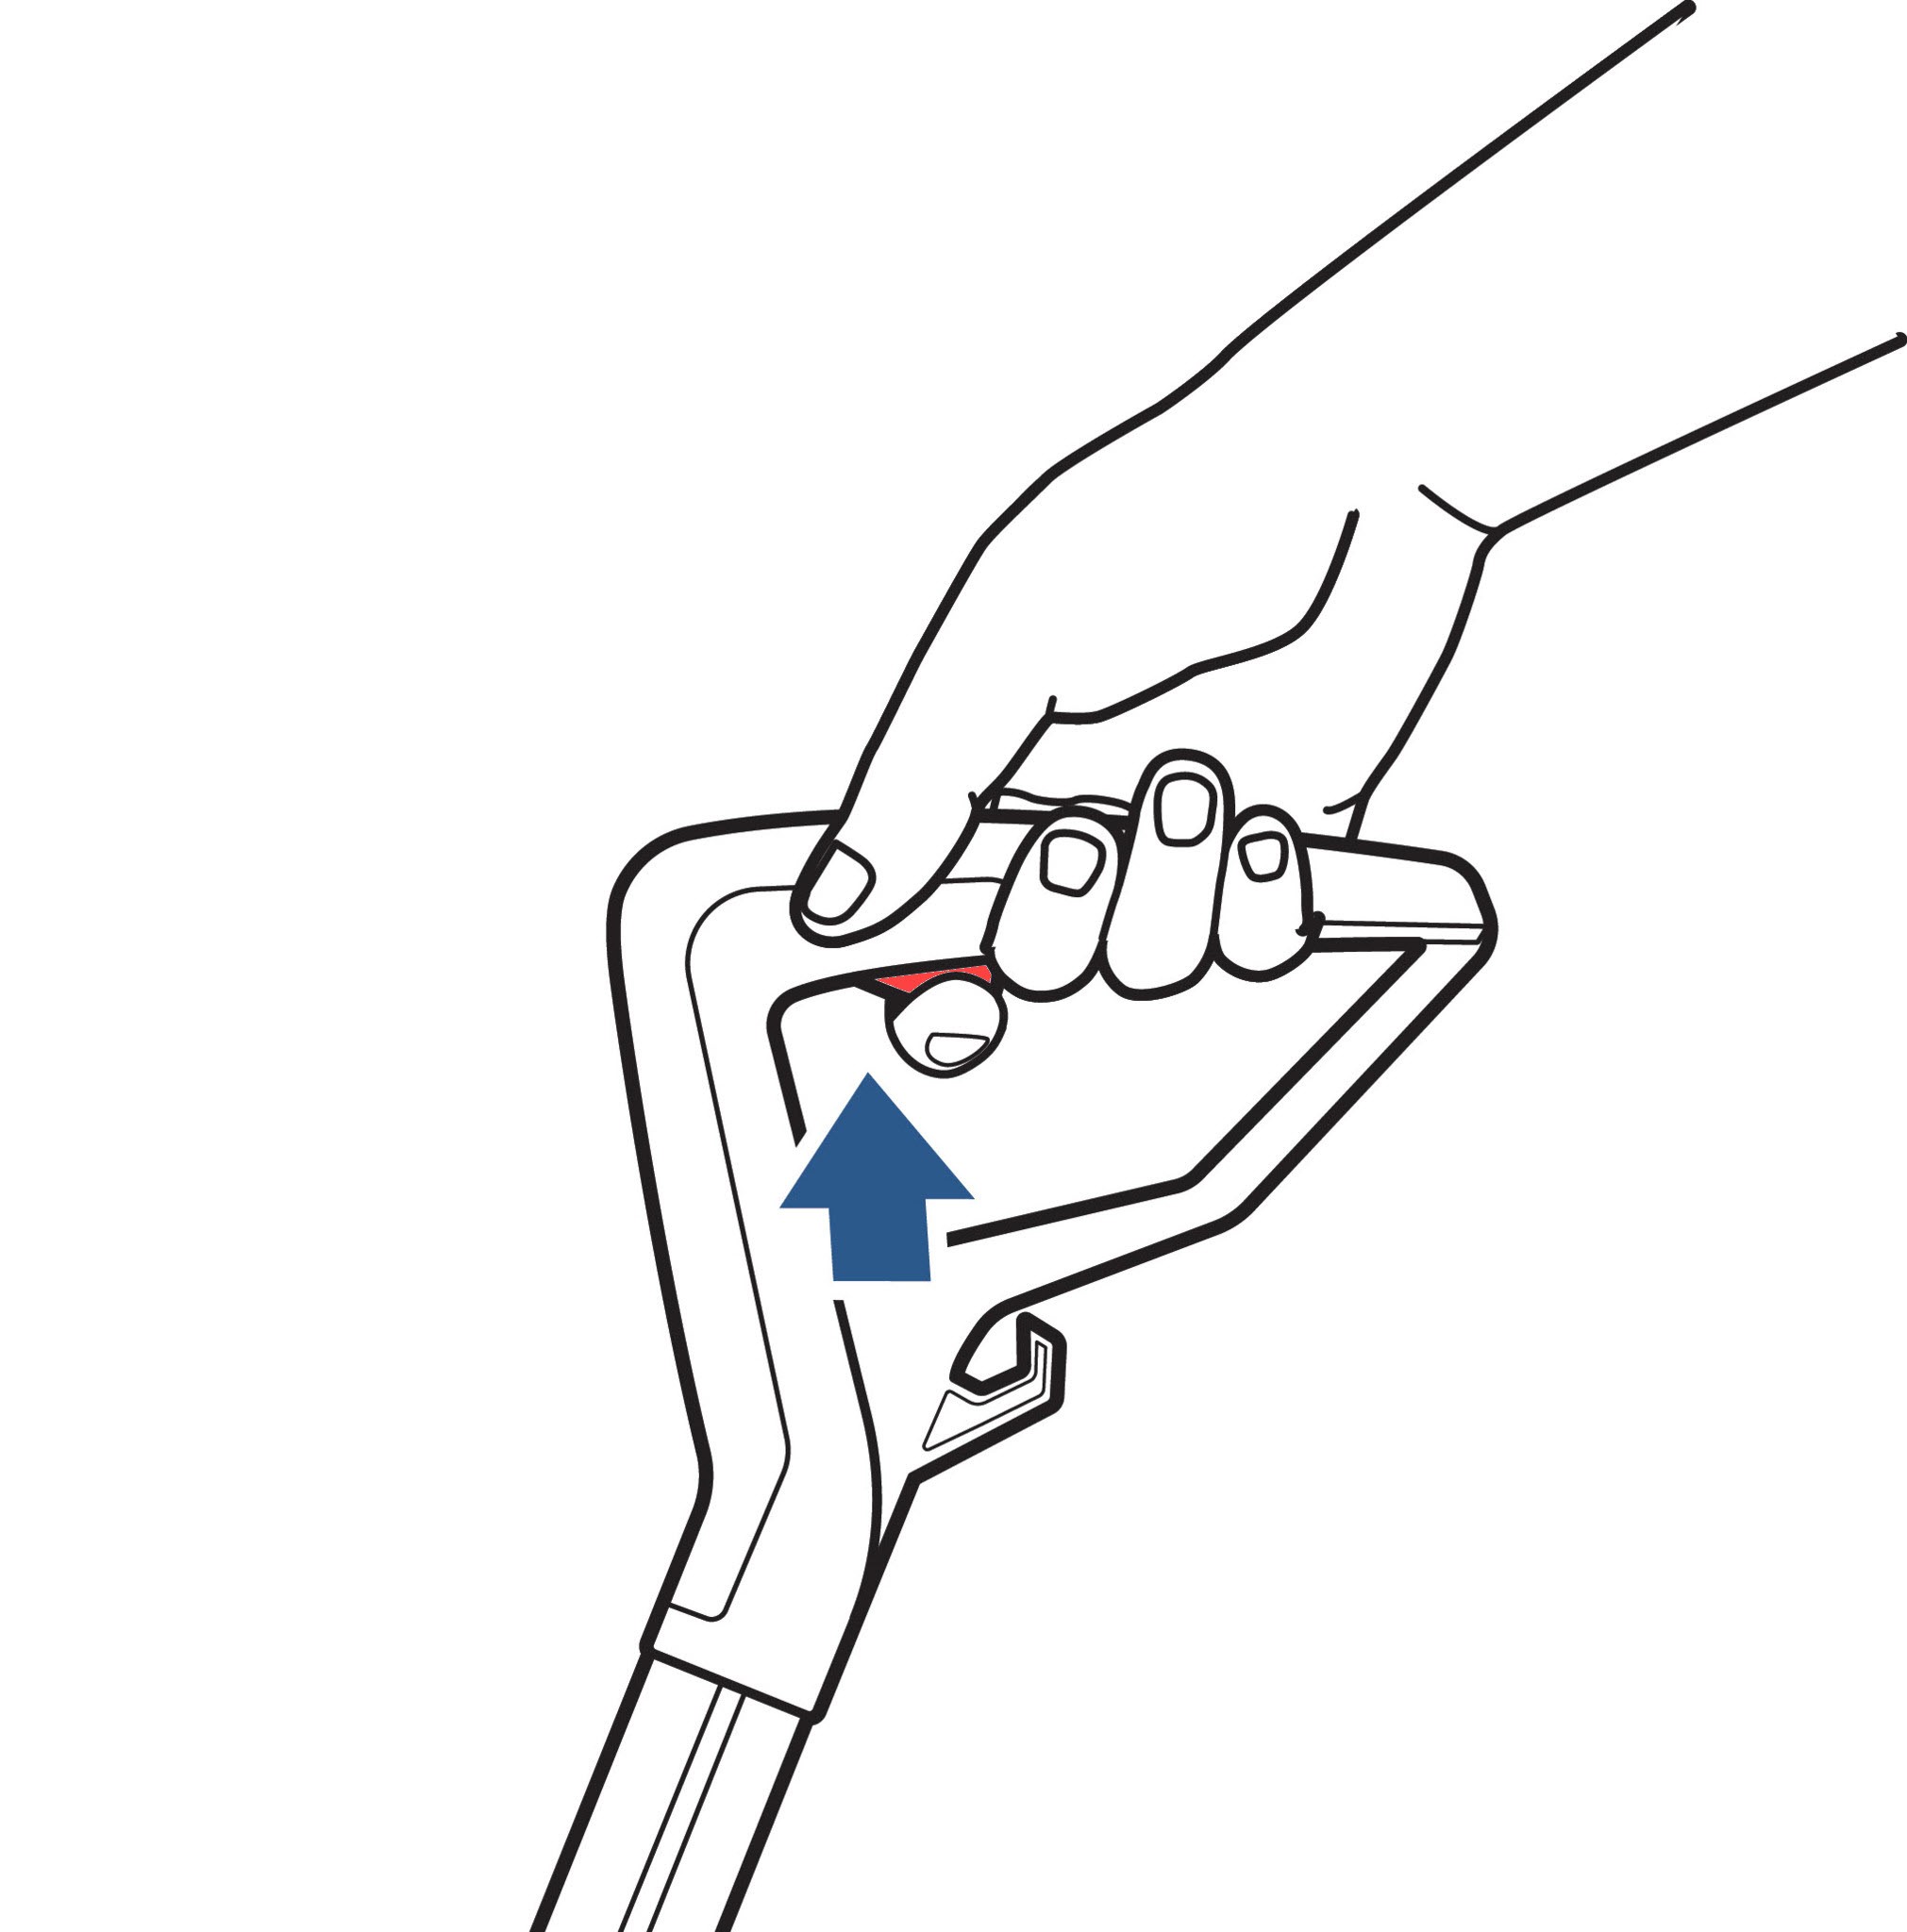
- Recline the machine by pressing the recline pedal with your foot.
4.2. Dispensing Cleaning Solution
Hold the spray trigger on the handle to dispense the cleaning solution. Priming the machine by holding the trigger for 10 seconds wets the brush roll before cleaning.
4.3. Cleaning Techniques
Follow these guidelines for effective cleaning, depending on the cleaning mode:
| Cleaning Mode | Action | Timing |
|---|---|---|
| Express Clean | Press trigger while moving forward and backward | Make 2 slow, wet passes, then 2 dry passes. |
| Max/Deep Clean | Press trigger while moving forward, release backward | Make 2 slow, wet passes, then 2-4 dry passes. |
Move the machine slowly for optimal cleaning. Continue making dry passes (without holding the trigger) until no more water is visible entering the nozzle.
4.4. Using CleanShot Pretreater
For tough stains:
- Recline the machine and press the CleanShot button on the foot.
- Spray the stain until completely soaked.
- Turn the CleanShot button OFF and allow the stain to soak for 5 minutes.
- Move the machine over the stain to extract and continue cleaning as directed.
5. Using Hose and Tools
The hose and tool attachments provide versatility for cleaning upholstery, stairs, and hard-to-reach areas.
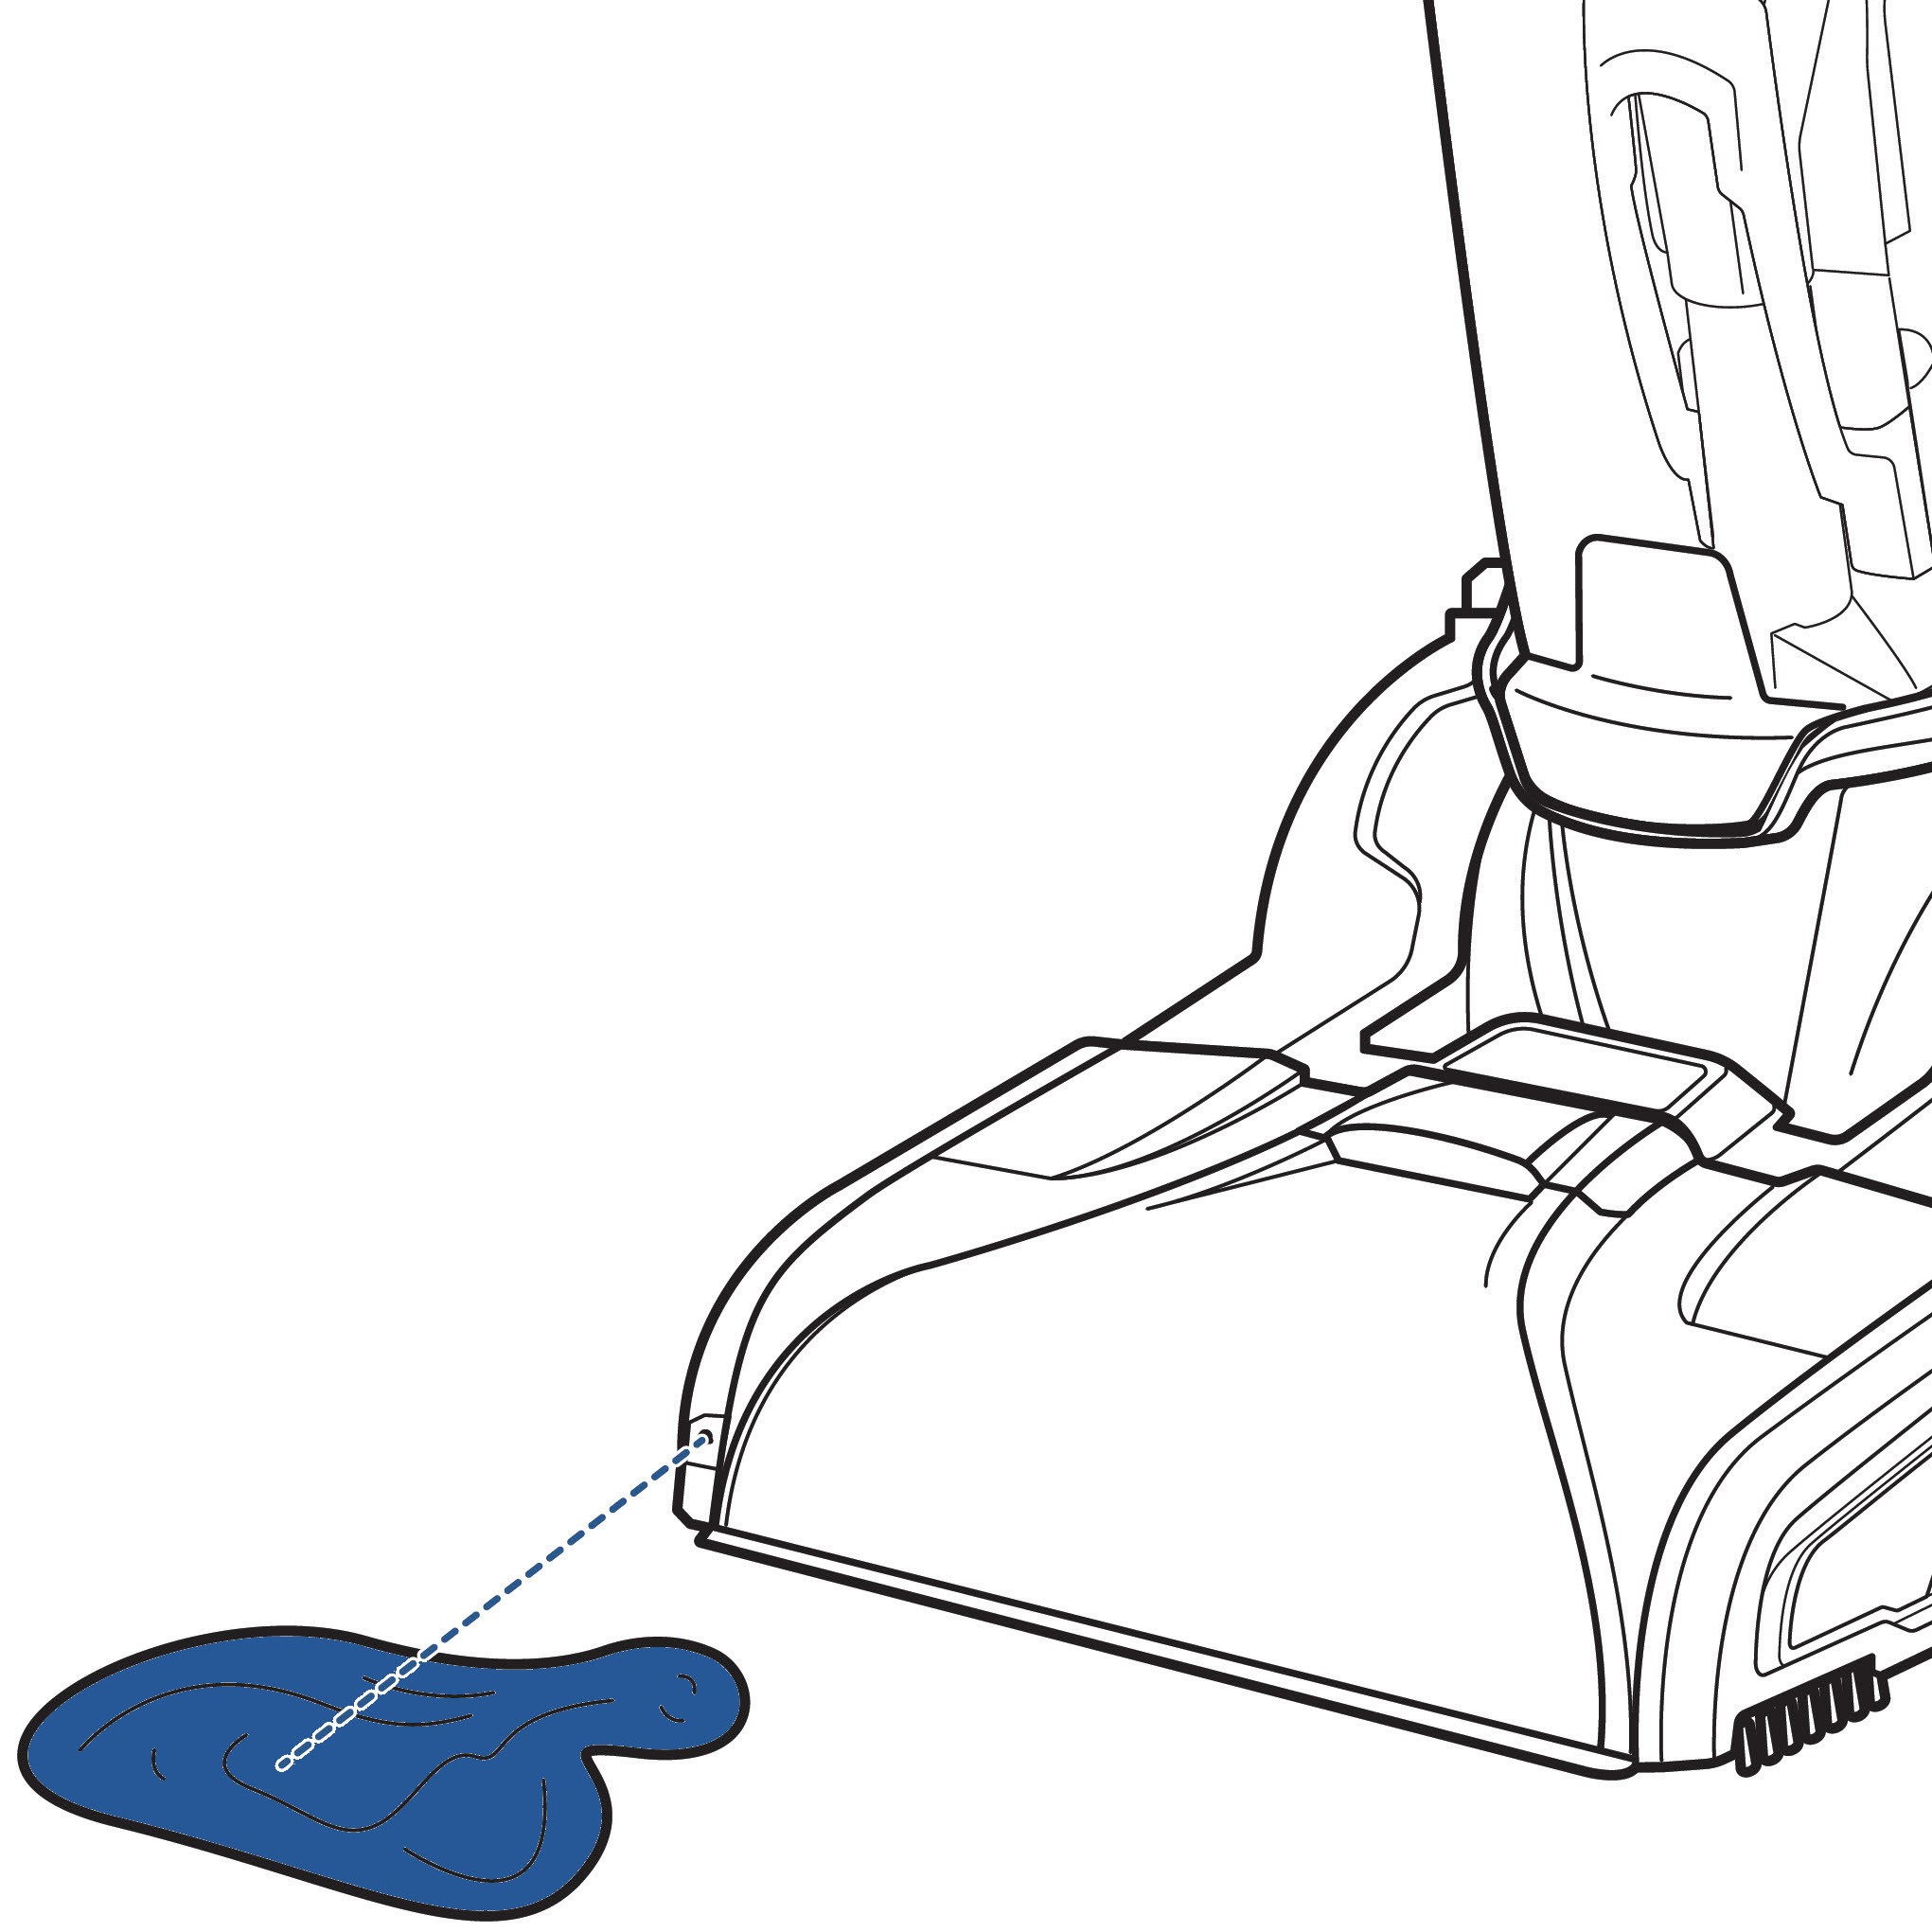
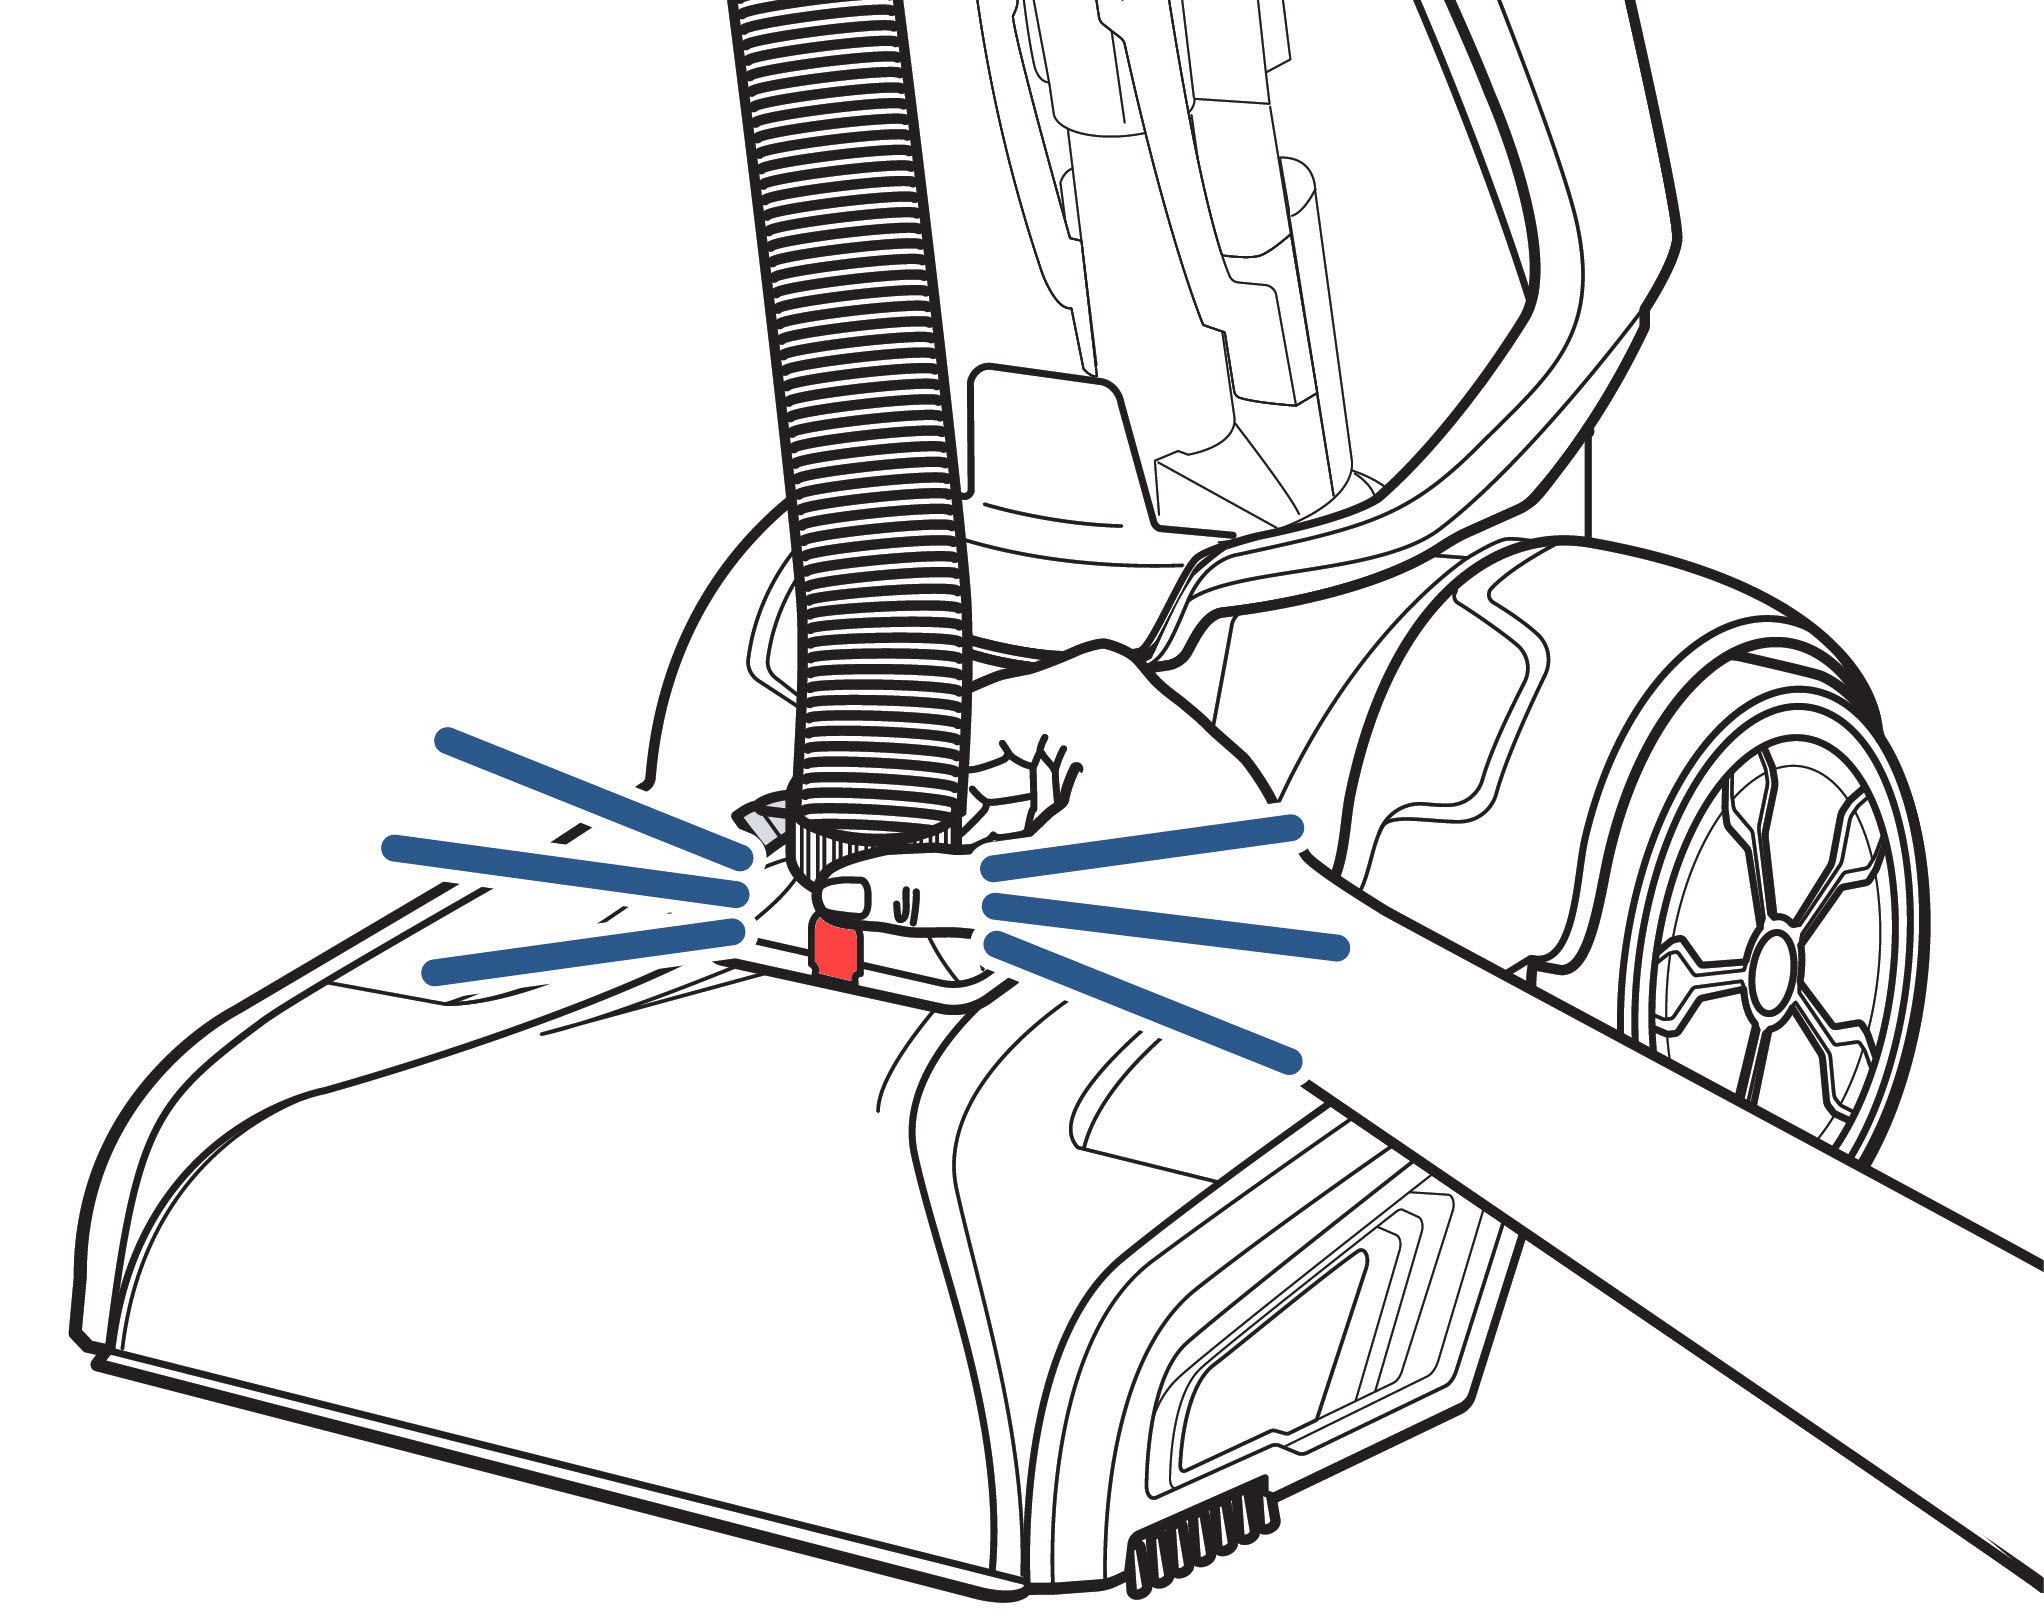
5.1. Attaching the Hose
- Lift the accessory hose door located on the foot of the machine.
- Insert the hose with the colored release clip facing away from the machine until it snaps into place.
- Attach your desired tool to the other end of the hose.
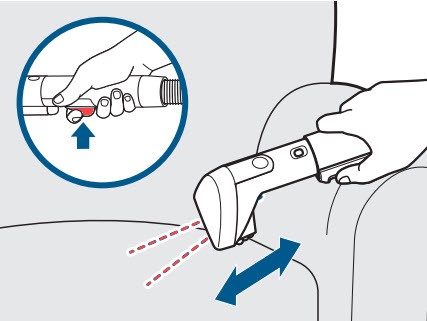
5.2. Cleaning with Tools
- Hold the tool a few inches above the spot or stain.
- Press the spray trigger to treat the stain.
- Release the spray trigger and use the scrubbing portion of the tool to gently scrub the stain.
- Tilt the tool forward to allow the suction channel to make solid contact with the surface and move the tool backward to suction up the mess.
6. Emptying and Cleaning the Dirty Water Tank
Regularly emptying and cleaning the dirty water tank prevents odors and ensures optimal performance.
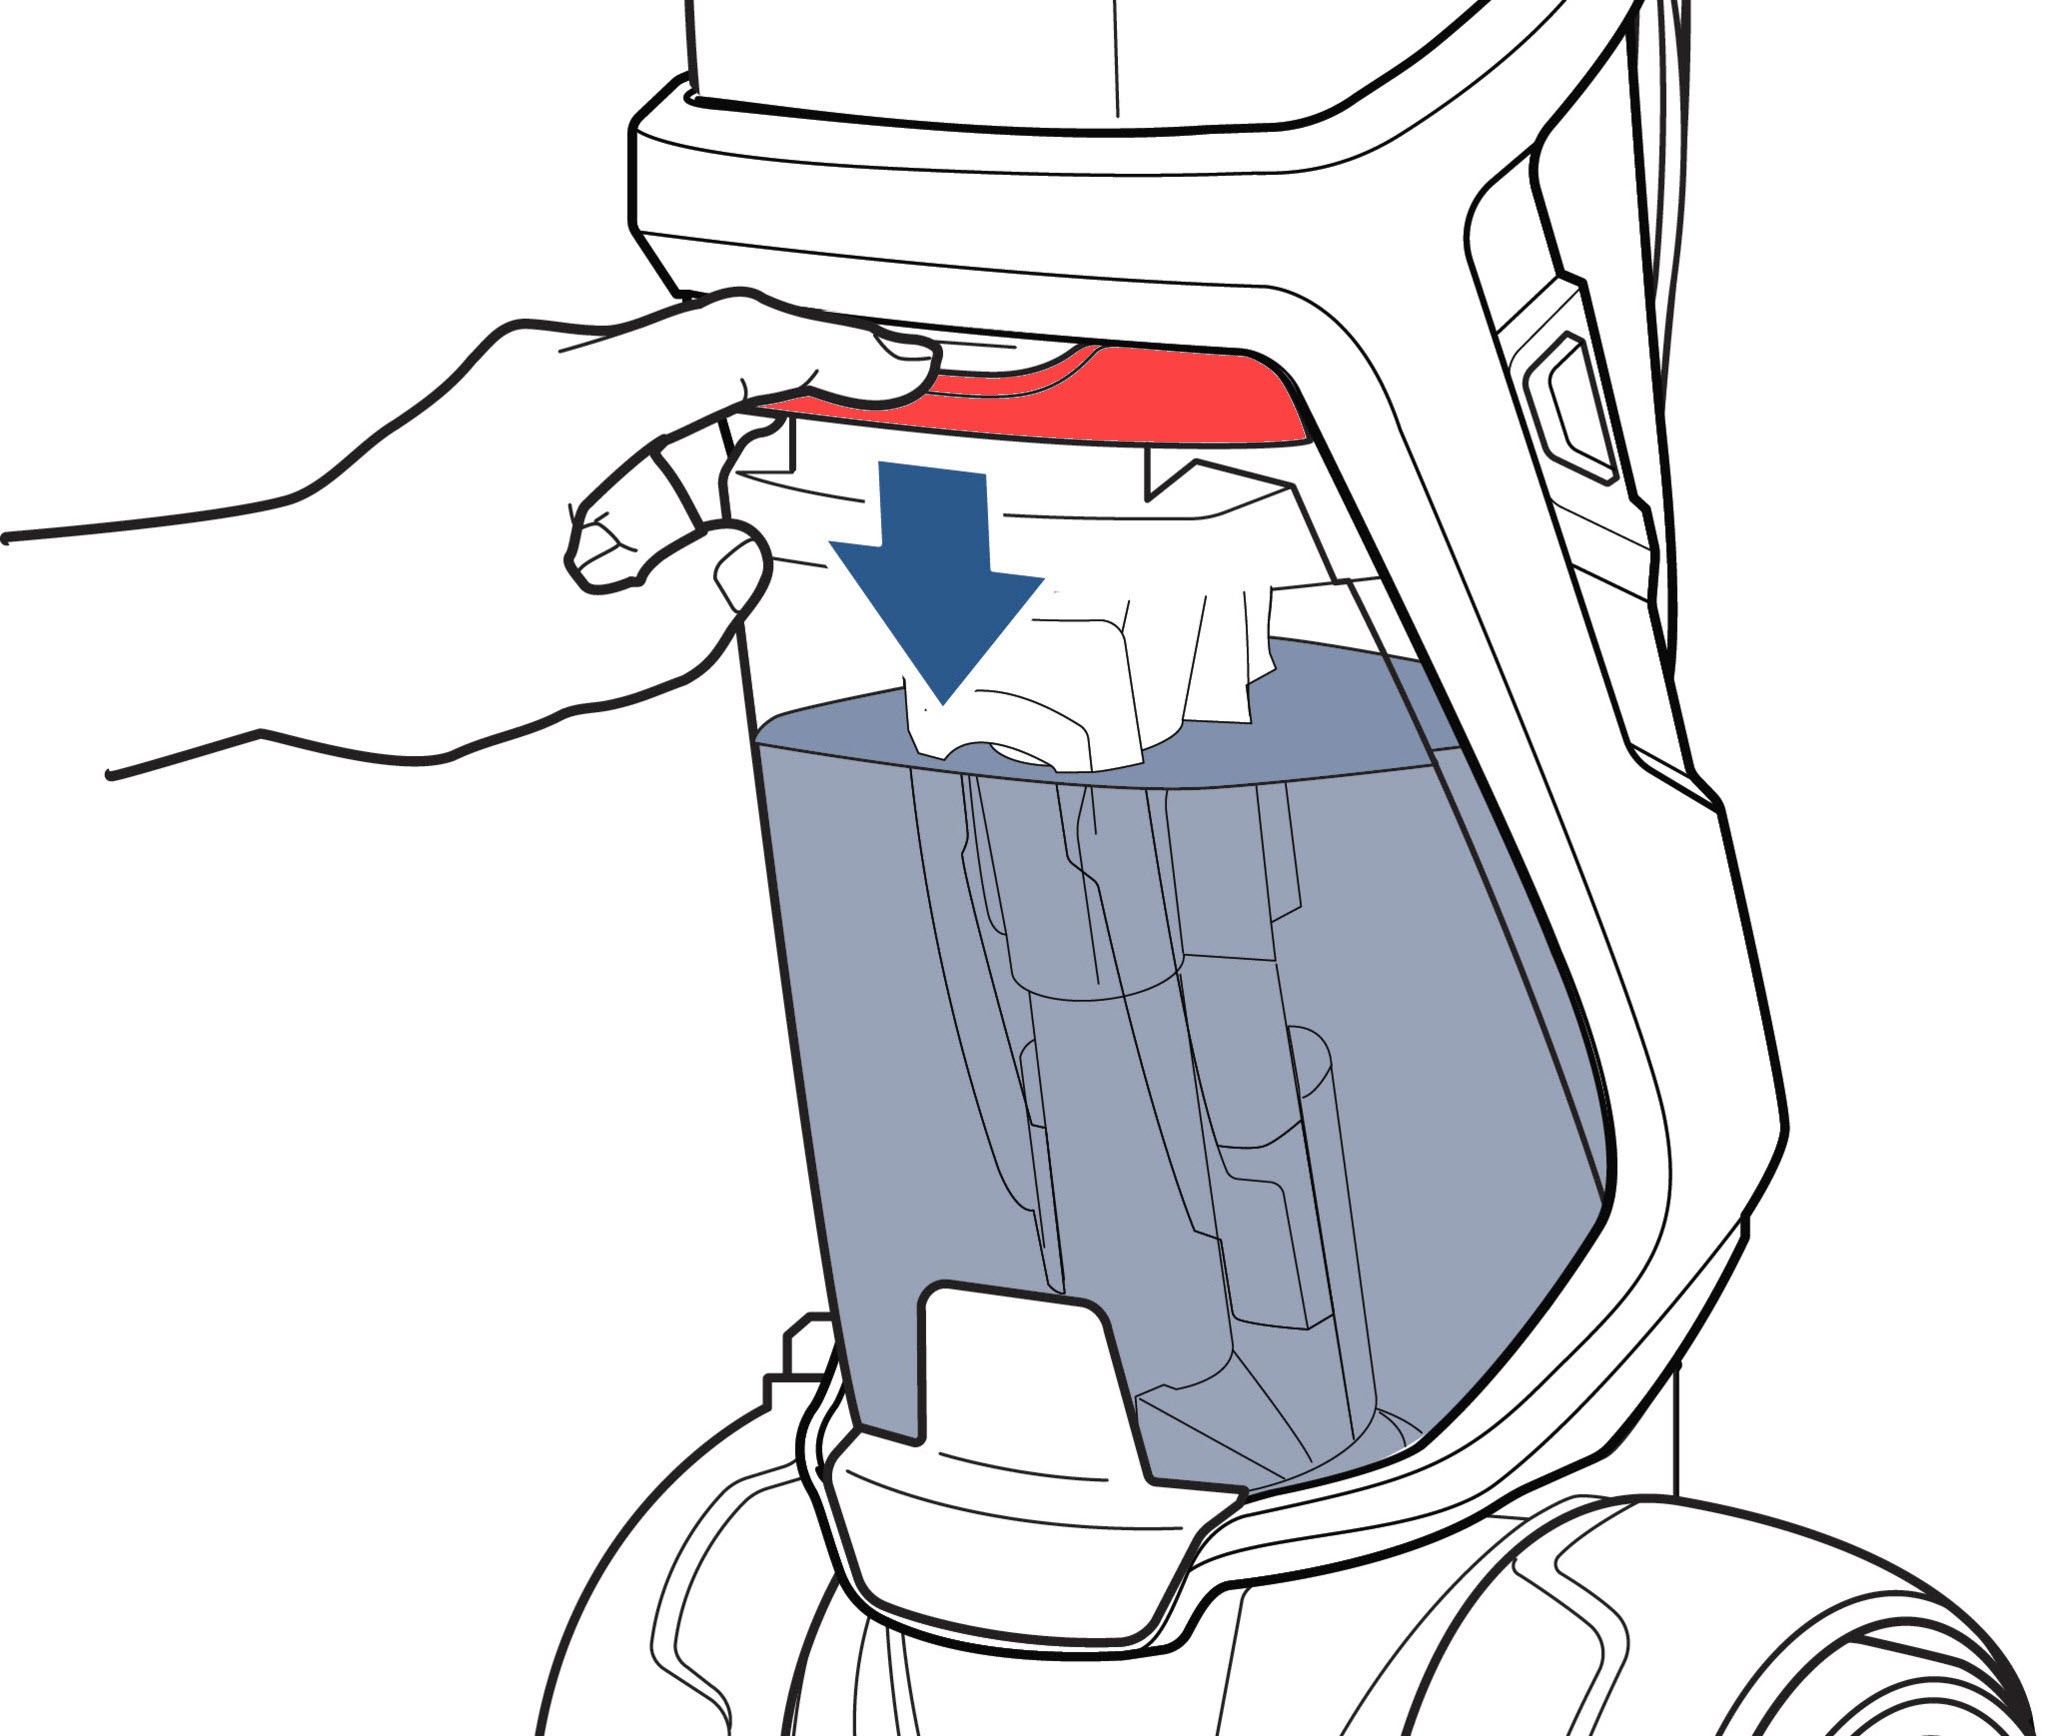
6.1. Removing the Dirty Water Tank
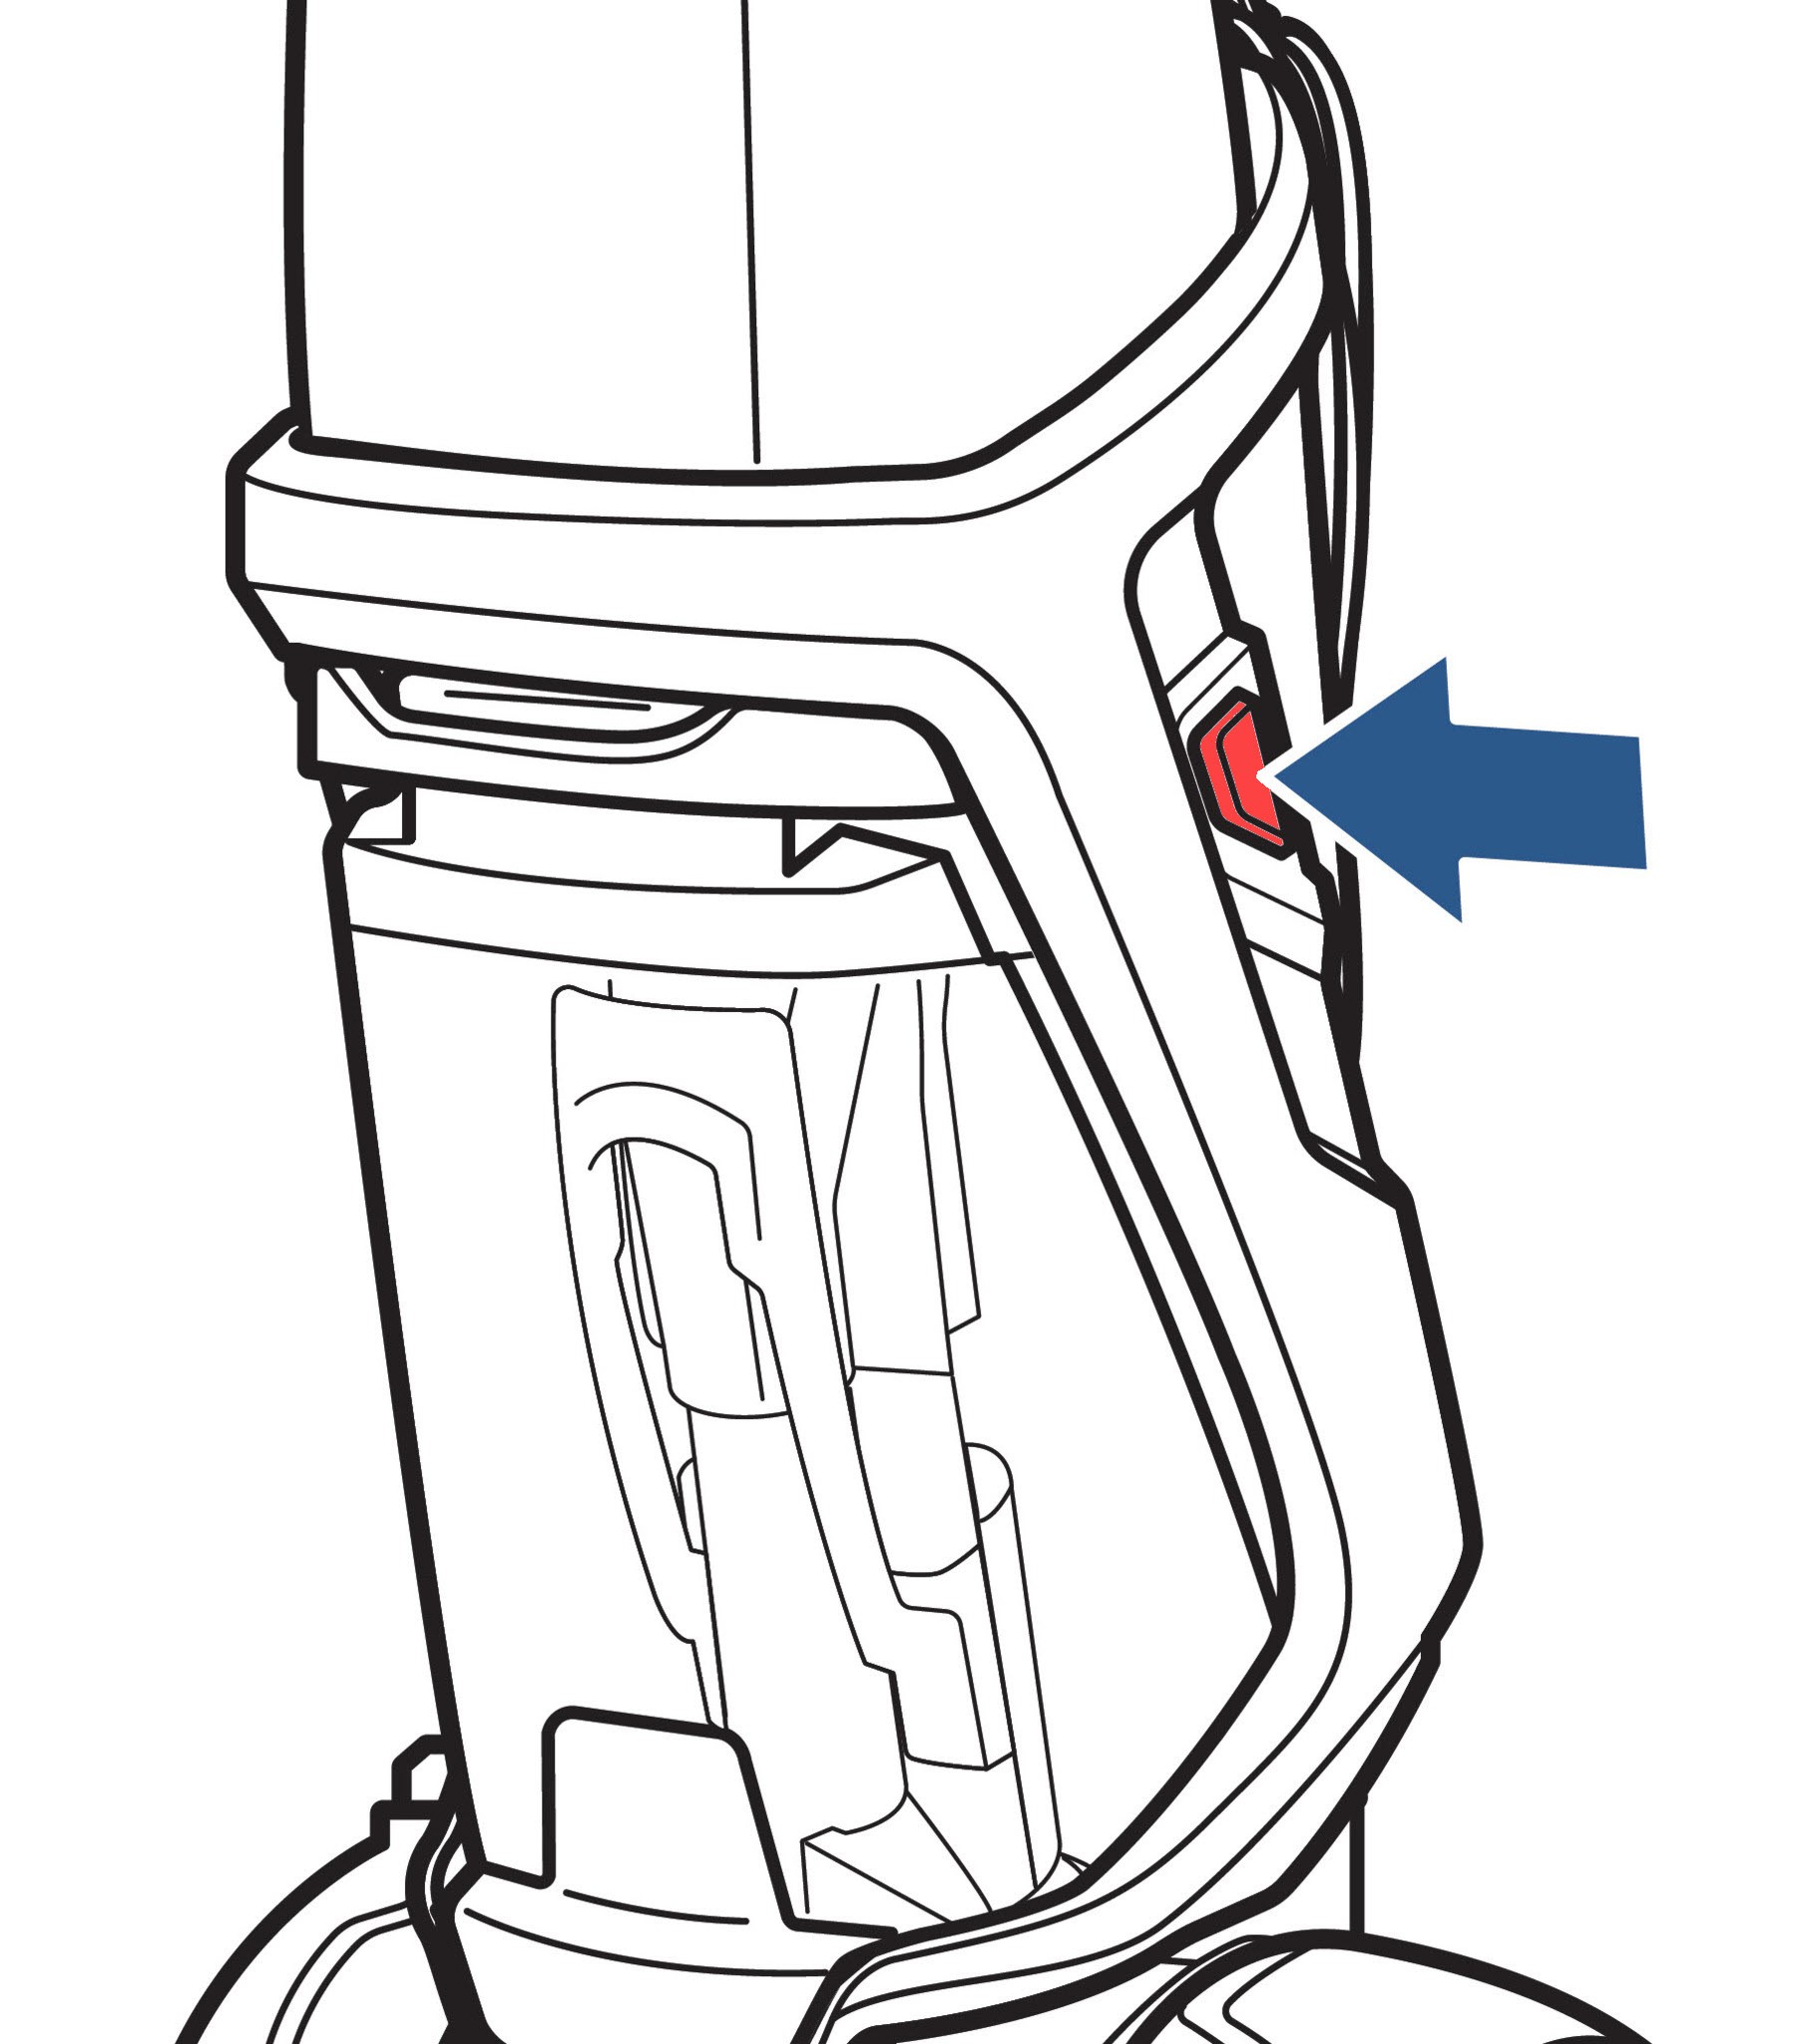
- Press the tank handle on the dirty water tank downward.
- Tilt the tank forward to remove it. Use both hands to support the tank.
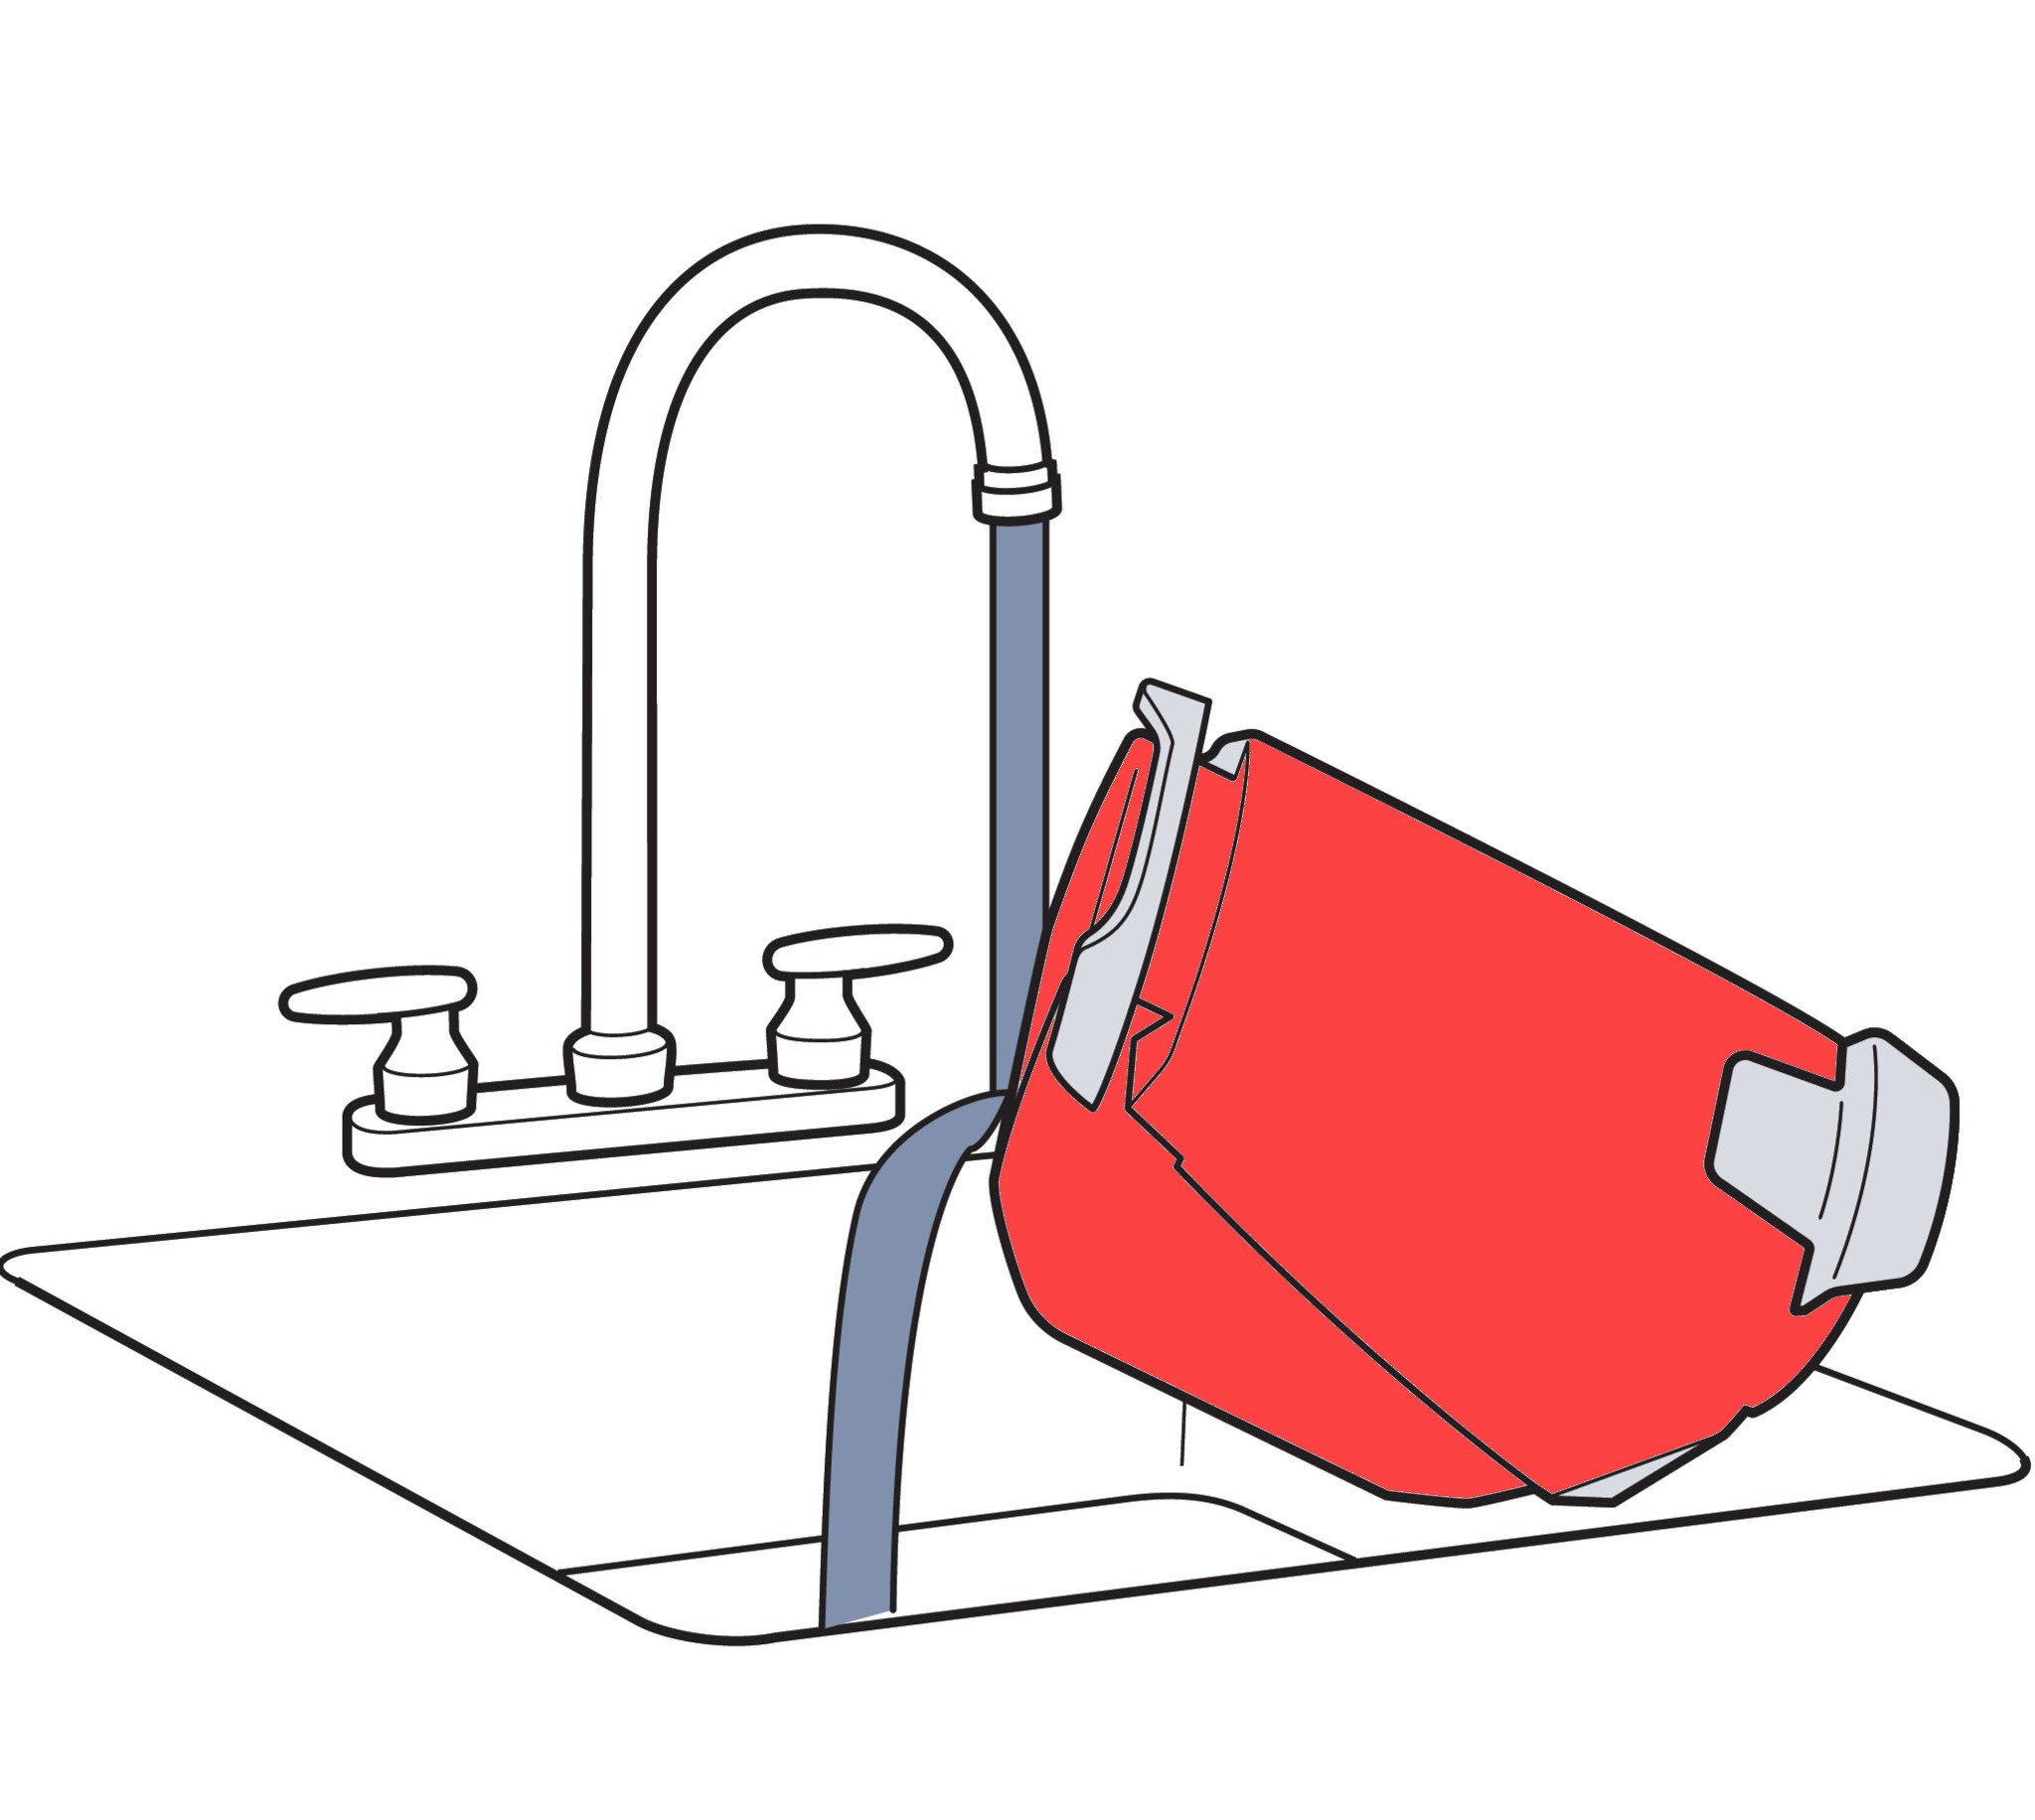
6.2. Emptying and Rinsing the Tank
- Empty the dirty water tank by pulling the rubber tab on the top and slowly tilting the tank.
- Close the rubber tab securely after emptying.
- Unscrew the ring on the bottom of the tank and remove the float stack.
- Rinse the float stack and the dirty water tank to remove any residue.
6.3. Reinstalling the Dirty Water Tank
- Reinstall the float stack, aligning the arrow on the stack with the one on the tank.
- Twist the ring back onto the tank, ensuring a tight seal.
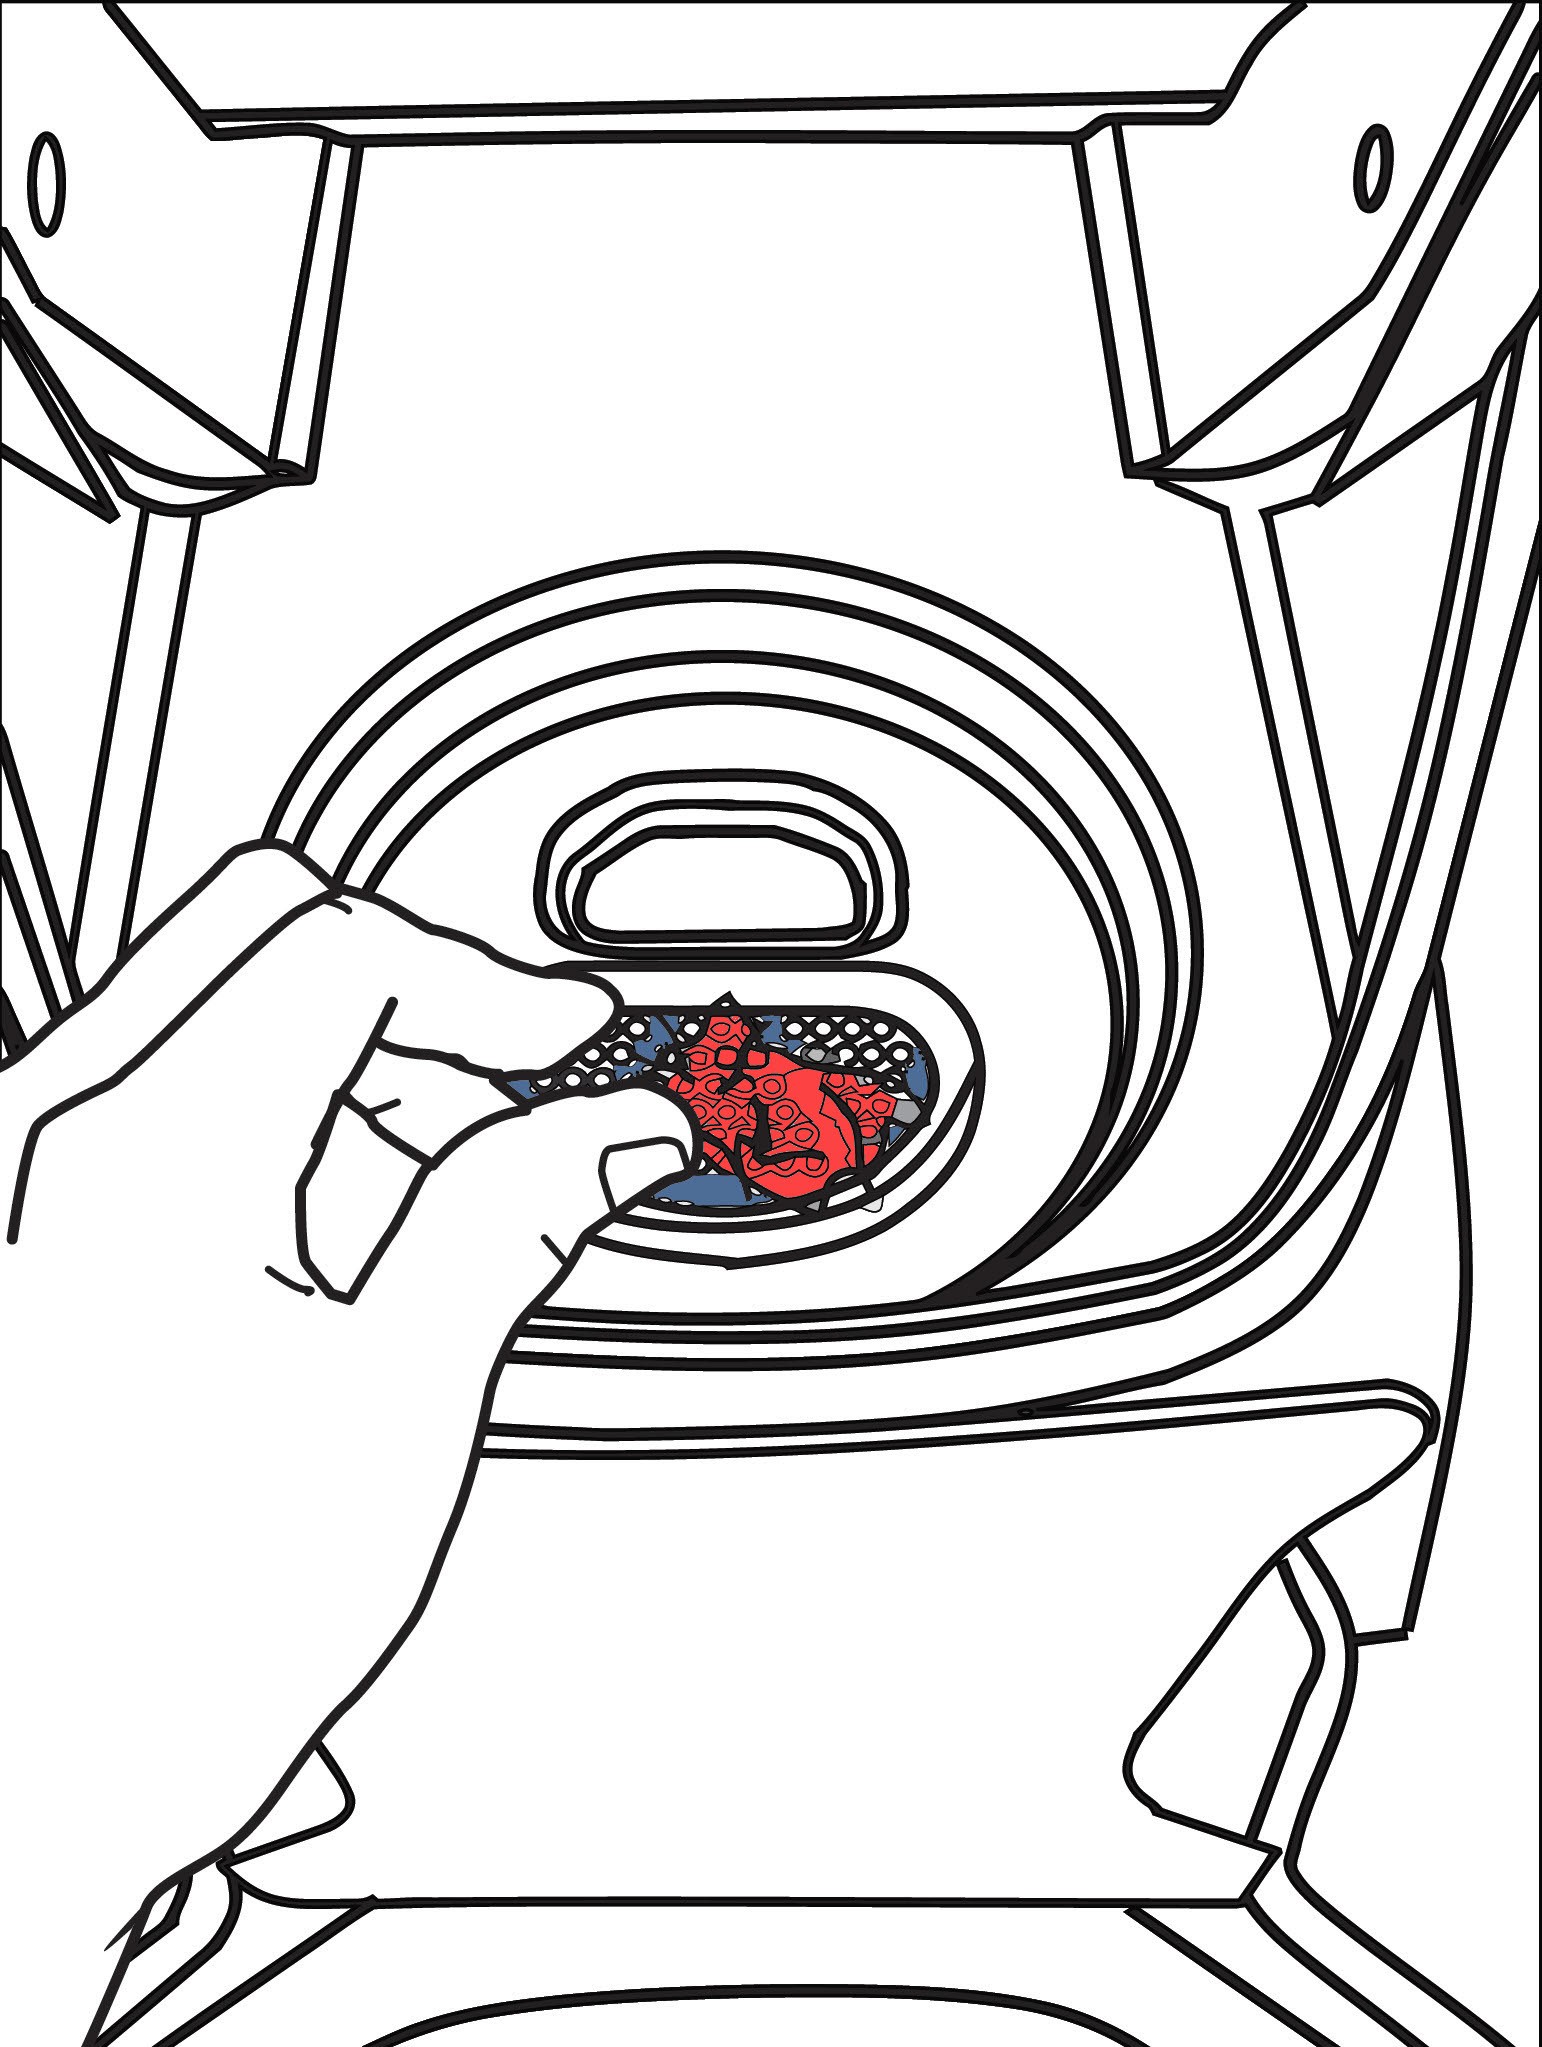
- Clean the red filter below where the tank rests on the machine.
- Return the tank to the machine by inserting the bottom end first, then angling the top end until it clicks into place.
7. Maintaining Your Bissell Pet Pro
Regular maintenance ensures your Bissell Pet Pro remains in top condition for years to come.
7.1. Cleaning the Brush Roll
Regularly check and clean the brush roll to remove hair and debris. This ensures effective cleaning and prevents damage to the machine.
7.2. Checking and Cleaning the Nozzle
Ensure the nozzle is free from obstructions to maintain proper suction. Use a small brush or tool to clear any blockages.
7.3. Storing the Machine
Store the Bissell Pet Pro in a dry place. Ensure all parts are clean and properly assembled before storing.
8. Troubleshooting Common Issues
Even with proper use and maintenance, you may encounter occasional issues. Here are some common problems and their solutions:
| Issue | Possible Cause | Solution |
|---|---|---|
| Machine Not Spraying | Clogged nozzle or empty clean water tank | Check and clean the nozzle; refill the clean water tank |
| Loss of Suction | Full dirty water tank or clogged hose | Empty the dirty water tank; check and clear the hose |
| Streaking on Carpet | Dirty brush roll or excessive solution usage | Clean the brush roll; reduce the amount of cleaning solution |
| Machine Not Turning On | Power cord not plugged in or blown fuse | Ensure the power cord is plugged in; check and replace the fuse |
| Unusual Noises | Brush roll obstruction or motor issue | Check and clear the brush roll; contact customer support if the noise persists |
| Leaking | Improperly sealed tanks or damaged components | Ensure tanks are correctly sealed; inspect for damage and replace if necessary |
9. Advanced Cleaning Tips
For more effective cleaning, consider these advanced tips:
9.1. Using a Defoamer
If you notice excessive foam in the dirty water tank, use a defoamer to reduce foam buildup.
9.2. Deep Cleaning Frequency
Deep clean your carpets every 3-6 months, depending on foot traffic and pet activity.
9.3. Professional Cleaning Services
Consider professional carpet cleaning services for heavily soiled carpets or specialized stain removal.
10. Why Choose Bissell Pet Pro?
The Bissell Pet Pro stands out due to its specialized features designed for pet owners:
10.1. Superior Pet Stain Removal
The Bissell Pet Pro is engineered to effectively remove tough pet stains and odors, leaving your carpets fresh and clean.
10.2. Powerful Suction
Its powerful suction ensures thorough cleaning, extracting deep-seated dirt and allergens from your carpets.
10.3. User-Friendly Design
The intuitive design makes it easy to use and maintain, providing a hassle-free cleaning experience.
11. User Testimonials
Read what other users are saying about the Bissell Pet Pro:
- Sarah J. “The Bissell Pet Pro has been a lifesaver with my two dogs. It tackles stains and odors effortlessly.”
- Mike T. “I was skeptical at first, but the Bissell Pet Pro exceeded my expectations. My carpets look brand new.”
- Lisa M. “Easy to use and incredibly effective. I highly recommend the Bissell Pet Pro to all pet owners.”
12. Addressing Common Concerns
Here are answers to some frequently asked questions about the Bissell Pet Pro:
12.1. Is the Bissell Pet Pro Safe for All Carpet Types?
The Bissell Pet Pro is generally safe for most carpet types. However, always test a small, inconspicuous area first to ensure compatibility.
12.2. Can I Use Other Cleaning Solutions?
It’s recommended to use only genuine Bissell cleaning solutions to prevent damage and ensure optimal performance.
12.3. How Often Should I Replace the Brush Roll?
Replace the brush roll every 6-12 months, depending on usage and wear.
12.4. What is the Warranty on the Bissell Pet Pro?
The Bissell Pet Pro typically comes with a limited warranty. Check the product documentation for specific details.
12.5. How Do I Prevent Mold Growth in the Dirty Water Tank?
Ensure the dirty water tank is thoroughly cleaned and dried after each use to prevent mold growth.
12.6. Can I Use the Bissell Pet Pro on Hardwood Floors?
The Bissell Pet Pro is designed primarily for carpets and rugs. Using it on hardwood floors may cause damage.
12.7. Where Can I Purchase Bissell Cleaning Formulas?
Bissell cleaning formulas are available at most major retailers and online.
12.8. How Do I Contact Bissell Customer Support?
You can contact Bissell customer support through their website or by phone.
12.9. What Do I Do if My Bissell Pet Pro Smells Bad?
Thoroughly clean both the clean and dirty water tanks. Rinse all parts with a mixture of water and vinegar. Ensure all components are completely dry before reassembling.
12.10. Is the Bissell Pet Pro Worth the Investment?
For pet owners, the Bissell Pet Pro is a worthwhile investment due to its powerful stain removal, user-friendly design, and long-term cost savings compared to professional cleaning services.
13. How PETS.EDU.VN Can Help
At PETS.EDU.VN, we understand the challenges of pet ownership. That’s why we provide expert advice and resources to help you care for your furry friends and maintain a clean home.
13.1. Comprehensive Guides
Our website offers comprehensive guides on various pet-related topics, including cleaning tips, health advice, and training techniques.
13.2. Expert Advice
Our team of pet care professionals provides expert advice to address your specific concerns and needs.
13.3. Local Services
We can help you find reputable pet care services in your area, including veterinary clinics, grooming salons, and pet-friendly accommodations.
14. Call to Action
Ready to take your pet care to the next level? Visit PETS.EDU.VN for more tips, advice, and resources. Contact us at 789 Paw Lane, Petville, CA 91234, United States, or WhatsApp: +1 555-987-6543.
Remember, a clean home is a happy home for both you and your pets. Let pets.edu.vn help you achieve the best possible environment for your beloved companions.