Are you considering upgrading your lawn to a pet-friendly oasis? How To Install Artificial Turf For Pets involves selecting the right materials, proper preparation, and careful installation techniques to ensure a safe, clean, and enjoyable space for your furry friends. At PETS.EDU.VN, we’ll provide you with all the knowledge you need for a successful artificial grass installation, including choosing the best artificial grass, understanding the importance of drainage, and implementing effective maintenance strategies. Enhance your outdoor space and create a hygienic environment for your pets with our expert advice on pet-friendly landscaping and synthetic turf solutions.
1. Essential Base Preparation for Pet Turf Installation
Proper base preparation is essential for a successful and long-lasting artificial turf installation, ensuring adequate drainage and stability. Following the recommendations for base preparation will help create a solid foundation for your pet-friendly lawn.
Note: While manufacturers often suggest using a road base beneath artificial turf, homeowners frequently opt for decomposed granite for DIY projects. This choice simplifies the installation process without requiring heavy machinery or extensive hauling.
1.1. Gathering the Necessary Tools
Start by assembling all the necessary tools for your artificial grass installation. Before laying down the decomposed granite, clear the area of any natural grass and existing soil. A sod-cutting knife is highly effective for this task. Although manufacturers typically advise removing about 2 inches of soil, the actual amount may vary based on the root system present. It’s a good idea to remove a little extra soil around the perimeter to enhance weed prevention and secure the artificial turf more effectively during installation.
1.2. Applying Weed Killer and Installing Edging Materials
Generously apply weed killer across the exposed surface to prevent future weed growth under your synthetic lawn. Important: For pet turf installations, avoid using weed barrier fabric. This type of material can trap bacteria and lead to unpleasant odors as pets use the area.
If your project requires edging, install bender boards or treated wood before starting base preparation. Edging is crucial for maintaining the stability of the installation, clearly separating the artificial grass from planters, natural grass, trees, fences, and other elements.
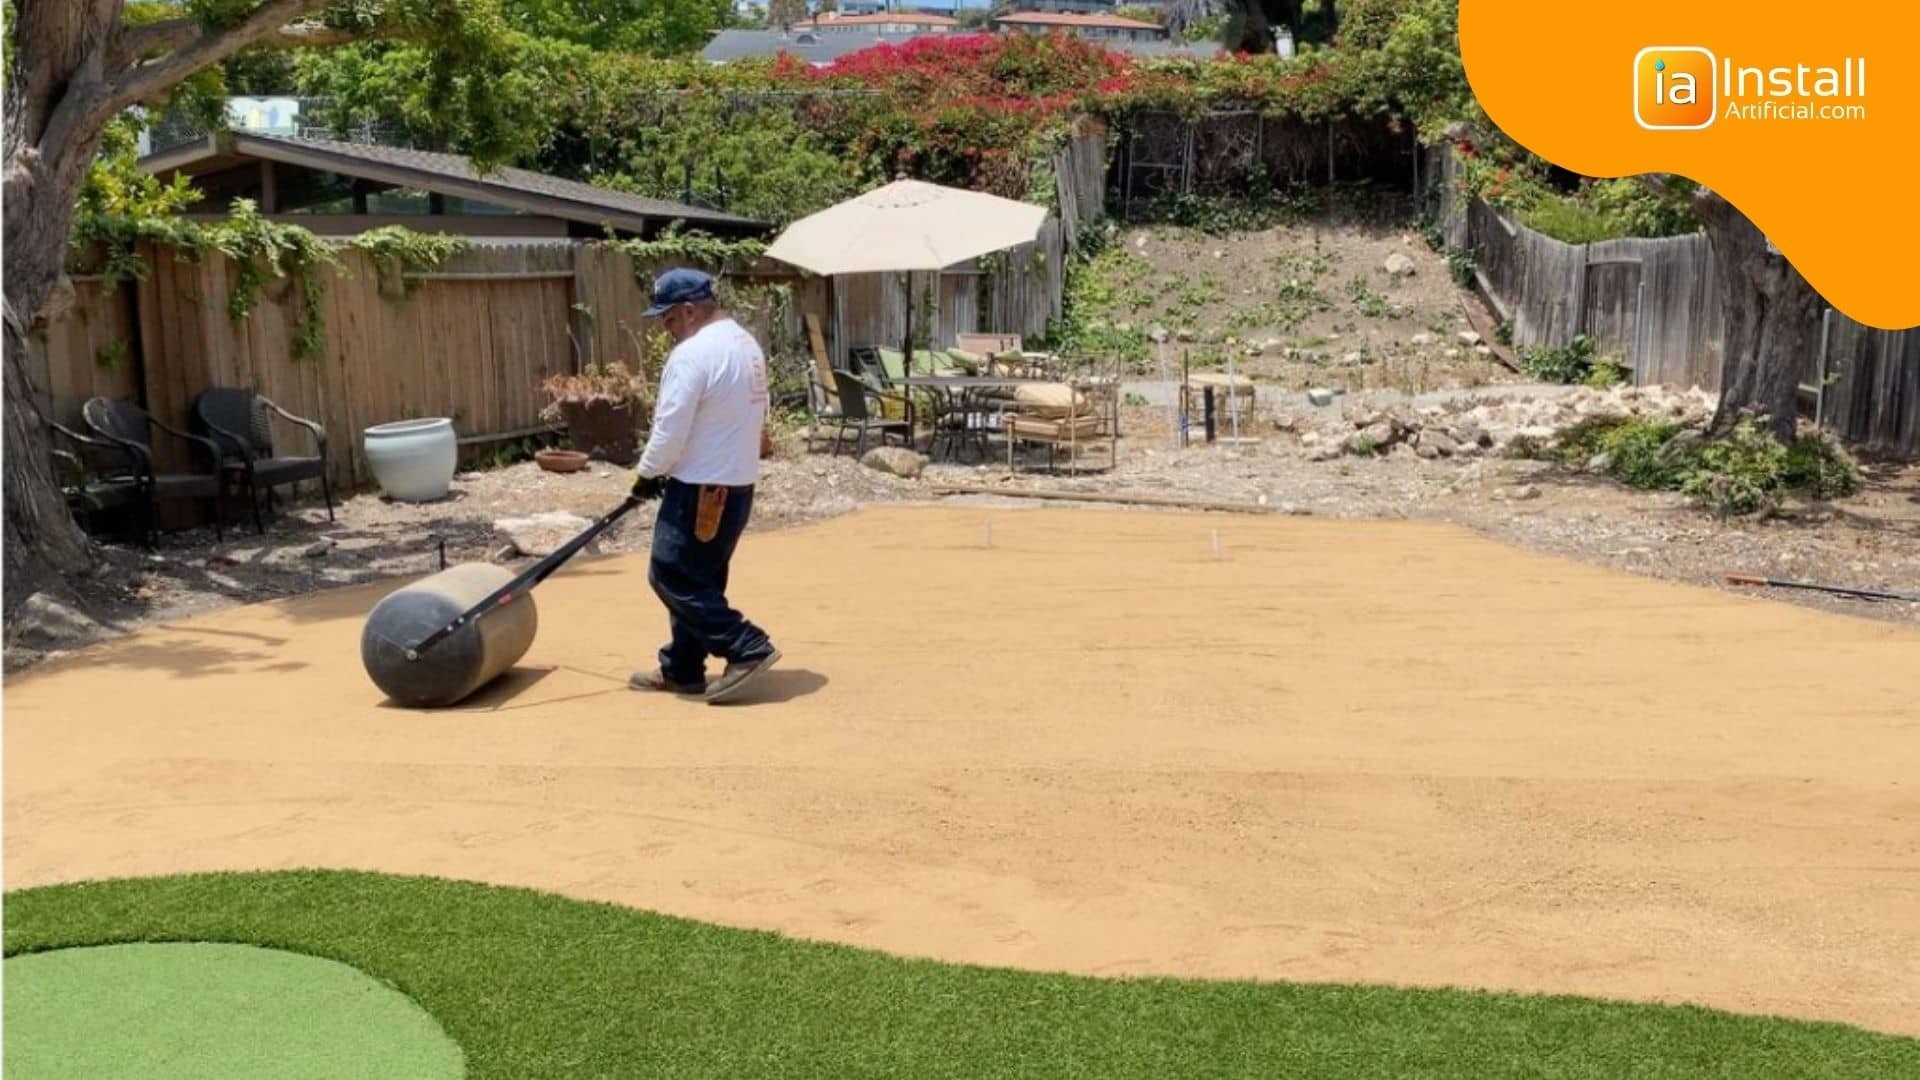
1.3. Spreading Decomposed Granite for a Level Surface
Spread a 1-inch layer of decomposed granite evenly over the prepared area. Use a push broom to smooth the DG and a heavy-duty roller to compact and level the surface. Repeat this process two or three times to achieve a consistently even base.
1.4. Stabilizing the Decomposed Granite Layer
Apply a decomposed granite stabilizer to the DG to harden the surface, providing a secure hold for nails during the turf-laying stage. Generally, one container covers about 50 square feet, so calculate the number of containers needed based on your area’s size. If you skip this step, the artificial turf edges may lift over time, and the nails may not stay in place. Allow the area to dry thoroughly before proceeding.
1.5. Applying Turf Deodorizer for Odor Control
Spread a layer of turf deodorizer like Zeofill over the prepared base. This helps to prevent odors from developing beneath the surface, particularly in areas where pets relieve themselves. Typically, use two to three bags for every 300 square feet of turf.
2. DIY Pet-Friendly Turf Installation: Steps for Success
When installing artificial pet turf yourself, it’s crucial to take extra steps beyond regular artificial grass installations to ensure adequate drainage for a hygienic environment. Before you lay artificial grass, ensure the area has a solid foundation and a drainage underlayment layer. Proper drainage is essential for regularly cleaning and sanitizing the artificial lawn, which prevents odors and bacteria buildup.
2.1. Laying the Drainage Layer for Optimal Pet Turf Hygiene
Begin by laying down your chosen drainage layer across the prepared surface. Drain core typically comes in 4 x 50-foot sheets, covering 200 square feet, so calculate your needs accurately to ensure you order the correct amount. The drain core should be secured with nails along the edges to keep it firmly in place beneath the turf surface. Incorporating a drain core is essential for a complete pet-friendly system, as it enhances ventilation and allows cleaning solutions to effectively reach under the material, promoting better hygiene.
2.2. Unrolling the Pet-Friendly Artificial Grass
Before unrolling, lay the turf roll in the sun for about 30 minutes to soften the material, making it easier to handle. Unroll the synthetic turf, ensuring that the blades face the same direction if you are using multiple pieces.
2.3. Seaming Synthetic Turf Pieces for a Seamless Look
This step is necessary only if you’re working with multiple pieces of turf. Once the artificial grass is measured and cut to the right size, seam the pieces together using professional adhesive. For the best and least visible seams, use the zipper or S method. Ensure that the blades of each piece are aligned in the same direction for a uniform appearance.
Note: Manufacturers typically advise against using nails in pet-friendly turf projects. This is because dogs might pull at the turf, potentially dislodging and removing the nails after installation. Instead, it is recommended to build a frame around the perimeter and staple the turf to this frame, providing a more secure installation. While many homeowners still opt to use nails, manufacturers often cannot be held liable for turf damage in such cases. If you choose to install a frame, this should be done after soil removal and before laying down your base layer.
2.4. Stretching and Securing the Pet Turf Effectively
Stretch the turf tightly and nail it down along the perimeter approximately every 2 inches. Stretching the artificial grass is crucial to prevent wrinkles. Ensure the nails are driven deep into the ground and are well concealed to prevent any hazard to pets and people. For additional security, consider nailing every 2 feet across the entire surface. Once secured, trim any excess material along the edges for a clean finish.
2.5. Applying Sand Infill and Brushing the Surface for a Polished Look
Apply antibacterial sand infill evenly across the turf surface. This helps prevent wrinkles, reduces bacteria, and keeps the surface cooler for your pets. Use approximately 1 pound of infill per square foot. While some might see this as an optional step, using sand infill is vital for prolonging the life and quality of your new artificial lawn. Use a push broom to distribute the sand uniformly across the area.
3. Maintaining Your Pet Turf for a Fresh and Clean Lawn
While pet turf systems offer enhanced ventilation and drainage, they still require consistent maintenance to remain hygienic. Regular rinsing and sanitizing are necessary to effectively control odors. Always brush the grass before deep cleaning to redistribute the sand infill, allowing the cleaning solution to penetrate more effectively. Discover effective strategies to win against odors by exploring our related articles. For insights on popular and effective cleansers, be sure to check out our guide here.
Ready to start your project and create a clean, green lawn for you and your pets? Request a customized pricing estimate for the best K9 turf materials today. We are here to help you select the perfect turf and provide all the necessary accessories for a successful installation. Contact us at PETS.EDU.VN, located at 789 Paw Lane, Petville, CA 91234, United States, or call us at Whatsapp: +1 555-987-6543. We look forward to assisting you!
4. Frequently Asked Questions About DIY Pet Turf Installation
4.1. How to Encourage a Dog to Urinate on Artificial Grass
Artificial grass is designed to closely mimic the look and feel of natural grass, making it comfortable for most dogs to use. To encourage your dog to relieve themselves on the new synthetic turf, use positive reinforcement techniques, consider adding a fake fire hydrant, and maintain a consistent potty break schedule.
4.2. What Materials Should Be Placed Under Artificial Grass for Pets to Manage Odor?
For the best odor control, install a drainage layer and odor-neutralizing infills beneath the artificial grass. Additionally, use an antibacterial infill on top of the surface to help neutralize odors.
4.3. What Are the Best Drainage Options Under Artificial Turf for Dogs?
Two popular drainage solutions for pet turf include DrainCore and AirDrain. Both provide excellent ventilation and a channel for water movement, which helps to flush out urine during cleaning.
4.4. What Is the Typical Cost of Pet Turf?
The cost of artificial turf materials typically ranges from $2.45 to $6.55 per square foot, while professional pet turf installation can range from $9 to $14 per square foot.
4.5. What Is the Best Base Material for Pet Turf?
The ideal base for any artificial grass installation is a Class II Road Base. However, for DIY projects, decomposed granite combined with a stabilizer is an excellent alternative.
4.6. How Do I Clean Artificial Grass After My Dog Pees or Poops on It?
To effectively clean artificial grass, start by removing any solid waste. Rinse the area thoroughly with water using a hose. For urine, use a specialized artificial grass cleaner or a mild enzymatic cleaner to neutralize odors. Regularly brushing the area will also help maintain its cleanliness and appearance. At PETS.EDU.VN, we offer guides on the best cleaning practices to keep your pet turf fresh and hygienic.
4.7. Can Artificial Turf Get Too Hot for My Pet’s Paws?
Yes, artificial turf can heat up in direct sunlight. To prevent discomfort for your pets, consider using a turf infill that helps cool the surface, such as acrylic-coated sand or crumb rubber. Regularly misting the turf with water can also help reduce its temperature during hot days. PETS.EDU.VN provides resources on selecting the best cooling solutions for your pet-friendly lawn.
4.8. What Type of Artificial Turf Is Most Resistant to Pet Damage?
The most durable artificial turf for pets typically features a high-quality polyethylene or polypropylene blend with a dense, short pile height. These materials are resistant to wear and tear from pet activity and easy to clean. Look for products specifically designed for pet use, which often include enhanced drainage and antimicrobial properties. Explore our product recommendations at PETS.EDU.VN to find the perfect turf for your needs.
4.9. How Often Should I Replace the Infill in My Pet Turf?
The frequency of infill replacement depends on the type of infill used and the level of pet activity. Generally, it’s recommended to replenish the infill every 1-2 years to maintain optimal drainage, cleanliness, and odor control. Regularly inspecting the infill level and condition will help you determine when it’s time for a replacement. PETS.EDU.VN offers maintenance guides to help you keep your pet turf in top condition.
4.10. Are There Any Specific Artificial Turf Brands That Are Recommended for Pet Owners?
Several brands specialize in pet-friendly artificial turf, offering products designed to withstand pet use and minimize odors. Some popular brands include PetSafe, K9Grass, and ForeverLawn. These brands often feature advanced drainage systems, antimicrobial technologies, and durable materials. Visit PETS.EDU.VN for detailed reviews and comparisons to help you choose the best brand for your pet turf project.
pets.edu.vn is your go-to resource for all things pet-related. From detailed guides and expert advice to product recommendations and local service directories, we’re dedicated to helping you provide the best possible care for your beloved companions. Our team of experienced veterinarians, trainers, and pet care specialists are here to support you every step of the way.
[