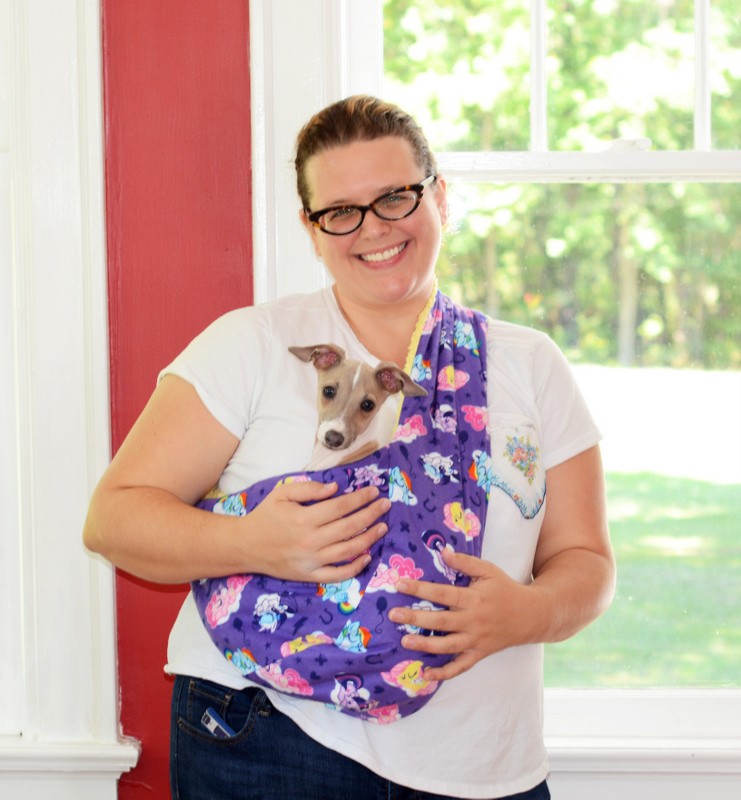
Bringing your small pet along for errands or leisurely strolls can be a joyful experience for both of you. However, managing a traditional pet carrier can sometimes be cumbersome. Enter the Pet Sling, a comfortable and convenient solution that keeps your beloved companion close while leaving your hands free. This guide will walk you through creating your own DIY pet sling, ensuring your furry friend is snug, secure, and stylishly carried.
Materials You’ll Need to Craft Your Pet Sling
Before embarking on this fun sewing project, gather these essential materials:
- Outer Fabric: Opt for durable and appealing fabric like flannel or quilting weight cotton. Choose a pattern that reflects your pet’s personality or your own style.
- Lining Fabric: For your pet’s comfort, select soft and cozy materials such as fleece or minky fabric. These will provide a warm and gentle environment for your furry friend.
- Sewing Essentials: You’ll need a sewing machine, matching thread, straight pins, a ruler or measuring tape, and a fabric marking pen or chalk.
- Scissors: Sharp fabric scissors are crucial for clean and precise cuts.
Step-by-Step Guide to Creating Your Pet Sling
Follow these straightforward instructions to sew a comfortable and secure pet sling for your small dog or cat:
1. Cutting the Fabric
- Measure for the Strap: Determine the desired length of the sling strap by measuring around your body where the sling will rest, and add a few extra inches for comfort and seam allowance. A length of 60 inches and a width of 8 inches is a good starting point, but adjust as needed. Cut one long strip of outer fabric and one of lining fabric to these dimensions, plus 1 inch extra on each dimension for seam allowance (e.g., 61″ x 9″). If your fabric isn’t wide enough, you can piece two sections together, remembering to include seam allowances.
- Create the Pouch Curves: Decide on the desired depth of the pouch and add the width of the strap. Mark these measurements on paper. Fold the paper in half lengthwise and draw a curve from the side to the bottom to create a half-circle template. You’ll need two half-circle pieces for both the outer and lining fabrics. Cut two half-circles from your outer fabric using your template, and repeat for the lining fabric.
2. Pinning the Pieces
- Mark Centers: Find and mark the center points of both half-circle pieces and the long strip for both outer and lining fabrics.
- Assemble the Pouches: Starting at the center mark, pin one half-circle piece to one side of the long strip, right sides together. Repeat for the other half-circle on the opposite side of the strip. Do this for both the outer flannel fabric and the inner fleece fabric sets separately, creating two distinct pouches.
3. Sewing the Pouches
- Stitch the Curves: Using a half-inch seam allowance, stitch the half-circles to the long strips for both the outer and lining fabric pouches. Start sewing from the top edge of one side of the semi-circle, around the curve, and up to the top edge of the other side. You should now have two separate, open-ended pouches – one from your outer fabric and one from your lining fabric.
4. Assembling the Sling
- Combine Pouches: Turn the snuggle fabric pouch right side out. Place it inside the flannel pouch, ensuring the right sides of both fabrics are facing each other. Pin the two pouches together around the entire edge.
- Stitch Around, Leaving an Opening: Begin stitching on one side of one strap end. Sew down the side, pivot at the half-circle curve, stitch across the top of the half-circle, pivot again and stitch up the side of the other strap. Pivot and stitch across the end of the strap, then back down the other side, across the other half-circle, and back up the remaining side. Leave the end where you started stitching open. This opening is for turning the sling right side out.
5. Finishing Touches
- Clip Curves and Corners: Carefully clip the curves and corners of your sewn sling. This will help reduce bulk and allow for smoother curves and sharper corners when you turn it right side out.
- Turn Right Side Out: Reach through the open end of the sling and gently pull the entire pouch through the opening, turning it right side out. This will reveal the finished sling shape with the outer fabric on the outside and the soft lining on the inside.
- Close the Opening: Fold the raw edges of the opening inwards, towards the inside of the sling. Overlap the closed end over the turned-in edge of the open end by about half an inch. Pin this overlap in place.
- Topstitch to Finish: Stitch across the overlapped end close to the edge to secure the opening closed and create a neat finish. For extra durability and style, turn the sling over and stitch across the same end again, close to the edge. Clip any loose threads.
Tips for Customization and Comfort
- Fabric Choices: Experiment with different fabric combinations to suit your pet’s needs and the weather. For warmer climates, consider breathable cotton for both the outer and lining. For colder weather, fleece or sherpa lining will provide extra warmth.
- Adjust the Size: Modify the dimensions of the sling to perfectly fit your pet. For larger small dogs, increase the length and width of the strap and pouch depth. For smaller pets, you can reduce the measurements accordingly. Always ensure the sling is deep enough to securely hold your pet.
- Safety First: Never leave your pet unattended in the sling. Always supervise them to ensure their safety and comfort. Make sure the sling fits snugly but not too tightly around you and your pet.
Conclusion
Creating your own pet sling is a rewarding DIY project that offers a practical and loving way to keep your small pet close. Not only is it a cost-effective alternative to store-bought carriers, but it also allows for personalization and customization to match your and your pet’s unique style. Enjoy the convenience and closeness a DIY pet sling provides on your next outing with your furry companion. Happy crafting and happy strolling!