Are you looking for a unique and heartwarming way to pamper your furry friend? Imagine your beloved pet snuggled up in pajamas specially made just for them, adorned with their own adorable face! Personalized Pet Pajamas are not only incredibly cute but also a fun and easy DIY project you can undertake. Inspired by the whimsy of celebrity-themed apparel, this guide will walk you through creating custom pet pajamas that are sure to bring joy to both you and your pet.
Why Personalized Pet Pajamas?
Beyond the undeniable cuteness factor, personalized pet pajamas offer a range of benefits. Firstly, they are a fantastic way to keep your pet warm and comfortable, especially during colder months or in air-conditioned homes. Pajamas can also help to reduce shedding around the house and protect sensitive skin from scratches or irritation.
Moreover, personalized pet pajamas make for incredibly thoughtful and unique gifts for fellow pet lovers. Imagine the delight of a friend receiving pajamas featuring their cherished companion! They are perfect for birthdays, holidays, or just because.
Lastly, creating personalized pet pajamas is a fun and rewarding DIY activity. It’s a chance to get creative, spend quality time crafting, and produce something truly special for your furry family member.
Supplies You’ll Need
To embark on this delightful DIY project, gather the following supplies:
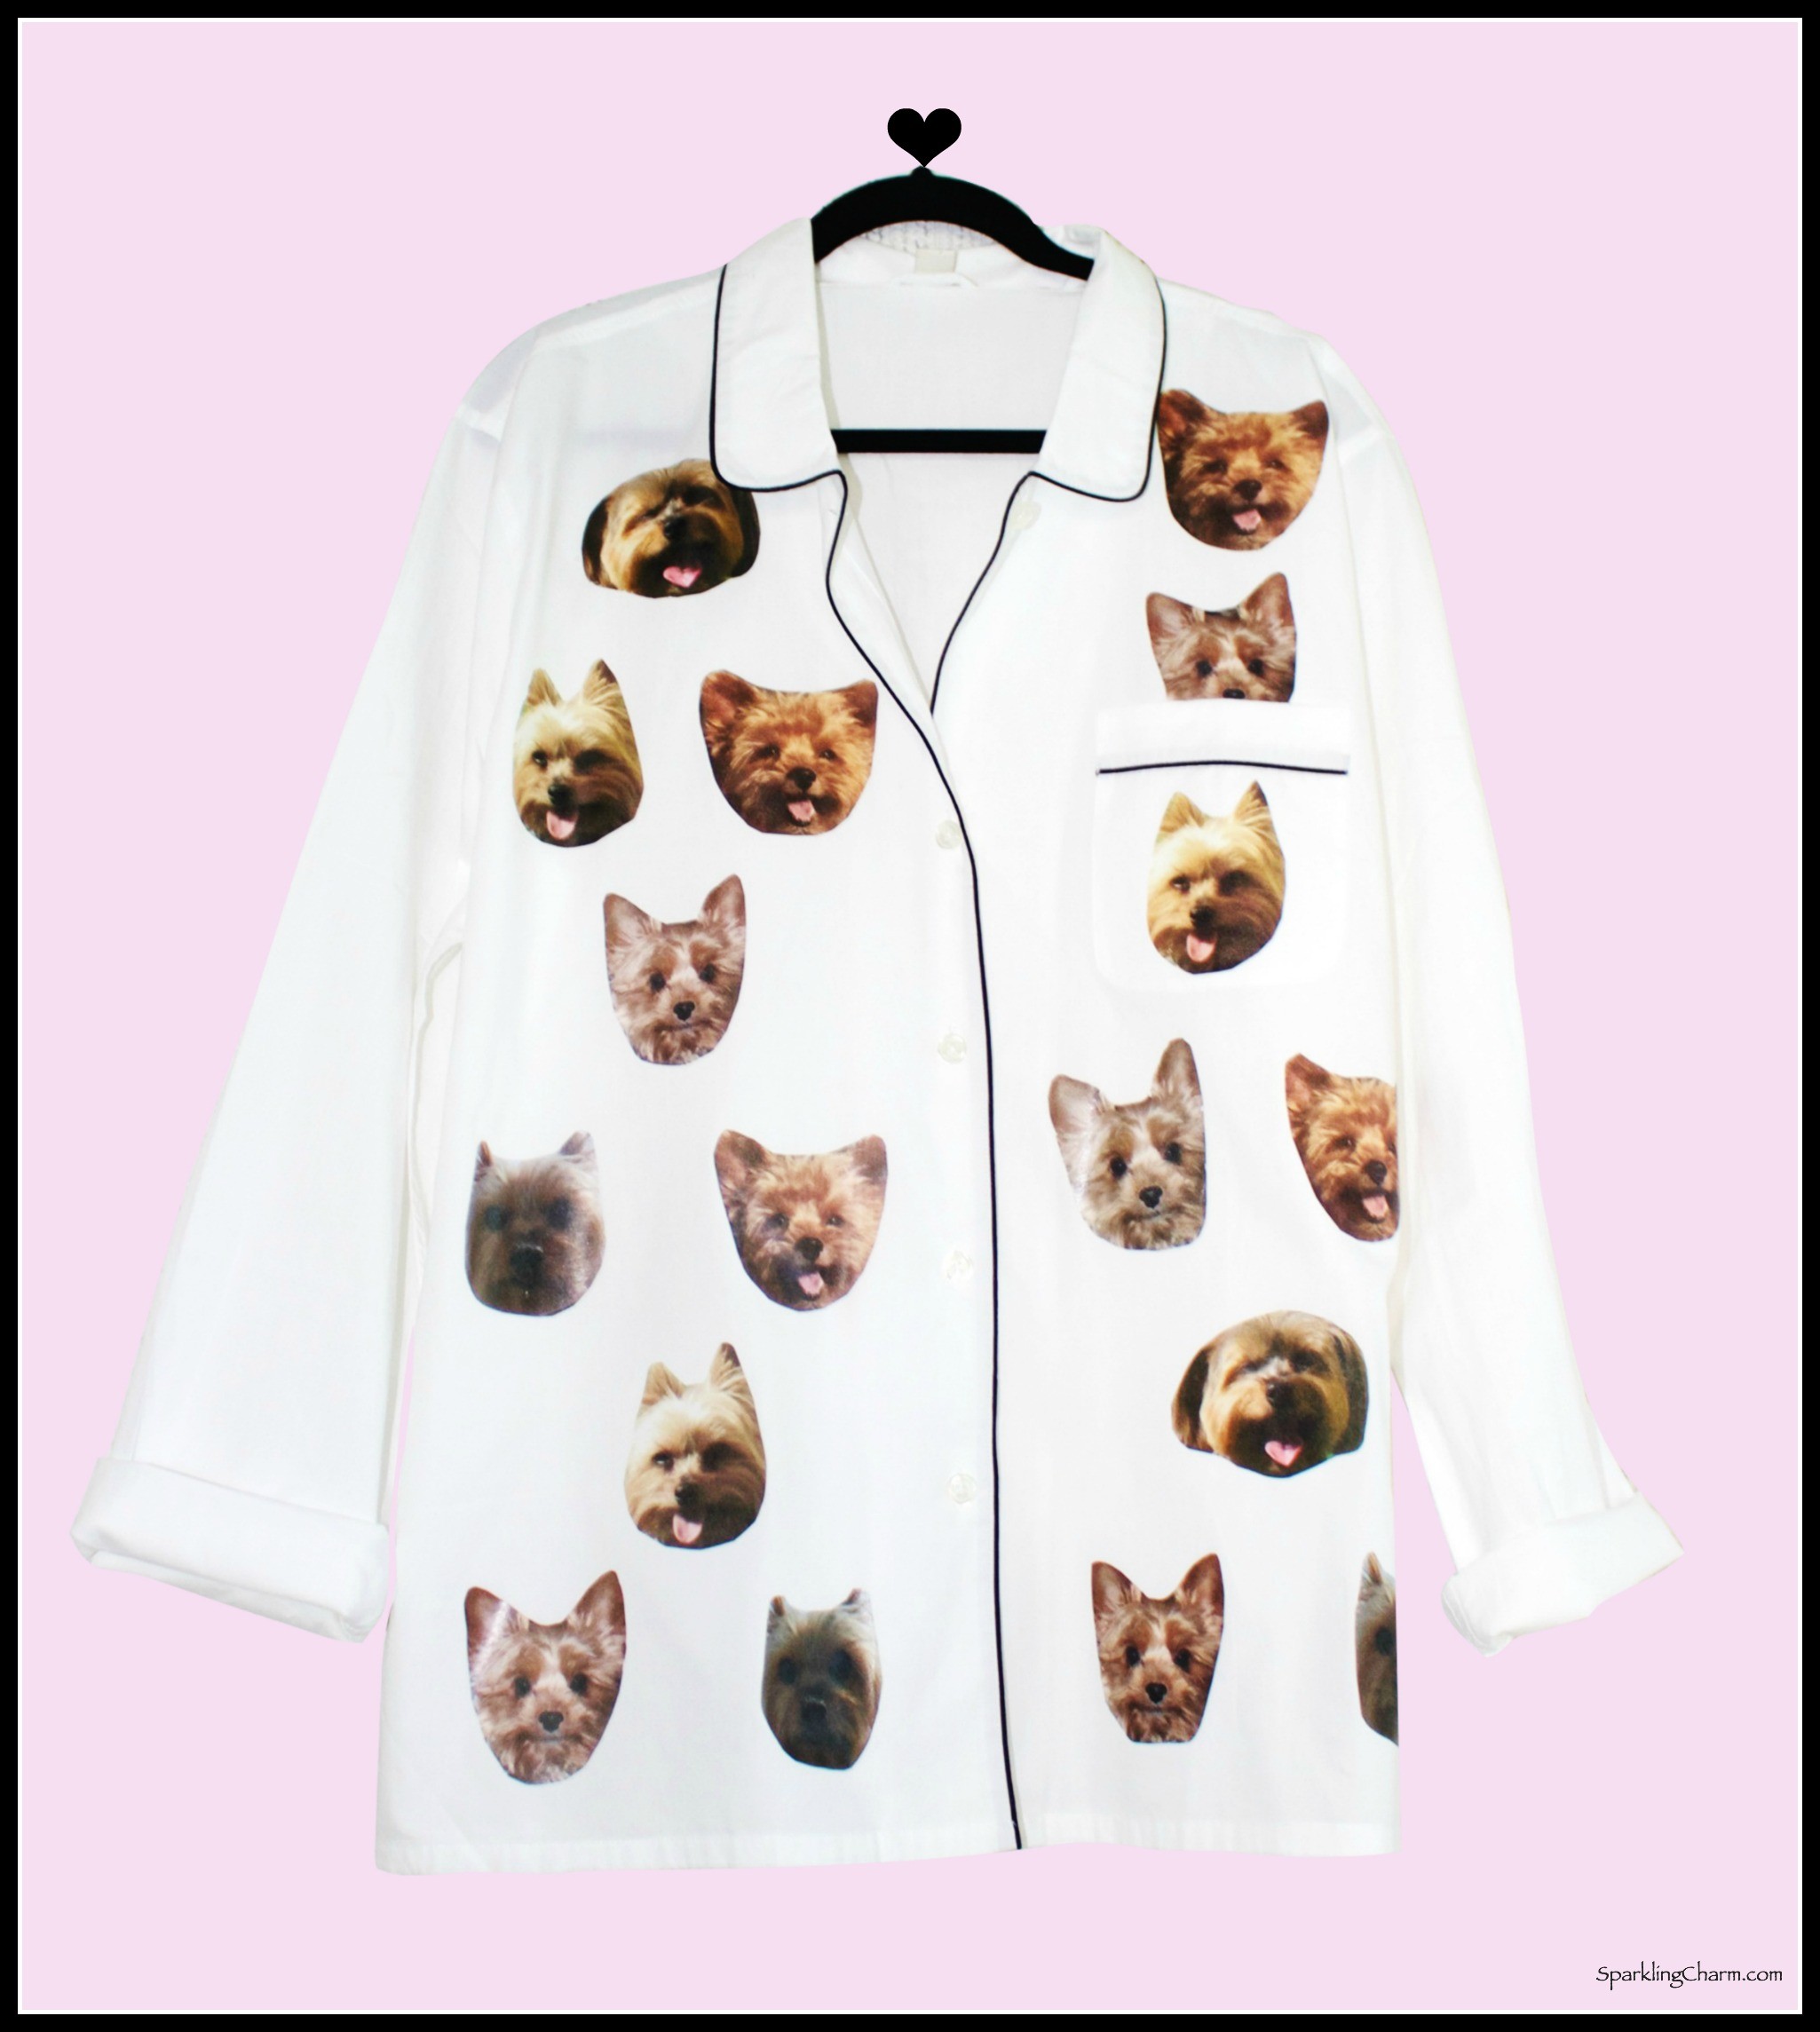
- Plain Pajamas: Choose white or any light-colored pajamas. While white provides the most contrast for photos, lighter shades will also work beautifully and might be easier to find and more affordable. Options include pajama sets or nightshirts, depending on your preference for your pet’s comfort and style. Consider materials like soft cotton for breathability and comfort.
- Digital Pet Photos: Select high-resolution digital photos of your pet facing forward. Clear, well-lit images will ensure the best transfer quality.
- Inkjet Transfer Paper for Light Fabrics: Specifically designed for light-colored fabrics, this special paper allows you to print your pet’s photos and transfer them onto the pajamas using an iron. Ensure you purchase paper compatible with your printer type (inkjet).
- Printer: An inkjet printer is necessary to print your pet photos onto the transfer paper.
- Scissors: Sharp scissors are needed for precisely cutting out the pet photos after printing.
- Iron: A household iron will be used to apply heat and transfer the images onto the fabric. Avoid using steam, as dry heat is required for the transfer process.
- Computer and Photo Editing Software (Optional): While basic cropping can be done with standard software, photo editing software can help enhance your pet’s photos, adjust size, and arrange them for printing.
Links to suggested supplies:
- White Vintage PJ’s
- White Night Shirt
- White Pajama Set
- Ink Jet Transfer Paper for light colored fabric
- Printer
- Scissors
- Iron
Step-by-Step Instructions for Creating Paw-jama Perfection
Follow these simple steps to create your own personalized pet pajamas:
-
Photo Selection and Cropping: Choose several forward-facing photos of your pet. Crop the images closely around your pet’s face to maximize the printable area and focus on their adorable features.
-
Image Arrangement and Reversal: Use your preferred computer program (like Word, Pages, or photo editing software) to arrange multiple pet photos on a single page. Aim for a photo height of around 3 inches to fit several images per sheet. Crucially, reverse the images horizontally (mirror image) before printing. This step is vital to ensure the photos appear correctly after ironing them onto the pajamas.
-
Printing the Photos: Load the inkjet transfer paper into your printer, following the manufacturer’s instructions. Print the page of reversed pet photos onto the transfer paper. Allow the ink to dry completely before proceeding.
-
Pajama Preparation: Iron your plain pajamas to remove any wrinkles and ensure a smooth surface for image transfer. Make sure the pajamas are completely dry and avoid using steam during this step.
-
Cutting Out the Photos: Carefully cut out each pet photo from the transfer paper using scissors, leaving a small margin around the image.
-
Image Transfer: Position the cut-out photo transfers face-down onto the desired locations on the pajamas. Follow the specific instructions provided with your transfer paper for heat and time settings. Typically, this involves applying firm, consistent pressure with a hot, dry iron for a designated period.
-
Cooling and Backing Removal: Allow the transfers to cool completely. Once cooled, carefully peel off the plastic backing from each transfer to reveal your pet’s image adhered to the pajamas.
-
Admire Your Paw-jamas! Your personalized pet pajamas are now complete! Get ready to dress your furry friend in their custom creation and enjoy the smiles and warmth they bring.
Tips for Perfect Personalized Pet Pajamas
- Fabric Choice: Opt for soft, breathable fabrics like cotton for your pet’s comfort.
- Image Size and Placement: Consider the size of your pet and the pajamas when deciding on image sizes and placement. Smaller images scattered across the pajamas can be very cute.
- Test Transfer: Before transferring all images, consider doing a test transfer on a scrap piece of fabric to get a feel for the process and ensure your settings are correct.
- Washing Instructions: Check the transfer paper instructions for washing guidelines. Generally, it’s recommended to wash personalized items inside-out in cold water and avoid harsh detergents or bleach to preserve the image quality.
Conclusion
Creating personalized pet pajamas is a delightful DIY project that combines creativity, pet love, and practicality. These custom pajamas are not only adorable and fun but also offer comfort and warmth for your furry companions. Whether you’re making them for your own pet or as a thoughtful gift, personalized pet pajamas are sure to be a hit. So gather your supplies, unleash your creativity, and start crafting these unique and charming pet essentials today!