Losing a pet is akin to losing a family member. The grief can be profound, and finding ways to memorialize your beloved companion becomes a crucial part of the healing process. While there are various options for pet memorials, creating a pet headstone yourself offers a deeply personal and meaningful way to honor their memory. This guide will walk you through the process of making a lasting pet headstone, ensuring you create a tribute as enduring as your love for your pet.
Creating a pet headstone is not just about marking a burial spot; it’s about crafting a tangible symbol of your bond. A DIY approach allows for complete customization, ensuring the memorial truly reflects your pet’s unique personality. You have the freedom to choose the stone, the inscription, and even incorporate personal touches that resonate with your memories. While the process requires effort and care, the result is a deeply rewarding tribute crafted with your own hands.
Choosing the Right Stone and Materials
The foundation of any pet headstone is the stone itself. Granite is an excellent choice due to its durability and resistance to weathering, ensuring your memorial stands the test of time. Other natural stones like slate or fieldstones can also be used, each offering a unique aesthetic. Consider the size of your pet and the space you have available when selecting a stone.
For engraving, professional-grade tools like a diamond-tipped engraver are ideal for granite and harder stones. However, for softer stones like slate, rotary tools with engraving bits or even specialized masonry chisels and hammers can be effective. Safety gear is paramount; always wear safety glasses and gloves to protect yourself during the engraving process.
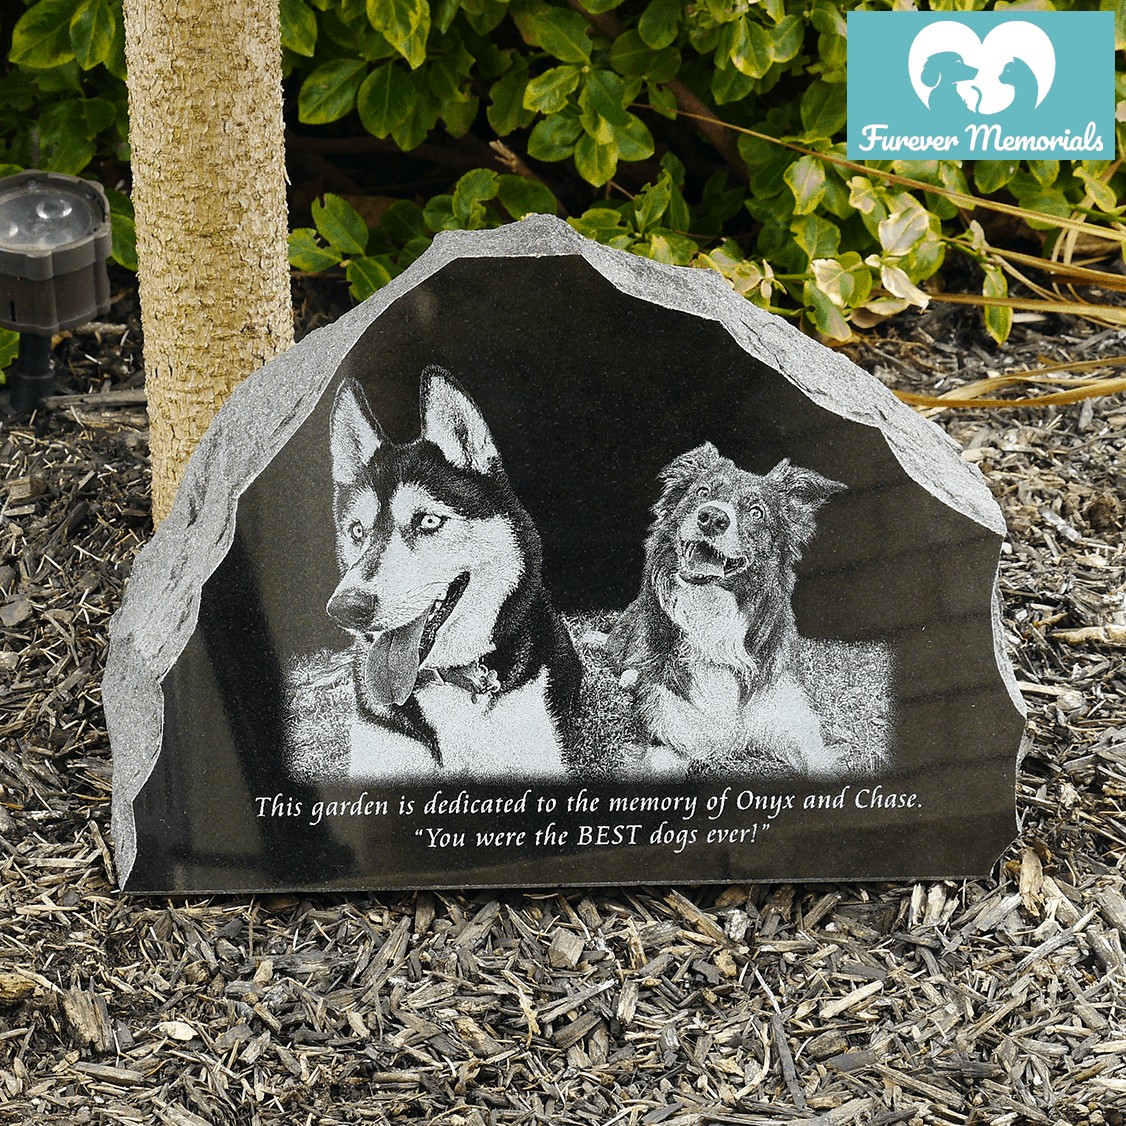 Black granite pet memorial
Step-by-Step Guide to Engraving Your Pet Headstone
Step 1: Preparing Your Design and Image
Before you start engraving, meticulous preparation is key. If you plan to include an image of your pet, the photo needs to be optimized for stone engraving. This often goes beyond simply converting it to black and white. Professional photo editing for stone engraving involves adjustments to enhance contrast, remove backgrounds, and highlight key features like fur or facial details. These enhancements are crucial because they directly impact how well the image translates onto the stone, preventing a faded or unclear engraving. While this step wasn’t shown in the video documentation of a similar process, it’s an essential pre-engraving stage.
Step 2: The Engraving Process
The engraving itself is a delicate process requiring patience and precision. Professional engravers often use specialized machines, sometimes costing upwards of $10,000, which utilize diamond impact technology. This method involves a diamond needle impacting the granite surface hundreds of times per second, creating a deep and lasting engraving. This “Diamond Impact” method is preferred over laser engraving for stone because laser engraving typically only burns the surface, resulting in shallow and less durable markings. While laser engraving is quicker and versatile for materials like wood or plastic, diamond impact ensures a higher quality, more profound inscription on granite.
For DIY enthusiasts without access to professional equipment, hand engraving is a viable option, especially for simpler designs or softer stones. Using engraving chisels for stone and a steady hand, you can carefully carve your pet’s name, dates, or a short message. Remember to work slowly and steadily, removing small amounts of stone at a time to avoid mistakes.
Step 3: Highlighting and Finishing Touches
Once the engraving is complete, clean the stone surface with compressed air or a soft brush to remove any stone dust. At this stage, you have the option to highlight the engraving to enhance visibility, especially in varying weather conditions. Natural stone can darken when wet, making unhighlighted engravings harder to read.
Highlighting is typically done with specialized masonry paints or even durable outdoor paints. Apply the paint to the engraved areas and then gently wipe off the excess from the stone’s surface with a soft cloth. The paint will remain in the recesses of the engraving, creating contrast and making the inscription stand out. Choose a color that complements the stone; off-white or light gray are often effective for black granite, providing readability without being stark.
Final Thoughts
Creating a pet headstone is a labor of love, a final act of devotion to your cherished companion. By following these steps, you can craft a beautiful and enduring memorial that serves as a constant reminder of the joy and unconditional love your pet brought into your life. Whether you choose a simple inscription or a detailed engraving, the personal touch of a DIY pet headstone makes it an exceptionally meaningful tribute.