Dealing with pet urine accidents is a common challenge for pet owners, but when urine seeps into the subfloor, the problem escalates. The porous nature of subflooring materials like wood and plywood allows urine to penetrate deeply, trapping odors that can linger long after the initial accident. These persistent smells are not only unpleasant but can also encourage repeat offenses from your pet and even affect your home’s air quality. Effectively cleaning pet urine from your subfloor is crucial for maintaining a fresh and healthy home environment. This guide provides a detailed, step-by-step approach to eliminate pet urine odor from your subfloor, ensuring your home smells clean and stays that way.
Understanding Pet Urine and Subfloors
Pet urine is a complex concoction of waste products, including ammonia, uric acid crystals, bacteria, and hormones. The uric acid crystals are particularly problematic because they are not water-soluble and bind to surfaces, embedding themselves within the subfloor material. Standard cleaning methods often fail to remove these crystals entirely, leading to the resurgence of odors, especially in humid conditions when the crystals reactivate. Subfloors, typically made of plywood, OSB (oriented strand board), or concrete, are inherently porous. This porosity allows urine to soak in deeply, making surface cleaning insufficient. Addressing pet urine odor in subfloors requires a more thorough approach than simply cleaning the surface.
Step-by-Step Guide to Cleaning Pet Urine from Subfloor
Effectively removing pet urine from a subfloor involves a multi-stage process that addresses both the immediate stain and the embedded odor. Here’s a detailed guide to help you tackle this problem:
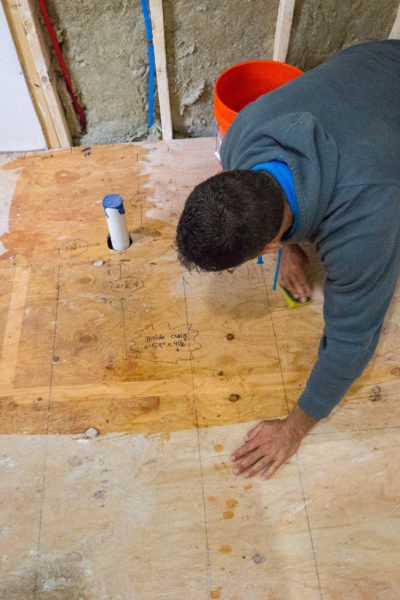
Step 1: Preparation and Assessment
Begin by removing all existing flooring materials in the affected area, including carpets, padding, rugs, and any tack strips. This exposes the subfloor and allows you to properly assess the extent of the urine damage. Identify all areas where urine has penetrated. Often, you can visually spot stains, but sometimes the odor is the primary indicator. Use your nose to pinpoint the strongest sources of the smell. It’s helpful to check from different angles and heights as odors can sometimes be more noticeable closer to the floor.
Step 2: Initial Cleaning with Enzymatic Cleaner
Enzymatic cleaners are specifically designed to break down organic materials like pet urine. These cleaners contain enzymes that accelerate the decomposition of uric acid, bacteria, and other odor-causing components into carbon dioxide and water.
- Choose the Right Cleaner: Select a high-quality enzymatic cleaner specifically formulated for pet urine. Ensure it’s safe for use on wood and subfloor materials.
- Apply Generously: Saturate the stained areas of the subfloor with the enzymatic cleaner. Do not be afraid to use a generous amount to ensure the cleaner penetrates deeply into the wood. Follow the manufacturer’s instructions regarding application and dwell time.
- Allow to Dwell and Dry: It is crucial to let the enzymatic cleaner sit on the subfloor for the recommended time, usually 24 to 48 hours, and allow it to air dry completely. Do not rush the drying process. The enzymes need time to work effectively. Avoid using fans directly on the area during the initial dwell time as this can cause the surface to dry too quickly, preventing deep penetration. Once the dwell time is complete, you can use fans to speed up the drying process.
- Reapply if Necessary: After the first application is completely dry, reassess the odor. If the urine smell persists, repeat the enzymatic cleaning process. Stubborn odors may require multiple applications for complete removal.
 Enzymatic cleaner application on subfloor for pet urine
Step 3: Sealing the Subfloor
In many cases, enzymatic cleaning alone may not completely eliminate deeply embedded odors. Sealing the subfloor is often necessary to lock in any remaining odor and prevent it from resurfacing.
- Choose a Sealer: Opt for a high-quality, odor-blocking primer and sealer specifically designed for stain and odor control. Oil-based primers like KILZ Original or Zinsser B-I-N (shellac-based) are excellent choices for sealing in pet urine odors. Ensure the product is mildew-resistant, especially if you live in a humid climate.
- Apply the Sealer: Once the subfloor is completely dry from the enzymatic cleaner, apply a generous coat of the sealer to all affected areas and slightly beyond. Use a brush or roller to ensure even coverage, working the sealer into the wood grain.
- Second Coat Application: Allow the first coat of sealer to dry completely according to the manufacturer’s instructions, typically for at least a few hours or overnight. Then, apply a second coat to ensure thorough coverage and odor blocking. For particularly strong odors or heavily stained areas, a third coat may be beneficial.
Step 4: Drying and Ventilation
Proper drying and ventilation are critical throughout the cleaning and sealing process.
- Use Fans: Employ fans to circulate air across the treated subfloor areas. This promotes faster drying of both the enzymatic cleaner and the sealer.
- Ventilation: Open windows and doors to improve ventilation in the room, especially during and after applying sealers, as some products can have strong fumes. Proper ventilation helps dissipate odors and speeds up drying times.
- Check for Dryness: Before proceeding to the next step, ensure the sealer is completely dry to the touch and no longer tacky. This may take several hours or even a full day, depending on humidity levels and the type of sealer used.
Step 5: Replacing Flooring
Once the subfloor is cleaned, sealed, and completely dry, you can proceed with replacing your flooring.
- New Padding and Carpet: If you are replacing carpet, use new padding and carpet. Reusing old padding is not recommended as it may retain urine odors and re-contaminate the cleaned subfloor.
- Consider Flooring Options: When replacing flooring, consider options that are more resistant to pet accidents in the future, such as tile, laminate, or sealed hardwood. These materials are easier to clean and less porous than carpet, reducing the likelihood of urine penetrating to the subfloor.
When to Consider Subfloor Replacement
In severe cases of pet urine damage, especially with particle board or OSB subfloors, cleaning and sealing may not be sufficient. Particle board and OSB are more absorbent and prone to swelling and damage when exposed to urine. If the subfloor is significantly deteriorated, warped, or smells strongly of urine even after cleaning, replacement of the affected section is the most effective solution.
Severely water-damaged subfloor indicating potential need for replacement.
- Cutting and Replacing: Carefully cut out and remove the damaged section of the subfloor, extending slightly beyond the visibly stained area to ensure all contaminated material is removed. Replace it with a new piece of subfloor material of the same thickness and type. Ensure proper support and secure attachment of the new section.
- Treat Surrounding Areas: Even when replacing a section, it’s wise to treat the surrounding subfloor with enzymatic cleaner and sealer to address any potential odor spread and ensure comprehensive odor control.
Prevention Tips for Future Accidents
Preventing future pet urine accidents on your subfloor is the best way to avoid the hassle of cleaning and odor removal.
- Regular Potty Breaks: Ensure your pets have frequent opportunities to relieve themselves outside, especially puppies and senior pets.
- Pet Doors: Consider installing a pet door to give your pets independent access to the outdoors, especially if you are away from home for extended periods.
- Training and Behavior: Address any underlying behavioral issues that may be causing indoor urination, such as anxiety or marking. Consult with a veterinarian or professional pet trainer if needed.
- Prompt Cleanup: If accidents do happen, clean them up immediately and thoroughly with an enzymatic cleaner designed for pet messes to prevent urine from soaking into the subfloor.
Conclusion
Cleaning pet urine from a subfloor is a challenging but manageable task. By following these detailed steps, starting with enzymatic cleaning and potentially progressing to sealing or even subfloor replacement in severe cases, you can effectively eliminate pet urine odors and restore a fresh and clean environment in your home. Remember, patience and thoroughness are key to success. Addressing pet urine issues promptly and effectively not only improves your home environment but also contributes to a healthier and happier living space for both you and your pets.