Creating a Chia Pet is a delightful and educational project, perfect for art classes, families, or anyone looking to add a touch of green fun to their home. This guide will walk you through the process of making your own unique clay Chia Pet, inspired by a classroom art project that brought these whimsical planters to life. Get ready to sculpt, plant, and grow your own living art!
Materials You’ll Need
Before you begin, gather these essential materials:
- Clay: Choose a clay that is suitable for firing, such as earthenware or stoneware clay.
- Water: For working with clay and hydrating chia seeds.
- Sculpting Tools: Basic pottery tools for shaping and carving clay.
- Chia Seeds: You can find these at most grocery stores or online.
- Kiln: For firing the clay sculpture (access to a pottery kiln is necessary).
- Glaze (Optional): If you want to add color and shine to parts of your Chia Pet.
- Shallow Tray: To hold water and provide humidity for seed germination.
- Cling Wrap (Optional): To create a humid environment for initial growth.
Step-by-Step Guide to Sculpting Your Clay Chia Pet
1. Sculpting the Clay Base
Start by shaping your clay into the desired animal or character form using pinch pot techniques or other sculpting methods. Consider animals like turtles, hedgehogs, or even fantastical creatures. Remember, the clay needs to be hollow to hold water for your chia seeds.
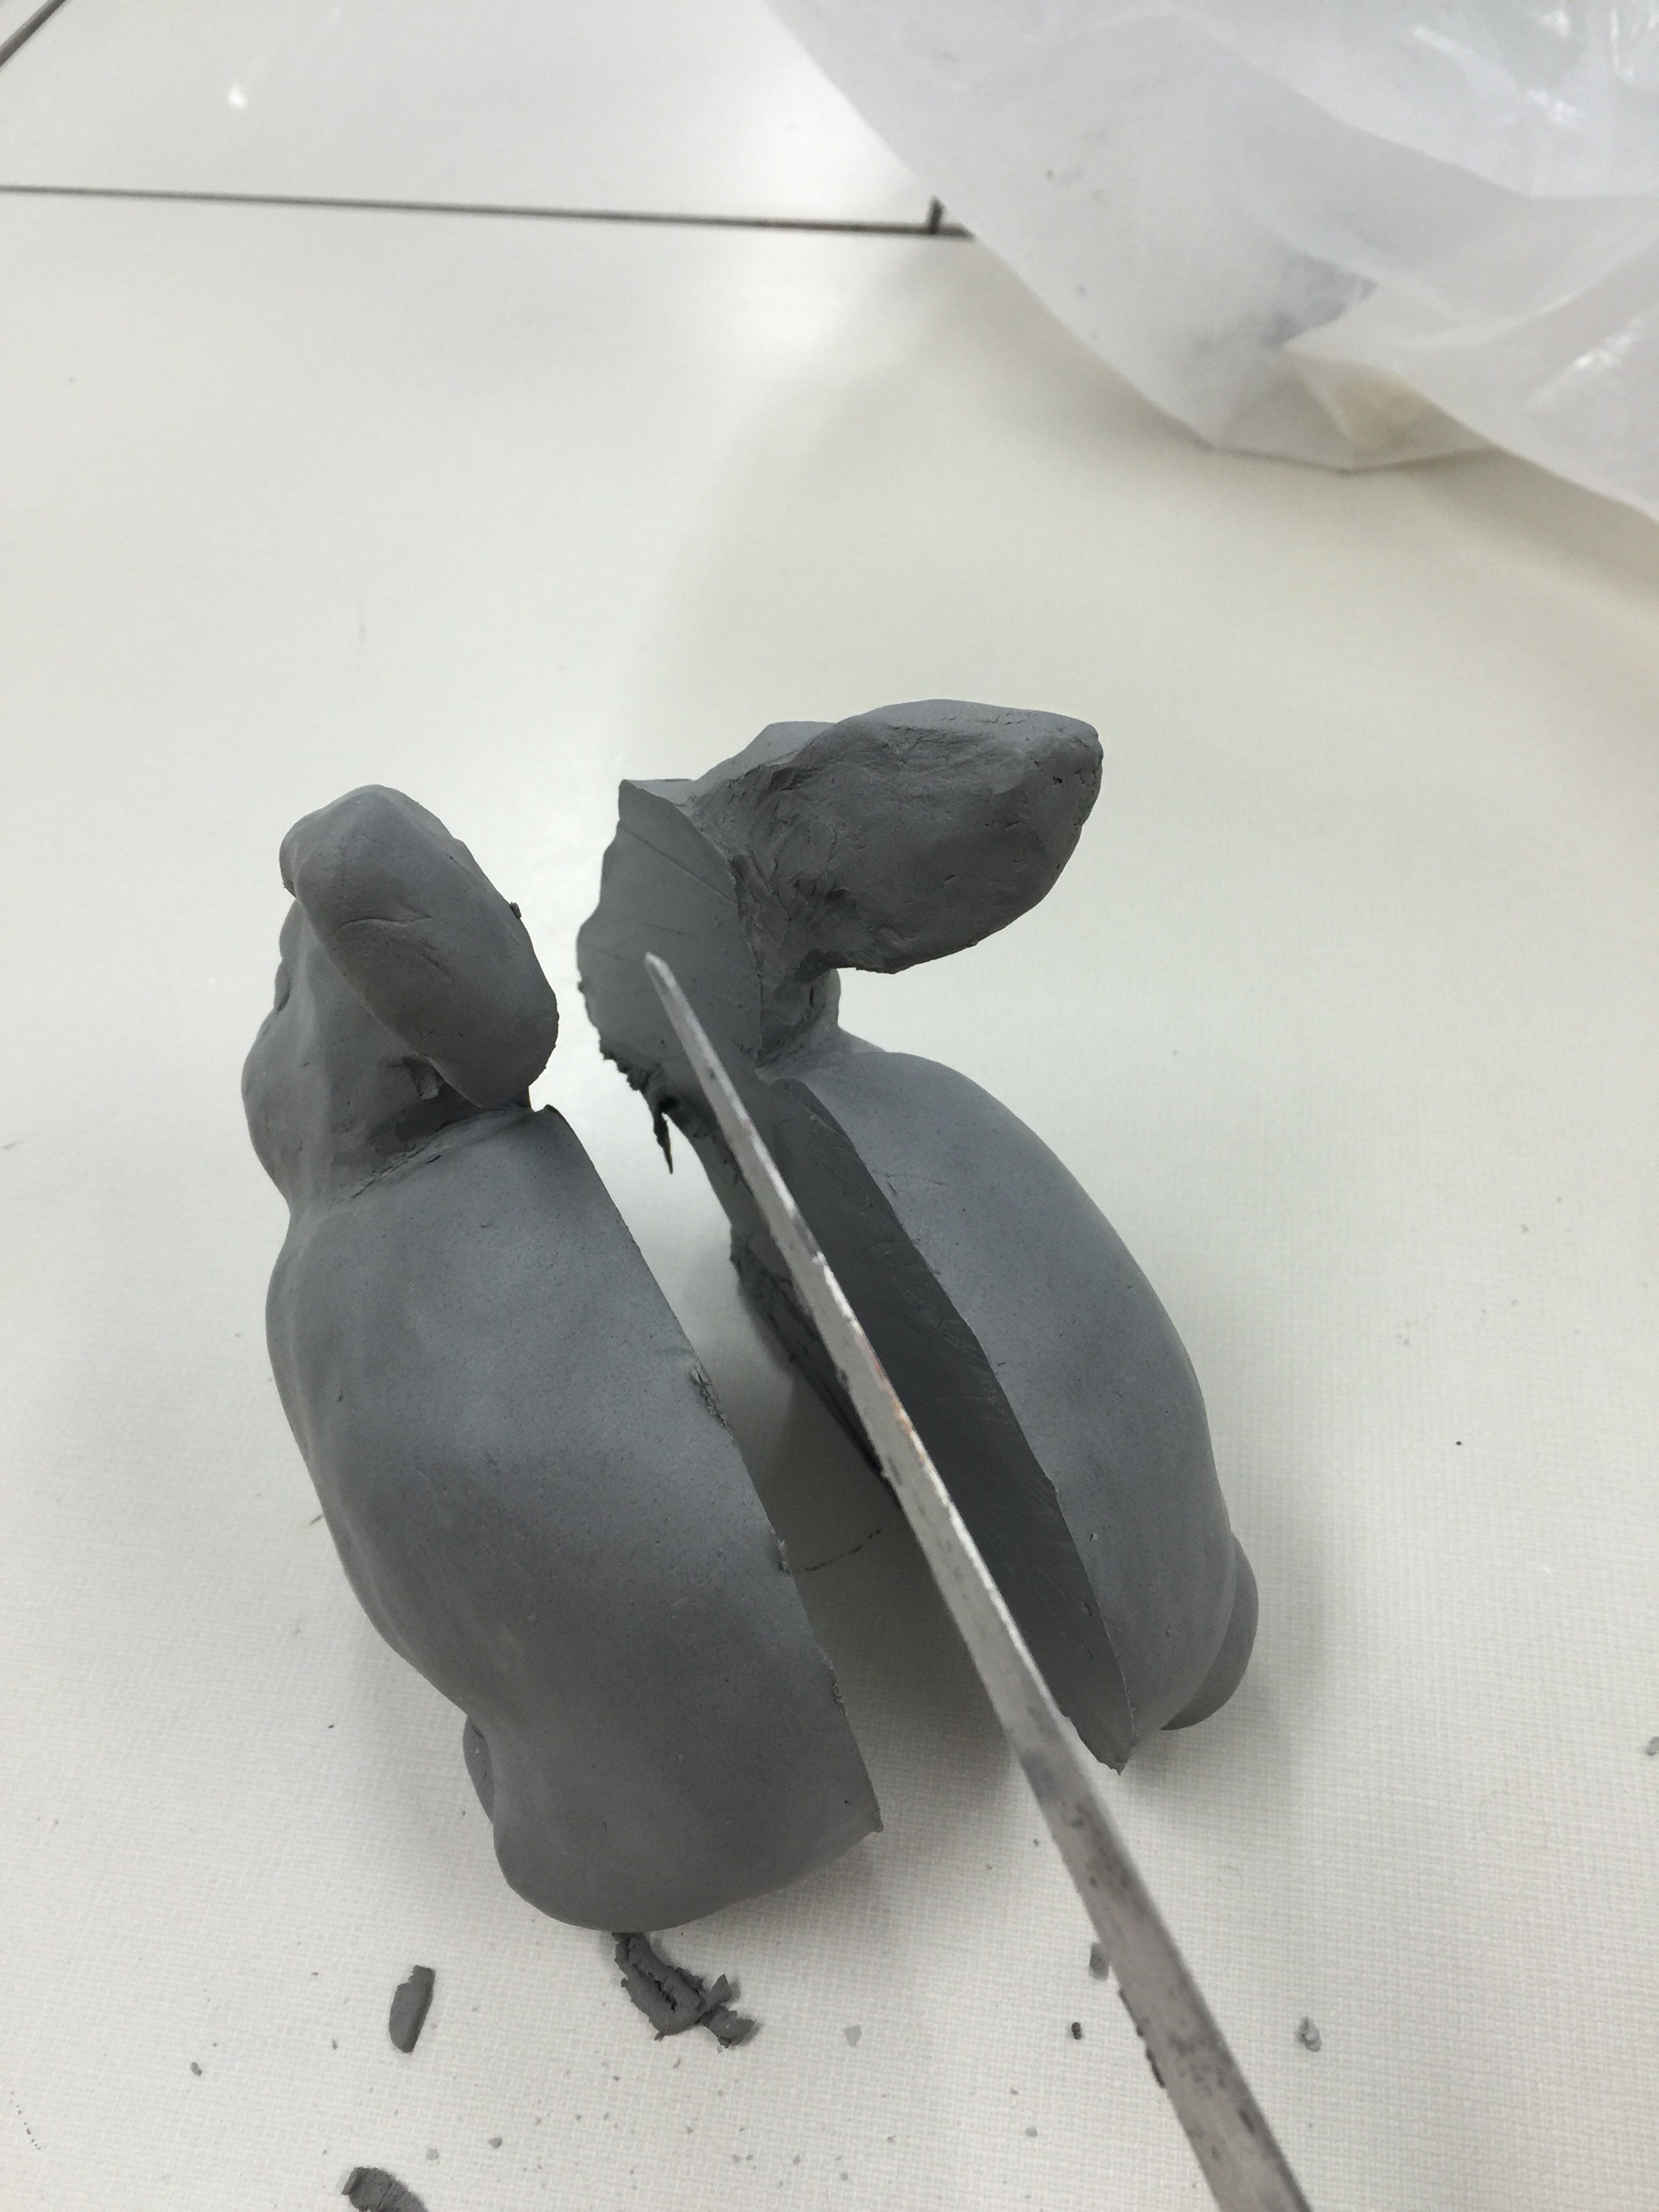
2. Hollowing and Joining the Clay
To prevent cracking during firing and to create a reservoir for water, carefully hollow out your clay sculpture. If your design is complex, it’s best to sculpt it in two halves. Once you have your basic shape, cut the clay form in half. Then, using a sculpting tool, scoop out the clay from the inside of both halves, ensuring the walls are no thicker than your thumb for even drying and firing.
Once hollowed, score and slip the edges of the two halves. “Scoring” means making scratches on the clay edges, and “slip” is a watery clay mixture that acts like glue. Press the halves firmly together to rejoin your sculpture.
3. Creating Seed Grooves and Water Hole
Create a hole, roughly the size of a quarter, on the top of your Chia Pet for watering. Next, scratch grooves into the areas where you want chia seeds to grow, such as the back, head, or any part you envision having “hair” or “fur.” These grooves help the seeds adhere and retain moisture, acting as mini water pools.
4. Firing and Glazing (Optional)
Allow your clay sculpture to dry slowly and completely to prevent cracking. Once dry, fire it in a kiln according to the clay manufacturer’s instructions. After firing, you have the option to glaze parts of your Chia Pet, but avoid glazing the grooved areas where seeds will be planted.
Planting Chia Seeds and Growing Your Chia Pet
1. Soaking Seeds and Planting
Before planting, soak your chia seeds and your fired Chia Pet in water overnight. Soaking the seeds creates a gelatinous coating that helps them stick to the clay and promotes germination. Soaking the clay ensures it is fully saturated.
The next day, remove your Chia Pet and seeds from the water. Apply the soaked chia seeds to the grooved areas of your sculpture.
2. Caring for Your Chia Pet
To encourage growth, place your planted Chia Pet in a shallow tray of water and cover it loosely with cling wrap to maintain humidity. Indirect sunlight is ideal. Keep the water tray filled to ensure the clay stays moist.
Sprouts should appear in a few days. Be patient and continue to water your Chia Pet to watch your green creation flourish!
Chia Pet Inspiration from Students
Here are some fantastic examples of Chia Pets created by students, showcasing a range of creative ideas:
Groot
Hedgehog
Fish
Turtle
Squirrel
Lion
Lizard
Crab
Donkey
Rhino
Making your own Chia Pet is a rewarding experience that combines art, gardening, and a touch of whimsy. Try it out and bring a unique, green friend to life!