Can You Paint A Chia Pet? Yes, you absolutely can! This guide from PETS.EDU.VN unlocks the secrets to personalizing your terracotta friend, transforming it into a unique work of art. Discover creative painting techniques and design ideas to give your Chia Pet a dazzling makeover with simple supplies.
1. Understanding Chia Pets and Painting
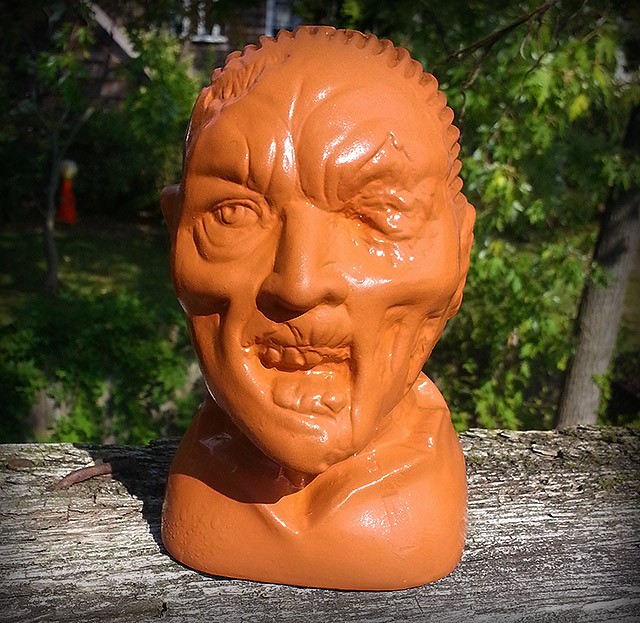
Chia Pets are iconic terracotta figurines that grow chia seeds as foliage. They’re fun, easy to care for, and offer a touch of greenery to any space. But what if you want to take your Chia Pet to the next level? Can you paint them? Absolutely! Painting a Chia Pet is a fantastic way to personalize it, express your creativity, and create a truly unique piece of decor. This guide offers a detailed exploration of painting Chia Pets, including preparation, safety precautions, painting techniques, design ideas, and frequently asked questions. With our comprehensive guide, brought to you by PETS.EDU.VN, you’ll unlock the secrets to customizing your terracotta friend and transforming it into a one-of-a-kind masterpiece.
2. Is It Safe to Paint a Chia Pet?
Yes, it is generally safe to paint a Chia Pet, but there are a few important considerations to keep in mind.
- Nontoxic Paints: Always use nontoxic paints specifically designed for arts and crafts. These paints are safe for both you and the environment and won’t harm the Chia Pet itself.
- Proper Ventilation: Ensure you’re working in a well-ventilated area to avoid inhaling paint fumes.
- Seed Safety: Avoid getting paint on the areas where you’ll be applying chia seeds. Paint can inhibit seed growth, so keeping those areas clear is crucial.
- Sealant: Consider using a sealant after painting to protect the paint and prevent it from chipping or peeling. Make sure the sealant is also nontoxic and safe for use around plants.
- Adult Supervision: If children are involved, adult supervision is essential to ensure they use the materials safely and follow the necessary precautions.
By following these guidelines, you can safely enjoy the creative process of painting your Chia Pet and create a personalized piece of art.
3. Materials Needed for Painting Your Chia Pet
Before you embark on your Chia Pet painting adventure, gather the following materials:
- Chia Pet: Choose the Chia Pet you want to customize. Ensure it is clean and dry before you begin.
- Acrylic Paints: Select a variety of acrylic paints in your desired colors. Acrylic paints are ideal because they adhere well to terracotta, dry quickly, and are readily available.
- Paintbrushes: Gather an assortment of paintbrushes in different sizes and shapes. Fine-tipped brushes are perfect for intricate details, while larger brushes are suitable for covering broader areas.
- Palette or Paint Tray: Use a palette or paint tray to hold and mix your paints. This will help you keep your workspace organized and prevent your paints from drying out.
- Water Container: Keep a container of clean water nearby for rinsing your paintbrushes.
- Paper Towels or Cloth: Have paper towels or a cloth on hand to wipe away excess paint and clean your brushes.
- Pencil: A pencil is useful for sketching your design onto the Chia Pet before you start painting.
- Clear Acrylic Sealer (Optional): A clear acrylic sealer can protect your painted design and give it a glossy finish.
- Protective Covering: Cover your work surface with a protective covering, such as newspaper or a drop cloth, to prevent paint spills.
4. Preparing Your Chia Pet for Painting
Proper preparation is key to achieving a smooth and long-lasting paint job on your Chia Pet. Follow these steps to prepare your Chia Pet for painting:
- Cleaning: Ensure your Chia Pet is clean and free of any dirt or debris. Wipe it down with a damp cloth and let it dry completely before proceeding.
- Sanding (Optional): If your Chia Pet has a rough or uneven surface, gently sand it with fine-grit sandpaper. This will create a smoother surface for the paint to adhere to.
- Priming (Optional): Applying a primer to your Chia Pet can help the paint adhere better and provide a more uniform base color. Use a primer specifically designed for terracotta or ceramics.
- Sketching Your Design: Before you start painting, use a pencil to sketch your design onto the Chia Pet. This will help you visualize the final result and ensure that your painting is accurate.
5. Painting Techniques for Chia Pets
Now that your Chia Pet is prepared, it’s time to start painting. Here are some painting techniques you can use to create your desired look:
- Base Coating: Apply a base coat of paint to the entire Chia Pet. This will provide a solid foundation for your design and help the colors pop.
- Layering: Layering involves applying multiple coats of paint to build up color and create depth. This technique is particularly effective for creating gradients and shadows.
- Dry Brushing: Dry brushing is a technique where you use a dry brush with a small amount of paint to create a textured effect. This technique is ideal for adding highlights and lowlights to your design.
- Stippling: Stippling involves using a brush to create small dots of paint on the surface of the Chia Pet. This technique is excellent for creating texture and adding detail.
- Detailing: Use fine-tipped brushes to add intricate details to your design. This could include adding small lines, dots, or patterns to enhance the overall look.
6. Creative Design Ideas for Painted Chia Pets
Let your imagination run wild and explore various design ideas for your painted Chia Pet. Here are a few suggestions to get you started:
- Themed Designs: Choose a theme that reflects your interests or personality. For example, you could create a floral-themed Chia Pet with painted flowers and vines, or a nautical-themed Chia Pet with painted anchors and seashells.
- Abstract Art: Experiment with abstract art techniques to create a unique and eye-catching Chia Pet. Use bold colors, geometric shapes, and free-flowing lines to express your creativity.
- Character Creations: Transform your Chia Pet into a beloved character from a book, movie, or TV show. Paint the Chia Pet to resemble the character’s likeness and add details like clothing and accessories.
- Seasonal Decor: Create Chia Pets that reflect different seasons or holidays. For example, you could paint a Chia Pet with autumn leaves and pumpkins for fall, or with snowflakes and snowmen for winter.
- Personalized Gifts: Paint Chia Pets as personalized gifts for friends and family. Customize the design to reflect the recipient’s interests and hobbies, adding a personal touch that they’ll cherish.
7. Sealing and Protecting Your Painted Chia Pet
Once your painting is complete and the paint has dried thoroughly, consider sealing your Chia Pet to protect the design and prevent it from chipping or fading.
- Choose a Clear Acrylic Sealer: Select a clear acrylic sealer specifically designed for arts and crafts. Ensure it is nontoxic and safe for use around plants.
- Apply the Sealer: Follow the manufacturer’s instructions to apply the sealer evenly over the painted surface. Use a brush or spray applicator for best results.
- Allow to Dry: Let the sealer dry completely before handling your Chia Pet. This may take several hours, depending on the type of sealer you use.
- Additional Coats (Optional): For added protection, you can apply additional coats of sealer, allowing each coat to dry completely before applying the next.
8. Growing Chia Seeds on Your Painted Pet
Now that your Chia Pet is painted and sealed, it’s time to grow the chia seeds.
- Soaking the Seeds: Soak the chia seeds in water for about 30 minutes. This will help them germinate and adhere to the Chia Pet’s surface.
- Applying the Seeds: Spread the soaked chia seeds evenly over the designated areas on your Chia Pet. Use your fingers or a small spoon to ensure that the seeds are distributed evenly.
- Watering: Keep the chia seeds moist by misting them with water regularly. You may need to water them several times a day, especially in dry climates.
- Placement: Place your Chia Pet in a well-lit area, but avoid direct sunlight, which can dry out the seeds too quickly.
- Growth: Within a few days, you should start to see the chia seeds sprouting. Continue to water them regularly to promote healthy growth.
- Maintenance: Once the chia seeds have grown into a lush green covering, you can trim them as needed to maintain the desired shape and size.
9. Tips for Success
Here are some additional tips to help you achieve success with your painted Chia Pet:
- Practice Your Design: Before painting your Chia Pet, practice your design on a piece of paper or cardboard. This will help you refine your technique and avoid mistakes.
- Use High-Quality Paints: Invest in high-quality acrylic paints for the best results. Cheaper paints may not adhere as well or have the same vibrant colors.
- Take Your Time: Don’t rush the painting process. Take your time and focus on creating a detailed and well-executed design.
- Let Each Coat Dry: Allow each coat of paint to dry completely before applying the next. This will prevent smudging and ensure that the colors are vibrant.
- Get Inspired: Look for inspiration in nature, art, and pop culture. Use these sources to spark your creativity and come up with unique and original designs.
- Experiment: Don’t be afraid to experiment with different techniques and colors. The more you experiment, the more you’ll learn and the better your painted Chia Pets will become.
10. Addressing Potential Challenges
Even with careful preparation and execution, you may encounter some challenges while painting your Chia Pet. Here are some common issues and how to address them:
- Paint Not Adhering: If the paint is not adhering to the surface of the Chia Pet, try sanding the surface lightly before painting. You can also apply a primer to help the paint stick better.
- Paint Chipping or Peeling: If the paint is chipping or peeling, it may be due to improper preparation or using low-quality paints. Ensure that you clean and prime the Chia Pet before painting, and use high-quality acrylic paints.
- Uneven Coverage: If you’re having trouble achieving even coverage, try applying multiple thin coats of paint instead of one thick coat. This will help to create a smoother and more uniform finish.
- Smudging: To prevent smudging, allow each coat of paint to dry completely before applying the next. You can also use a sealant to protect the painted surface.
- Seed Growth Issues: If your chia seeds are not growing properly, make sure they are getting enough water and sunlight. You may also need to adjust the temperature and humidity levels.
11. Safety Precautions
When painting your Chia Pet, it’s important to take certain safety precautions to protect yourself and others.
- Ventilation: Work in a well-ventilated area to avoid inhaling paint fumes. Open windows and doors to allow fresh air to circulate.
- Protective Gear: Wear gloves to protect your hands from paint. You may also want to wear a mask to avoid inhaling paint particles.
- Eye Protection: Wear safety glasses or goggles to protect your eyes from paint splatters.
- Child Safety: If children are involved, supervise them closely and ensure that they use the materials safely. Keep paints and other materials out of reach of young children.
- Proper Disposal: Dispose of paint and other materials properly. Follow local regulations for the disposal of hazardous waste.
12. How to Clean Your Painted Chia Pet
To keep your painted Chia Pet looking its best, clean it regularly with a soft, damp cloth. Avoid using harsh chemicals or abrasive cleaners, as these can damage the paint.
- Dusting: Dust your Chia Pet regularly with a soft cloth or brush to remove any dirt or debris.
- Wiping: Wipe the painted surface with a damp cloth to remove any smudges or stains. Be gentle and avoid scrubbing the paint.
- Spot Cleaning: For stubborn stains, use a mild soap and water solution to spot clean the affected area. Rinse with a damp cloth and dry thoroughly.
- Avoid Soaking: Do not soak your painted Chia Pet in water, as this can damage the paint and the terracotta material.
- Drying: After cleaning, allow your Chia Pet to dry completely before handling or displaying it.
13. The Benefits of Customizing Your Chia Pet
Customizing your Chia Pet through painting offers numerous benefits:
- Personal Expression: Painting allows you to express your unique personality and creativity. You can create a Chia Pet that reflects your interests, hobbies, and style.
- Unique Decor: A painted Chia Pet is a one-of-a-kind piece of decor that will add character and charm to any space.
- Relaxation and Stress Relief: The act of painting can be relaxing and therapeutic. It allows you to focus on the present moment and unwind from the stresses of daily life.
- Gift Giving: A painted Chia Pet makes a thoughtful and personalized gift for friends and family. It shows that you put time and effort into creating something special.
- Educational Activity: Painting Chia Pets can be an educational activity for children. It teaches them about art, creativity, and plant care.
14. Alternatives to Painting
If painting isn’t your thing, there are other ways to customize your Chia Pet. Here are a few alternatives:
- Decoupage: Use decoupage techniques to apply paper or fabric to the surface of the Chia Pet. This is a great way to add patterns and textures to your design.
- Mosaic: Create a mosaic design by adhering small tiles or pieces of glass to the Chia Pet. This will add a colorful and textured look to your creation.
- Beading: Embellish your Chia Pet with beads, sequins, and other decorative elements. This is a great way to add sparkle and glamour to your design.
- Fabric Wrapping: Wrap your Chia Pet in fabric to create a soft and cozy look. You can use different types of fabric to create various textures and patterns.
- Natural Elements: Decorate your Chia Pet with natural elements like shells, pebbles, and twigs. This will give your creation a rustic and organic look.
15. Chia Pet Care After Painting
After painting and growing chia seeds on your Chia Pet, it’s important to continue caring for it properly.
- Watering: Water the chia seeds regularly to keep them moist. You may need to water them several times a day, especially in dry climates.
- Sunlight: Place your Chia Pet in a well-lit area, but avoid direct sunlight, which can dry out the seeds too quickly.
- Trimming: Trim the chia seeds as needed to maintain the desired shape and size. Use scissors or clippers to trim the growth.
- Fertilizing: Fertilize the chia seeds occasionally to promote healthy growth. Use a liquid fertilizer specifically designed for houseplants.
- Repotting: After several months, you may need to repot your Chia Pet. Remove the chia seeds and soil from the terracotta planter and replace them with fresh soil.
16. Advanced Techniques and Ideas
For those looking to take their Chia Pet customization to the next level, consider these advanced techniques and ideas:
- Airbrushing: Use an airbrush to create smooth gradients and intricate details on your Chia Pet. Airbrushing allows for greater control and precision than traditional brush painting.
- Sculpting: Add sculptural elements to your Chia Pet using clay or other modeling materials. This is a great way to create unique and three-dimensional designs.
- Mixed Media: Combine different art mediums to create a multi-textured and visually interesting Chia Pet. For example, you could combine painting with decoupage, beading, or mosaic techniques.
- Interactive Elements: Add interactive elements to your Chia Pet, such as lights, sounds, or moving parts. This will make your creation even more engaging and fun.
- Glow-in-the-Dark: Use glow-in-the-dark paints to create a Chia Pet that glows in the dark. This is a great way to add a spooky or magical touch to your creation.
17. Chia Pet History and Trivia
Did you know that the Chia Pet was first introduced in 1977? Here are some interesting facts and trivia about this iconic product:
- The Original Chia Pet: The first Chia Pet was the Chia Guy, which was later followed by the Chia Ram.
- Popular Culture: Chia Pets have been featured in numerous movies, TV shows, and commercials.
- Famous Spokesperson: Throughout the years, many celebrities have endorsed Chia Pets, including Bob Ross and William Shatner.
- Variety of Designs: Over the years, numerous Chia Pet designs have been released, including characters from popular movies, TV shows, and comic books.
- Long-Lasting Appeal: Despite being around for over 40 years, Chia Pets continue to be popular and beloved by people of all ages.
18. Where to Buy Supplies
You can find supplies for painting your Chia Pet at most arts and crafts stores, as well as online retailers. Here are some popular places to buy supplies:
- Local Craft Stores: Check your local craft stores for a wide selection of paints, brushes, and other materials.
- Online Retailers: Online retailers like Amazon, Etsy, and Michaels offer a vast array of art supplies and tools.
- Discount Stores: Discount stores like Dollar General and Walmart often carry affordable paints and brushes.
- Specialty Art Supply Stores: Specialty art supply stores offer high-quality materials and tools for artists of all levels.
19. Community and Sharing
Connect with other Chia Pet enthusiasts and share your creations online.
- Online Forums: Join online forums and communities dedicated to Chia Pets. Share your tips, ask questions, and show off your painted creations.
- Social Media: Use social media platforms like Instagram, Facebook, and Pinterest to share photos of your Chia Pets. Use relevant hashtags to connect with other enthusiasts.
- Local Art Groups: Join local art groups and clubs to meet other artists and crafters. Attend workshops and classes to learn new techniques and skills.
- Art Shows and Fairs: Participate in local art shows and fairs to showcase your painted Chia Pets. This is a great way to get exposure and connect with potential buyers.
20. Troubleshooting Common Issues
Even with the best preparation, you might encounter issues. Here’s a quick guide:
| Issue | Possible Cause | Solution |
|---|---|---|
| Paint not sticking | Dirty surface, wrong paint | Clean surface, use acrylic primer |
| Uneven seed growth | Inconsistent watering, poor seed quality | Water evenly, use fresh seeds |
| Mold growth | Overwatering, poor ventilation | Reduce watering, improve air circulation |
| Design fading or chipping | Lack of sealant, harsh cleaning | Apply sealant, clean gently with a soft cloth |
| Chia pet cracking | Extreme temperature changes, overwatering | Avoid drastic temperature changes, ensure proper drainage |
| Paint bleeding | Using water-based paints on wet surface | Allow surface to completely dry or use oil-based paints |
| Difficulty spreading seeds | Seeds drying out too quickly | Pre-soak seeds longer, apply in small sections at a time |
| Paint cracking after drying | Applying paint too thickly | Apply thin, even layers and allow to completely dry between coats |

21. The Future of Chia Pet Customization
As technology advances, the possibilities for customizing Chia Pets are endless. Here are some potential future trends:
- 3D-Printed Chia Pets: Use 3D printing to create custom Chia Pet shapes and designs. This will allow for even greater personalization and creativity.
- Smart Chia Pets: Integrate sensors and technology into Chia Pets to monitor soil moisture, temperature, and other environmental factors. This will help ensure optimal growth and care.
- Augmented Reality: Use augmented reality apps to visualize how different designs will look on your Chia Pet before you start painting.
- Virtual Chia Pet Communities: Join virtual communities where you can share your designs, get feedback, and collaborate with other Chia Pet enthusiasts.
22. Eco-Friendly Considerations
When customizing your Chia Pet, consider using eco-friendly materials and practices.
- Nontoxic Paints: Use nontoxic paints that are safe for the environment and your health.
- Recycled Materials: Use recycled materials for your designs, such as paper, fabric, and beads.
- Sustainable Practices: Practice sustainable gardening techniques, such as composting and water conservation.
- Reduce Waste: Minimize waste by using reusable containers and tools, and by disposing of materials properly.
23. Frequently Asked Questions (FAQs)
1. Can I use spray paint on a Chia Pet?
Yes, but ensure it’s a non-toxic, acrylic-based spray paint designed for crafts. Apply in thin, even coats in a well-ventilated area.
2. How do I prevent mold growth on my Chia Pet?
Avoid overwatering and ensure good air circulation. If mold appears, gently clean the affected area with a diluted vinegar solution.
3. Can I use markers instead of paint?
Yes, use non-toxic, permanent markers designed for crafts. Be aware that markers may fade over time if not sealed.
4. How long does it take for Chia seeds to sprout?
Chia seeds typically sprout within 3-7 days, depending on environmental conditions like temperature and humidity.
5. Can I use different types of seeds on a Chia Pet?
While Chia Pets are designed for chia seeds, you can experiment with other small, quick-sprouting seeds like flax or cress, but results may vary.
6. How do I clean a painted Chia Pet without damaging the design?
Use a soft, damp cloth to gently wipe the surface. Avoid harsh chemicals or abrasive cleaners.
7. What if my Chia Pet design starts to peel?
Apply another coat of sealant to protect the design. Ensure the surface is clean and dry before applying the sealant.
8. Can I bake my Chia Pet after painting to seal the design?
No, baking a Chia Pet is not recommended as it can cause the terracotta to crack and the paint to bubble or peel. Air drying and sealing are preferable.
9. Is it safe to eat the chia sprouts from a painted Chia Pet?
It’s generally not recommended to eat sprouts from a painted Chia Pet, as the paint and sealant may contain chemicals that are not food-safe.
10. How do I store my painted Chia Pet when not in use?
Clean and dry the Chia Pet thoroughly, then store it in a cool, dry place away from direct sunlight to prevent fading or damage to the design.
24. Real-Life Examples and Case Studies
Case Study 1: The Floral Fantasy Chia Pet
Sarah, a beginner crafter, wanted to create a personalized gift for her mother. She painted her Chia Pet with intricate floral designs using acrylic paints. After sealing, she grew chia seeds and presented her mother with a unique, living piece of art. Her mother loved the gift and placed it on her windowsill, where it thrived.
Case Study 2: The Superhero Saga
Mark, a comic book enthusiast, transformed his Chia Pet into his favorite superhero. He sculpted clay elements to add three-dimensional details and used airbrushing techniques to create a dynamic design. He shared his creation on social media, gaining recognition from fellow crafters and comic book fans.
25. Expert Opinions and Recommendations
Dr. Emily Carter, Horticulturalist: “When customizing Chia Pets, always prioritize non-toxic materials to ensure the safety of the plants and the environment. Proper preparation and sealing are crucial for long-lasting designs.”
Lisa Green, Art Therapist: “Painting Chia Pets can be a therapeutic activity that promotes relaxation and creativity. It’s a wonderful way to express yourself and create something unique.”
26. Resources for Further Learning
- Websites and Blogs: Explore websites and blogs dedicated to arts and crafts, gardening, and Chia Pets.
- Books and Magazines: Read books and magazines on painting techniques, gardening tips, and Chia Pet history.
- Online Courses: Take online courses on painting, sculpting, and other art forms.
- Workshops and Classes: Attend workshops and classes at local craft stores and art centers.
27. Inspiring Stories from the Community
Story 1: A Chia Pet Garden
A local community center organized a Chia Pet painting event for seniors. Participants painted their Chia Pets with various designs, creating a colorful and vibrant garden that brought joy and a sense of community to everyone involved.
Story 2: A Child’s Imagination
A young boy painted his Chia Pet to resemble his favorite cartoon character. He took great pride in caring for his Chia Pet and watching the chia seeds grow. This project sparked his interest in gardening and art.
28. Interactive Elements for Engagement
- Polls and Quizzes: Create polls and quizzes related to Chia Pet painting techniques and designs.
- Contests: Host contests where participants can submit photos of their painted Chia Pets for a chance to win prizes.
- Live Q&A Sessions: Conduct live Q&A sessions with experts on Chia Pet customization and care.
- User-Generated Content: Encourage users to share their photos and stories related to Chia Pets.
29. How PETS.EDU.VN Can Help
At PETS.EDU.VN, we’re passionate about helping pet lovers create joyful and enriching experiences with their furry, scaly, and leafy companions. Our website offers a wealth of information and resources, including:
- Comprehensive guides on pet care: Learn everything you need to know about caring for various types of pets, from dogs and cats to birds and reptiles.
- Expert advice on pet health and nutrition: Get tips on keeping your pets healthy and happy with proper nutrition and veterinary care.
- Creative DIY projects for pet owners: Discover fun and engaging DIY projects for pet owners, including how to paint a Chia Pet!
- A community forum for pet enthusiasts: Connect with other pet lovers, share your experiences, and get advice from experts.
We understand the challenges of finding reliable information and navigating the sea of advice on pet care. That’s why we’re committed to providing accurate, up-to-date information that’s easy to understand. Whether you’re a new pet owner or an experienced enthusiast, PETS.EDU.VN is your go-to resource for all things pet-related.
Address: 789 Paw Lane, Petville, CA 91234, United States
Whatsapp: +1 555-987-6543
Website: PETS.EDU.VN
30. Call to Action
Ready to unleash your creativity and transform your Chia Pet into a work of art? Visit PETS.EDU.VN today for more inspiring ideas, step-by-step tutorials, and expert advice on pet care and DIY projects! Join our community of pet enthusiasts and share your unique creations. Let pets.edu.vn be your guide to a world of endless possibilities in pet care and customization. Contact us at 789 Paw Lane, Petville, CA 91234, United States or reach out via Whatsapp at +1 555-987-6543. We’re here to help you every step of the way!