Getting a new Bissell Little Green Pet Pro is exciting, and you’re likely eager to tackle those pet messes and stubborn stains. This guide will walk you through everything you need to know to get started with your new portable carpet cleaner, ensuring you unleash its cleaning power effectively and efficiently. Whether you’re dealing with a fresh pet accident or older set-in stains, understanding your Little Green Pet Pro is the first step to a cleaner home.
Getting Acquainted with Your Little Green Pet Pro
Before diving into cleaning, let’s familiarize ourselves with the parts of your Bissell Little Green Pet Pro. Knowing each component will make assembly, operation, and maintenance a breeze. Refer to the diagram below to identify each part:
| Product Overview |
|---|
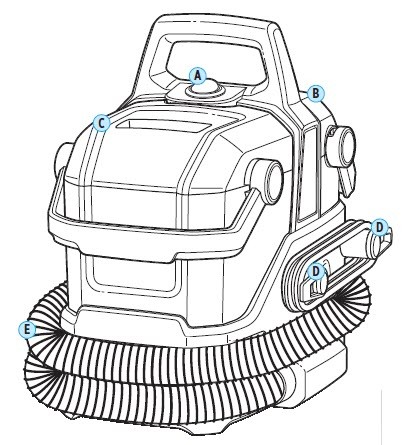


Key Components:
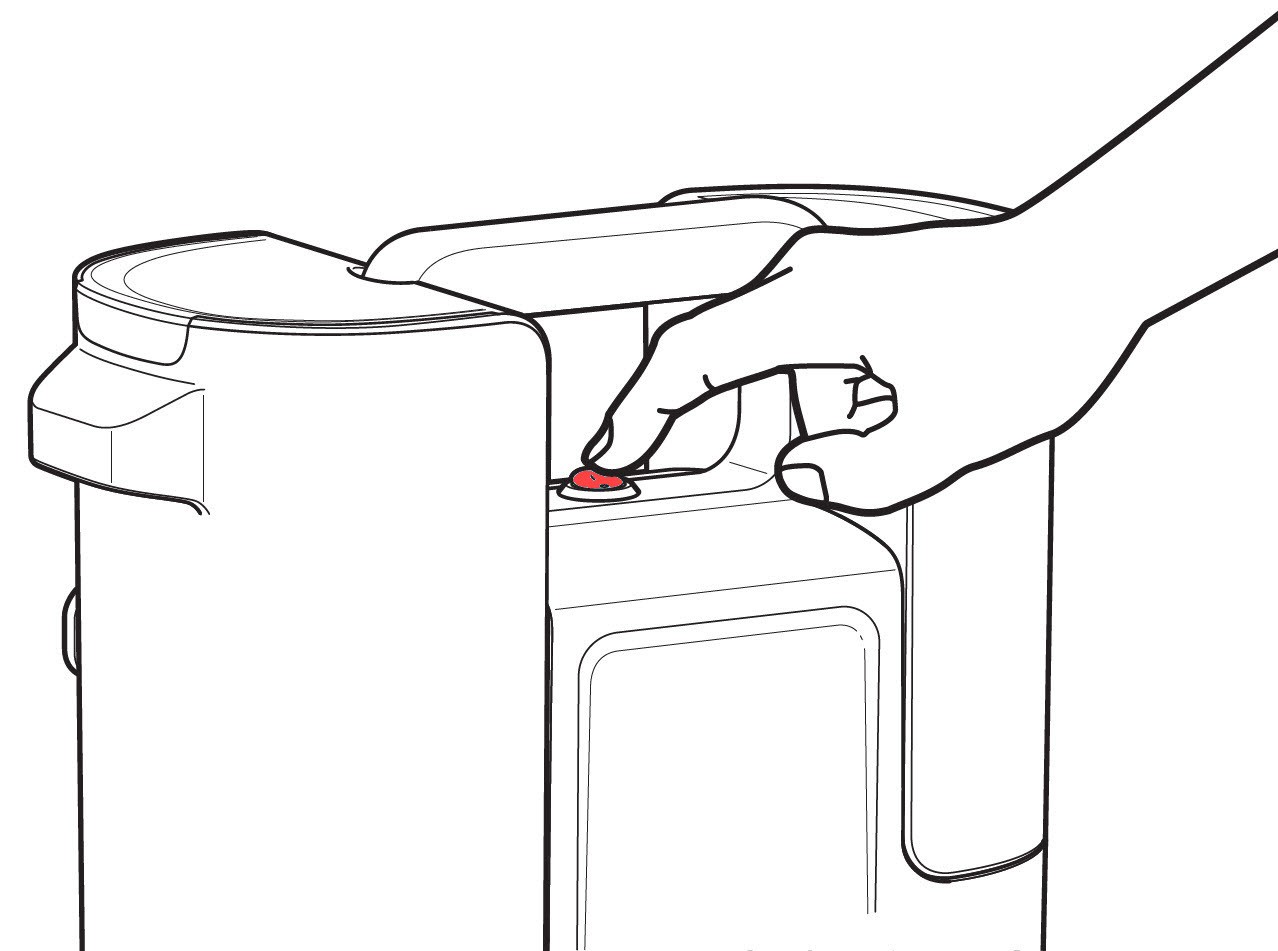
- A. Power Switch: Easily turn your machine on and off with this switch.
- B. Clean Water Tank: This tank holds the clean water and cleaning formula mixture.
- C. Dirty Water Tank: The extracted dirty water and污垢 are collected in this tank.
- D. Quick Release Cord Wrap & Power Cord: For convenient cord storage and access.
- E. Flexible Hose: Provides reach and flexibility for spot cleaning various surfaces.
Assembling Your Spot Cleaner
Setting up your Bissell Little Green Pet Pro is straightforward. Follow these simple steps to get it ready for its first use:
-
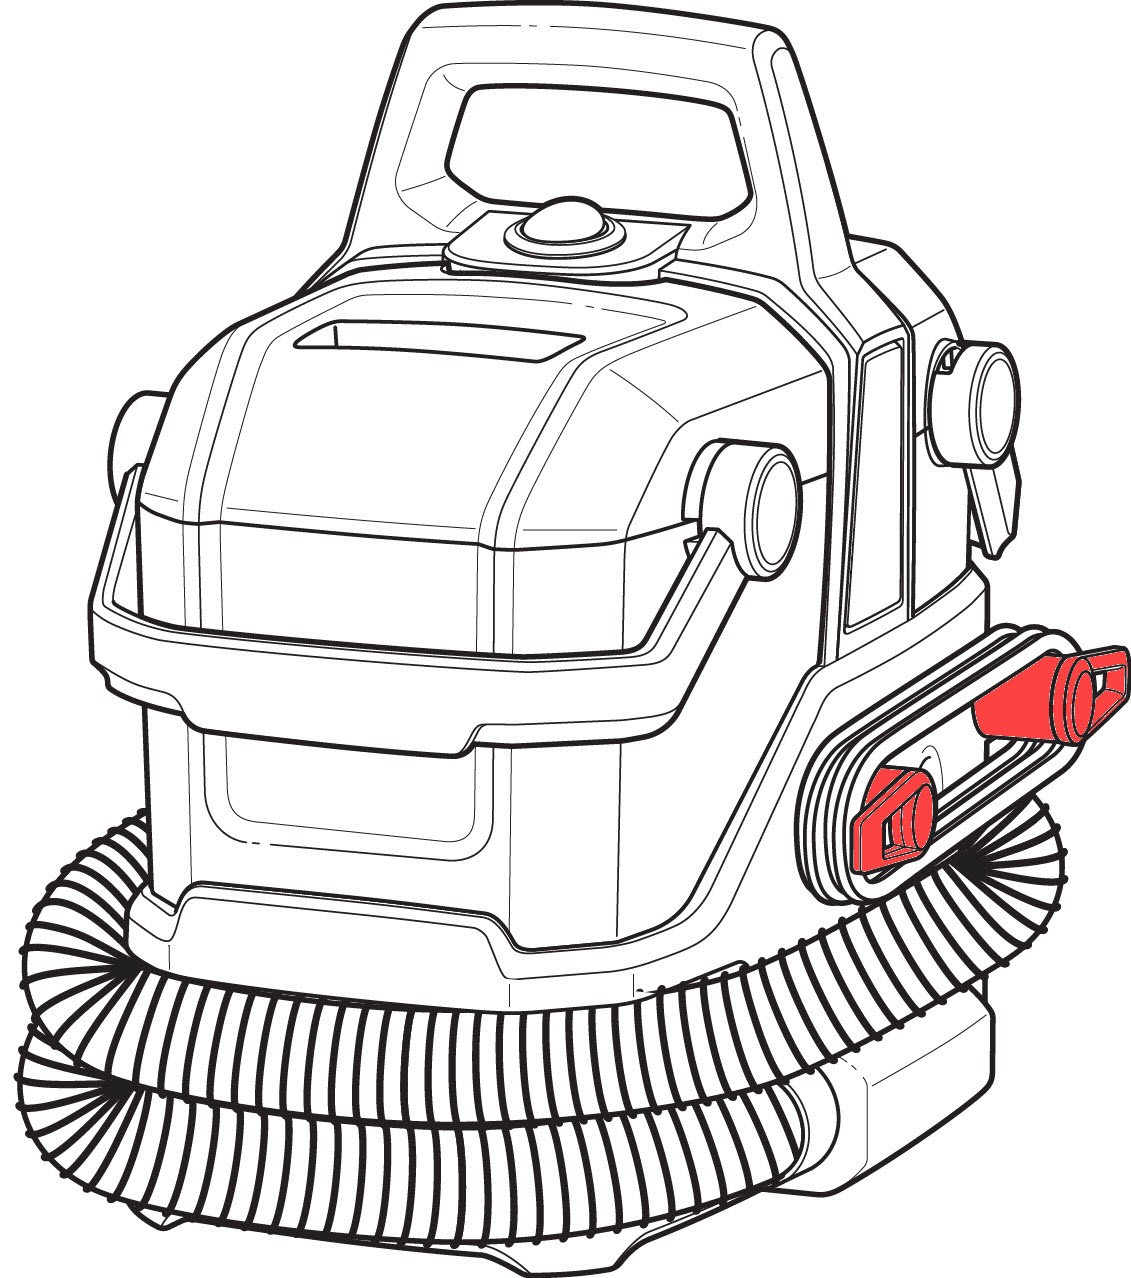
Cord Management: Begin by wrapping the power cord around the cord wraps located on the side of the machine. Make sure the cord wraps are facing outwards for easy wrapping and unwrapping.
-
Hose Storage: Next, wrap the flexible hose around the base of the machine. Secure the end of the hose into the designated hose clip to keep it neatly stored and prevent it from dangling.
-
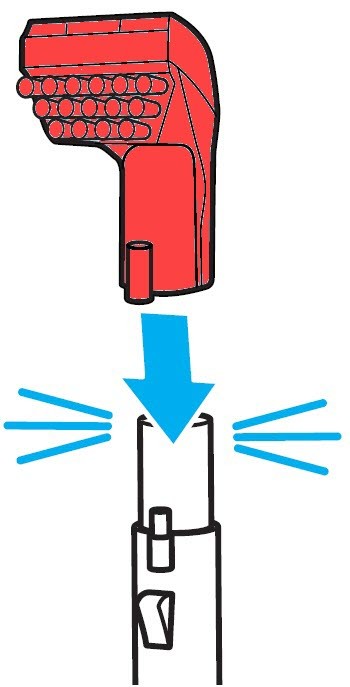
Tool Attachment: Select the appropriate cleaning tool for your task and insert it onto the end of the flexible hose. Push until you hear a click, ensuring it’s securely attached for effective cleaning.
Filling the Clean Water Tank: Preparing Your Cleaning Solution
Before you can start cleaning, you need to fill the clean water tank with water and Bissell cleaning formula. Here’s how to do it correctly:
-
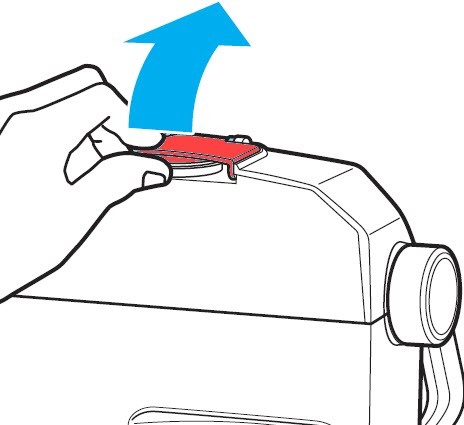
Remove the Tank: Detach the clean water tank from the machine by lifting it upwards.
-
Open the Lid: Open the lid of the clean water tank to access the filling area.
-
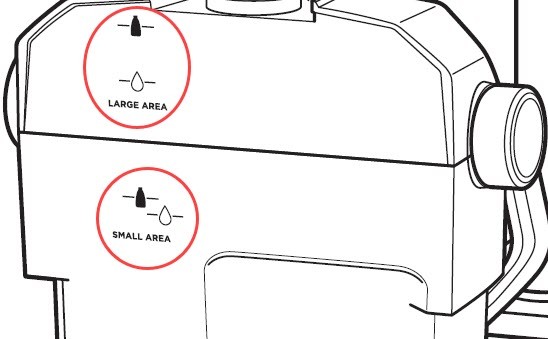
Understand Fill Lines: Your clean water tank has two sets of fill lines to accommodate different cleaning needs: “Small Area” and “Large Area”. Choose the appropriate fill level based on the size of the area you intend to clean.
- Large Area Cleaning:
- Fill with water to the “WATER” line (56 oz).
- Add formula to the “FORMULA” line (8 oz).
- Small Area Cleaning:
- Fill with water to the “WATER” line (28 oz).
- Add formula to the “FORMULA” line (4 oz).
- Large Area Cleaning:
-
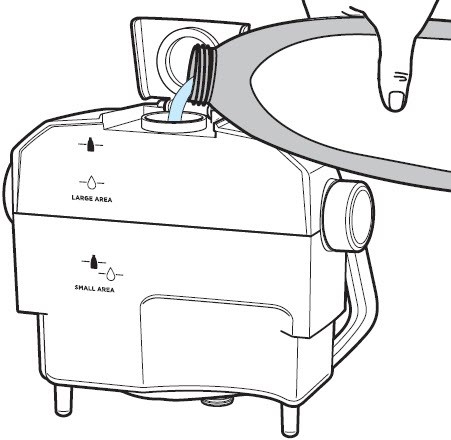
Water Temperature and Formula: Use warm tap water (maximum 140°F or 60°C) for optimal cleaning performance. Fill water first to the water line, and then add your chosen Bissell formula to the formula fill line. Important: Avoid using excessively hot water, as it can damage the tank and affect machine performance.
-
Recommended Formulas: For the best results and to maintain your machine’s longevity, use genuine BISSELL portable carpet cleaner formulas. Compatible options include:
- PET PRO OXY Spot & Stain Formula
- Little Green OXY Spot & Stain Formula
- Simply Spot & Stain Pet Formula
You can purchase these and other BISSELL formulas at Bissell Parts & Accessories.
-
Reinstall the Tank: After filling, securely close the lid of the clean water tank and slide it back into the machine until you hear it click into place.
Cleaning Like a Pro with Your Little Green Pet Pro
Now that your machine is assembled and ready, let’s get cleaning! Follow these steps to effectively remove spots and stains:
-
Pre-Clean the Area: Before using your Little Green Pet Pro, remove any loose debris and solid pet messes from the area with a dry vacuum cleaner. This prevents clogging and ensures more effective stain removal.
-
Pretreat Stubborn Stains (Optional): For tough or set-in stains, consider using a BISSELL stain pretreat spray. Apply it to the soiled area and let it sit for a few minutes as directed on the pretreat product label.
-
Power Up: Unwrap the hose and power cord completely. Plug the machine into a power outlet and turn it ON using the power switch.
-
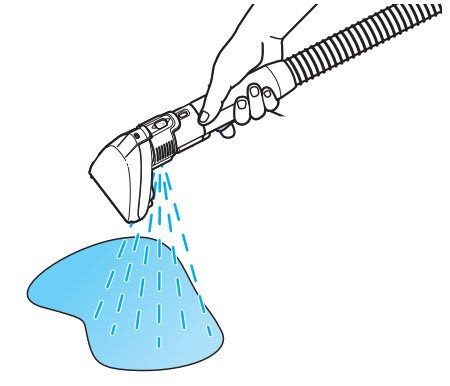
Prime and Spray: Hold the spray trigger on the tool handle to dispense the cleaning solution. Initially, allow up to 30 seconds for the pump to prime and establish a steady spray. Once primed, solution will spray from the tool.
-
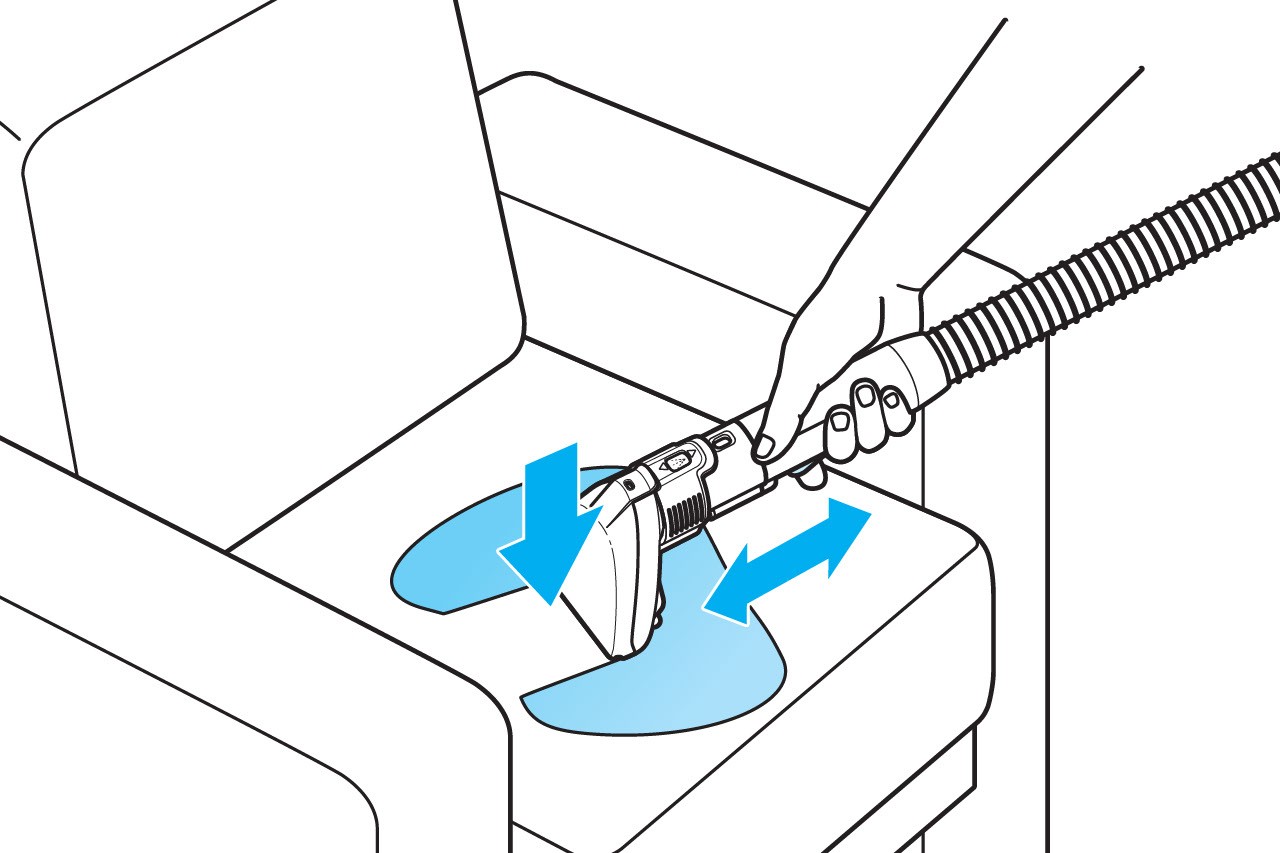
Spray and Scrub: For optimal stain removal, hold the cleaning tool a few inches above the stain and press the spray trigger to saturate the area with the cleaning solution. Release the trigger and gently scrub the stain using the brush on the tool.
-
Suction and Lift: After scrubbing, tilt the tool forward to engage the suction. Ensure the suction channel makes full contact with the surface. Slowly move the tool in a backward motion over the stain, extracting the dirty solution. Continue this process until the stain is removed or until no more dirty water is being suctioned up.
-
Monitor Tank Levels: Keep an eye on both the clean and dirty water tanks during your cleaning session. You may need to refill the clean water tank or empty the dirty water tank depending on the size and number of stains you are tackling. A change in the machine’s sound or a decrease in suction power indicates that the dirty water tank is full and needs emptying.
-
Post-Cleaning Hose Suction: When you’ve finished cleaning, hold the end of the hose upwards for about 5 seconds while the machine is still on. This will help suction any remaining water from the hose into the dirty tank, preventing drips and messes during storage.
-
Power Off: Finally, turn your Bissell Little Green Pet Pro OFF using the power switch.
Emptying and Cleaning the Dirty Water Tank
Properly emptying and cleaning the dirty water tank is crucial for hygiene and maintaining your machine’s performance. Follow these steps after each cleaning session or when the dirty water tank is full:
-
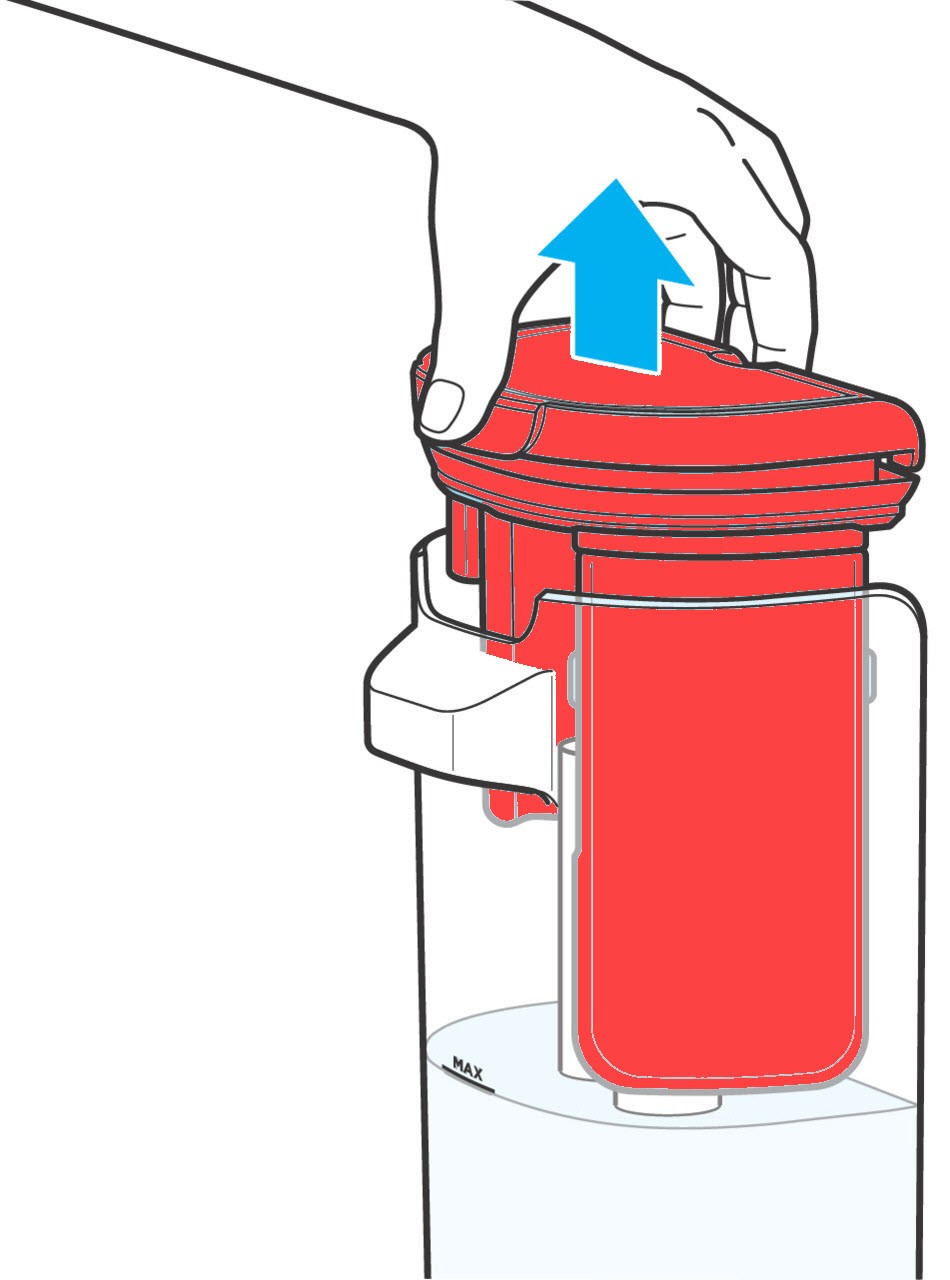
Remove the Dirty Water Tank: Pull upwards on the handle of the dirty water tank to detach it from the machine. Note the “MAX” fill line on the tank and avoid overfilling during use.
-
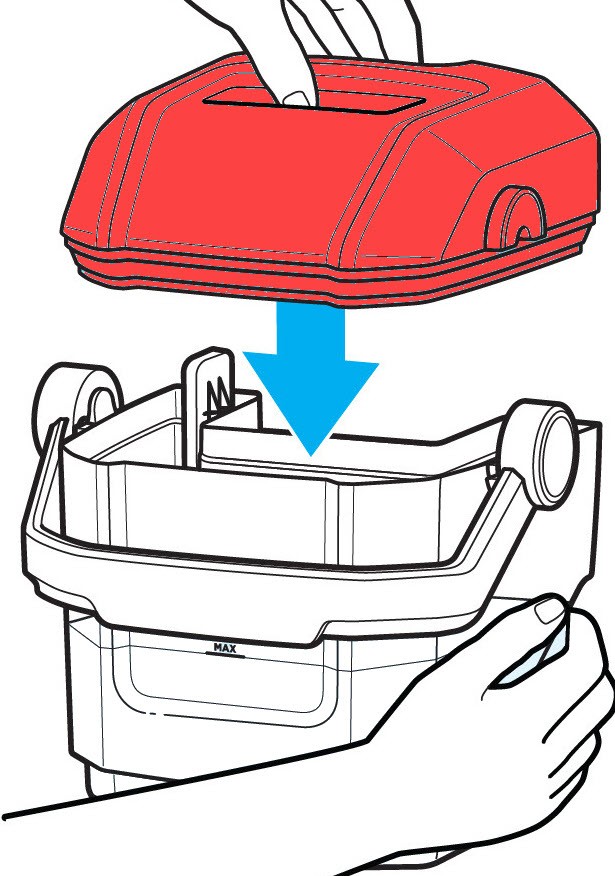
Remove the Lid: Once removed, lift up on the dirty tank lid to take it off the tank.
-
Empty and Rinse: Carefully pour the dirty water out of the tank into a sink or toilet for disposal. Rinse the inside of the dirty water tank and the lid with clean water to remove any remaining debris or residue.
-
Reassemble the Tank: Place the lid back onto the dirty water tank, ensuring it is fully seated and there are no gaps.
-
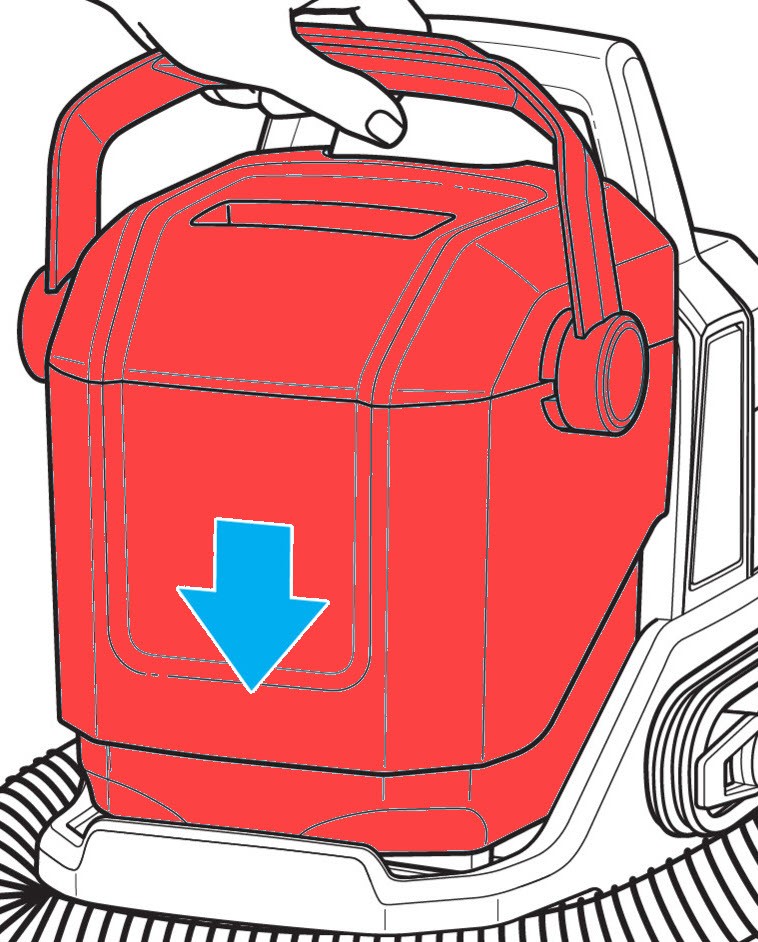
Reinstall onto Machine: Slide the reassembled dirty water tank back into its place on the machine until you hear a click, confirming it is securely attached.
With these steps, you’re now ready to effectively use your Bissell Little Green Pet Pro to keep your home spotless and fresh, even with pets around! For further assistance, explore related articles at support.bissell.com.